When the artwork (base image to digitize) is a raster image with well defined colors, auto-trace digitizing method may save the time required for the classic digitizing method to define the shape of the object. Instead of digitizing each node, this application can detect and recognize regions according to the colors of the image and create the geometry of the object with a single click. This digitizing method requires an image, otherwise the function AUTO-TRACE is disabled.
How to create objects using Auto-Trace digitizing?
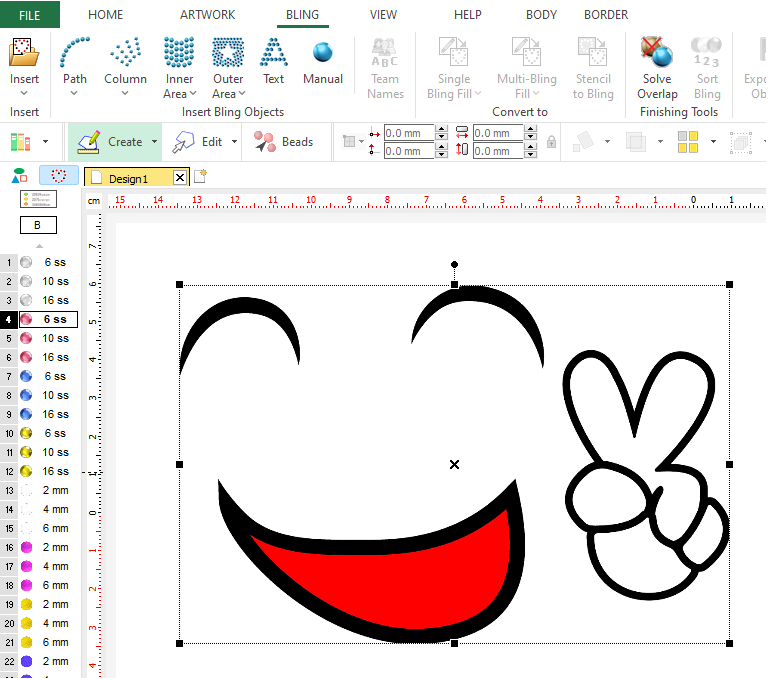
➢Insert a raster (bitmap type) image. This image is available in the catalog (raster images) as "face 01.png". |
|
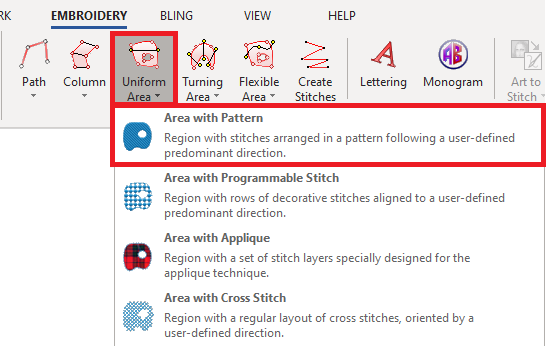
➢Click on CREATE OBJECT, on the MAIN bar and select the AREA Embroidery Object + PATTERN STITCHES fill style. You can select the object type from the tooltab EMBROIDERY or through the drop-down menu on the CREATE OBJECT arrow. |
|
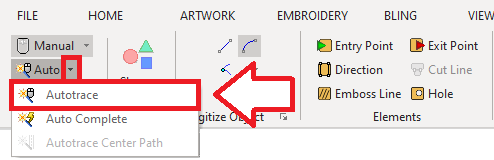
➢Click on the arrow next to the AUTO function, on the digitizing methods group. A drop-down menu is displayed. ➢Click on AUTO-TRACE digitizing. |
|
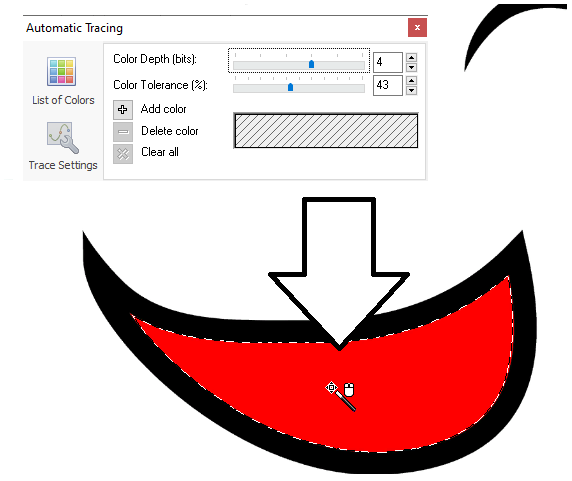
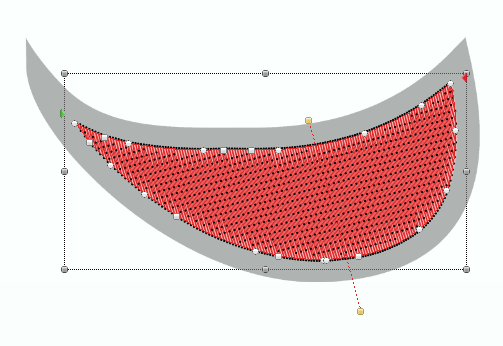
The Auto-Trace toolbox is displayed. This tool is useful when the images do not contain pure color like this example, then we won't use this tool at this time. ➢Point the mouse cursor over the region to digitize and press the mouse left button on it. The application will detect the region of the same color, and that region it will be surrounded by a flashing dashed line. As the shape of the objects has been defines, you can then define any of the other geometric elements of the object (stitch direction, entry and exit points, etc.). |
|
➢Click on the Enter key to confirm the trace, create the object and generate the stitches. That's all! Once the first object has been created, you are ready for the next one. |
|
➢Click on EDIT OBJECT to modify the nodes positions or any node property. ➢Click on the Enter Key to confirm the shape and generate the stitches. |
|

Suggestions for the correct use of Auto-Trace
For better results, use simple, clearly defined outline images with pure colors, avoiding small areas.
See also Auto-Trace toolbox