When the artwork (base image to digitize) is a raster image with well defined colors, auto-complete digitizing method may save the time required to digitize the shape and to define other geometric elements of the object. Instead of digitizing each node of the shape and defining stitch directions, holes and other geometric elements of the object, this application can detect and recognize regions according to the colors of the image, and create the whole object with a single click. This method is more convenient on turning area object type, as it automatically insert the stitch direction lines. This digitizing method requires an image, otherwise the function AUTO-COMPLETE is disabled.
The main differences between Auto-Complete and Auto-Trace are:
•Auto-Complete creates objects with a single click, and there is no opportunity for the user to define the other geometric elements during the creation process.
•Auto-Complete inserts other geometric elements automatically, like holes for areas and stitch direction lines for turning areas.
•Auto-Complete can be applied to several regions at once (with a single click).
How to create objects using Auto-Complete digitizing?
➢Insert a raster (bitmap type) image. This image is available in the catalog (raster images) as "ASR-013.png". |
|
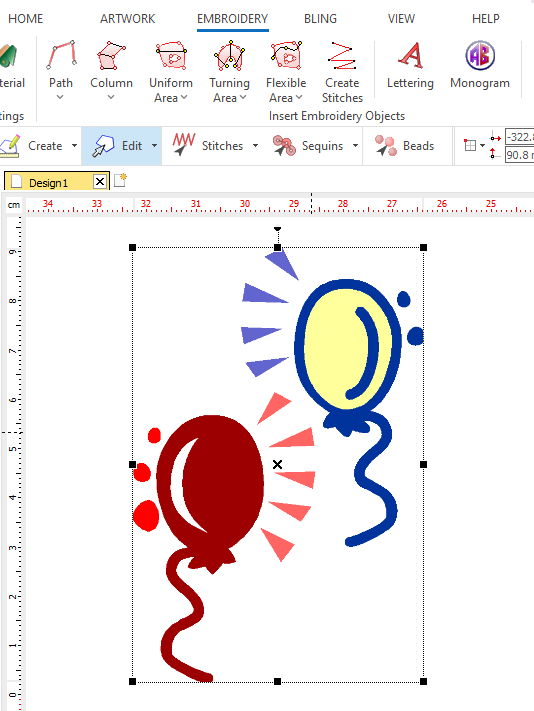
➢Click on CREATE OBJECT, on the MAIN bar and select the AREA Embroidery Object + PATTERN STITCHES fill style. You can select the object type from the tooltab EMBROIDERY or through the drop-down menu on the CREATE OBJECT arrow. Using Auto-Complete digitizing method on areas offers the same result of AUTO-TRACE as this object has a single stitch direction. Instead, this method is more productive for turning areas where several stitch directions are automatically inserted in the object. |
|

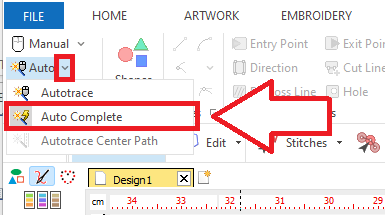
➢Click on the arrow next to the AUTO function, on the digitizing methods group. A drop-down menu is displayed. ➢Click on AUTO-COMPLETE digitizing. |
|
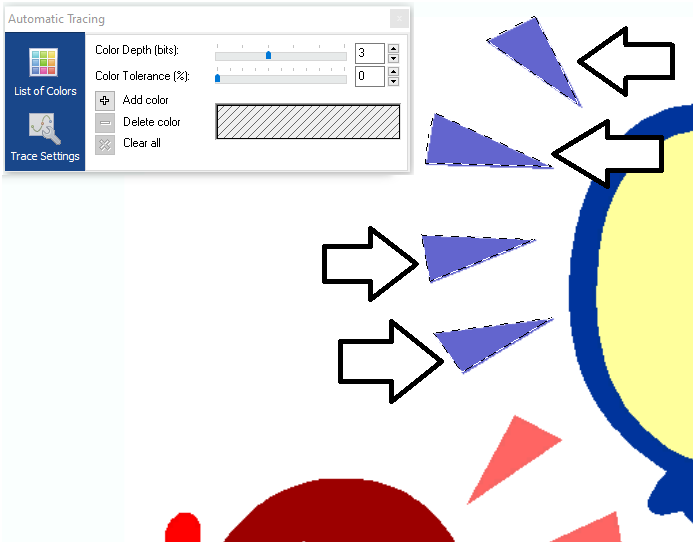
The Auto-Trace toolbox is displayed. This tool is useful when the images do not contain pure color like this example, then we won't use this tool at this time. ➢Point the mouse cursor over the region to digitize and press the mouse left button on it. The application will detect the region of the same color, and that region it will be surrounded by a flashing dashed line. ➢By pressing and holding the Ctrl key, you can trace several shapes at a time (point and click), creating several objects, of the same type and fill mode. |
|
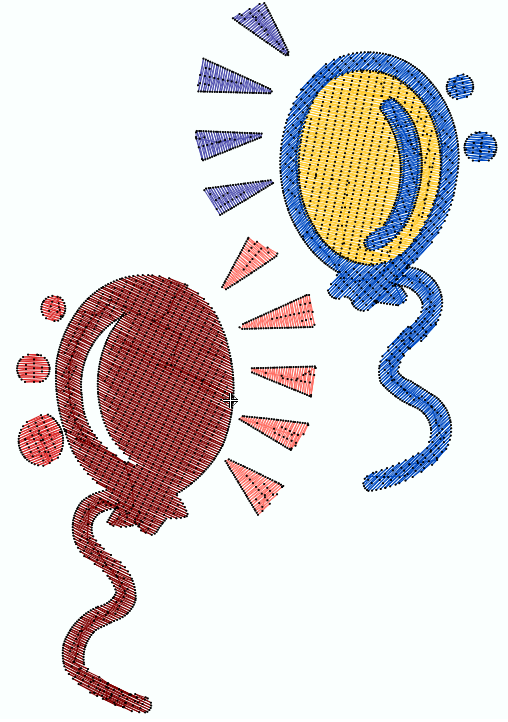
➢Press the Enter key to confirm the objects. The application will automatically insert the necessary geometric elements such Entry & Exit points, Direction lines, Holes, etc. You can edit these elements later. Repeat this process on the border of the globe, using the object type TURNING AREA + ZIGZAG STITCHES. |
|

That's all!
Repeat the process with the desired shapes in the artwork. |
|
Suggestions for the correct use of Auto-Complete
These are some suggestions to get optimal results when using Auto-Complete:
•Avoid images that have color gradation and mix of colors.
•Images with well-defined shapes and borders work best.
•Remove small regions.
•An error message is displayed if the image is not adequate for using this trace method.
See also Auto-Trace toolbox