When the Auto-Trace or the Auto-Complete digitizing method is activated, the Auto-Trace toolbox is displayed as a floating window on the workspace. This tool is useful mainly when the image to vectorize (to trace) has more colors than convenient for the automatic detection of regions based on the colors.
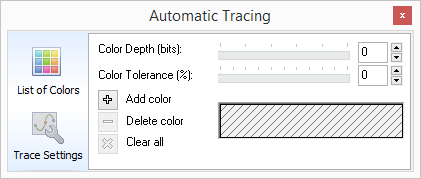
List of Colors
The colors of the list are persistent, that is, when you create a new object, the color list still contains the same colors you have previously defined. |
The list of colors will help you to trace regions of the image with similar colors, or with colors that should be considered as part of those regions. Color Depth: This tool is a color reduction filter. As the color depth increases, the number of color of the image decreases (several colors are considered as the same color). Then, when a color is pointed with the magic wand, it may find more adjacent pixels of the same color. Higher values will expand the number of colors detected and probably enlarge the detected area (lower color discrimination) Color Tolerance: All the adjacent pixels with colors included withing a tolerance range from the color is pointed with the magic wand are considered part of that same region. Higher values will probably enlarge the detected area by color similarity. Color Box: If the color of pixels adjacent to the pixel pointed with the magic wand have any of the colors you have included in the color box, those pixels will be included in the detected region. (+) Allows to add more colors to the list (-) Remove a particular color from the list (x) Clear all colors of the list at once. |
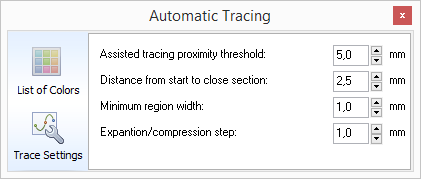
Trace Settings
|
These are the properties of the toolbox to adjust the detection of a region. Assisted tracing proximity threshold (disabled parameter): It is the distance to be considered on the tracing process. The trace will scan the image from where the cursor is placed, to the distance set in this field. Consider it as an action radius. Distance from start to close section: If the distance from the last position of the cursor to its first position is lower than the value entered in this field, the path is automatically closed. Minimum region width: This value can smooth the hard/jagged edges detected on the trace recognition. If they have a width value lower than the entered in this field, it will be removed. Expansion/ Compression step: Allows to define the expansion and reduction size of the trace recognition. It is activated while performing a trace and using the up and down arrows of the keyboard. |
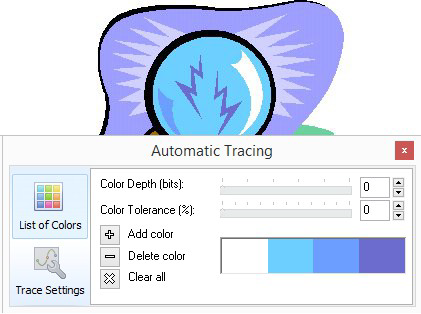
Identifying tracing colors
When the images do not have pure colors, either because the source is a scanned image or a photo, it is important to identify the colors of the area to trace. The same occurs when you need to trace sections that correspond to areas with a different color (for example, you might need to capture the shape of a section from the outline, formed by two or more colors of the drawing).
1.In the Auto-Trace toolbox, press the "+" button. 2.Point the mouse cursor within the area that will define the shape of the object. 3.Select the color/s (by pressing the mouse left button and dragging it to form a small frame). The colors box will contain the selected color/s. |
|
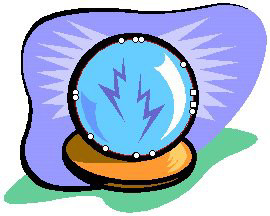
1.Place the mouse cursor on the area and press the mouse left button on the crystal ball’s outline to trace it. This trace includes the four selected colors. |
|
Auto-complete with complex color images
When you have an image with a complex color composition (like a photo), it is necessary to make a precise identification of the colors if you want to use any of the auto-tracing functions.
Follow there steps:
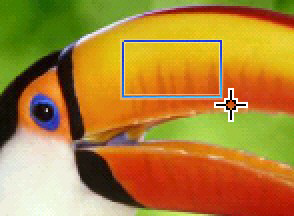
1.Open the List of Colors of the Auto-Trace toolbox and execute the Add Colors function (click on "+" button.) 2.Select a rectangle containing the colors you want to include. The colors picked in the selection will be displayed in the Colors box. If you wish to add more colors to the list, repeat this step. |
|
If you want to remove color of the area, you can follow the same procedure as before, but using the "-" button.
If you want to delete all colors of the list, press the "X" button.
So far, you have highlighted the colors included in the region you want to get. Now, you must scan the region.
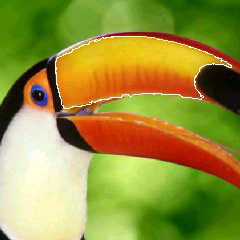
3.Press the mouse left button inside the image sector you want to trace. 4.You can also adjust the color tolerance to include in the region more colors that have the same shade. 5.Click on the Enter key to confirm the trace. |
|
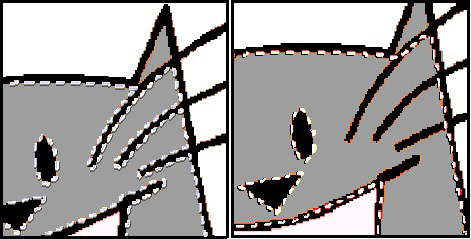
Increase or decrease outline recognition
Once the outline of the region has been detected, you can enlarge or reduce the detected area. When should you enlarge or reduce the area? Sometimes when you need the external outline of a shape but you have detected the internal shape, sometimes when you want to clean some noise from the borders or smooth abrupt outlines, sometimes when you want to filter some areas, sometimes when you need to combine the detected area with other areas, etc.
➢Click on the UP arrow key to enlarge the area ➢Click on the DOWN arrow key to reduce the area When you are satisfied with the obtained region, press the Enter key to create the object. |
|