You can import vector objects from graphic files, or from other graphic applications, or you can create vector objects on the fly. In any case, you are able to fully edit those objects at any moment and for any purpose.
Editing features include:
•Geometry Editing
•Properties Editing
•Block Editing
As this is an object oriented application, similar editing features and procedures apply to all the decoration types. This article includes a brief description of the editing functions for vector objects specifically.
Geometry Editing Features
The shape of the vector objects is defined by line segments that connects pair of points named nodes. We can say the the sequence of nodes with their properties define the geometry of the vector objects. Once a vector object is created, you can modify the shape by editing the nodes and the nodes properties.
Line segment can be straight lines or curves. This application can work with arc curves or bezier curves.
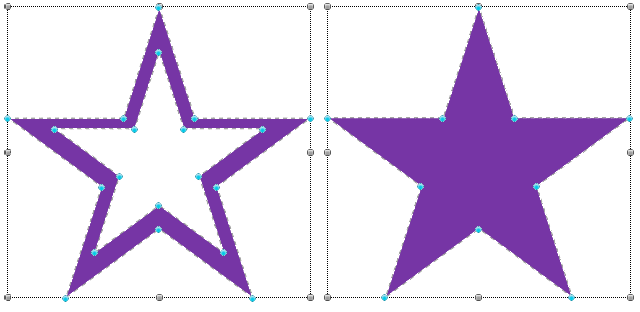
Once the vector objects is selected, you can see the nodes that define the object. |
|
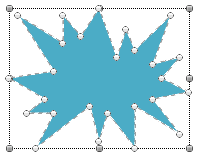
This is a list of functions to edit the geometry of the object:
•Move a Node |
Change the position and the angles of adjacent segments |
•Insert more Nodes |
Insert a single node, or add several nodes |
•Delete a Node |
Remove the node |
•Edit Node Properties |
Specify if adjacent segments are line or curve, node is normal or corner, etc |
•Convert Shape to Curve |
Creates the nodes of the object from a predefined shape object |
•Split vector Object |
Divides an object with a line/curve |
•Remove Holes from Object |
Deletes the holes of the vector object |
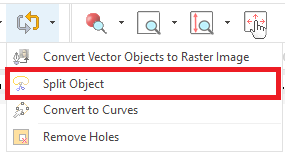
Split Vector
This tool allows to split a vector object using a user defined line/curve. This tool is available: •On the tooltab LAYOUT > "Reshape" group •On the context menu. |
|
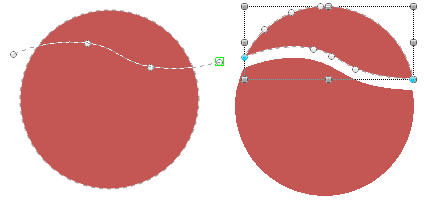
This tool allows to split a vector object using a user defined line/curve. Once the splitting line is created, press the Enter key to confirm. |
|
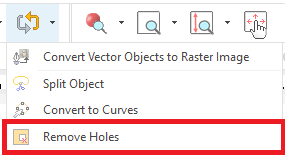
Remove Holes
Automatically deletes all the holes of the selected vector object. This tool is available: •On the tooltab LAYOUT > "Reshape" group •On the context menu. |
|
This tool allows to split a vector object using a user defined line/curve. Once the splitting line is created, press the Enter key to confirm. |
|
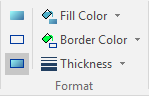
Properties (format) Editing Features
Allows to modify the border and the body properties, including: •The color of the body of the vector object •The color of the border (outline) of the vector object •The width of the border (outline) of the vector object •Choose the vector object contents: body, border or both |
|
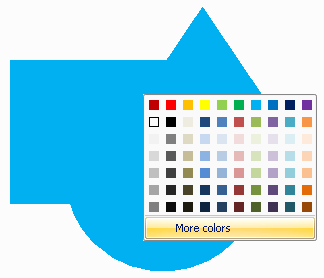
The color palette
The color bar may be used to quickly set the color of the border and the body of vector objects.
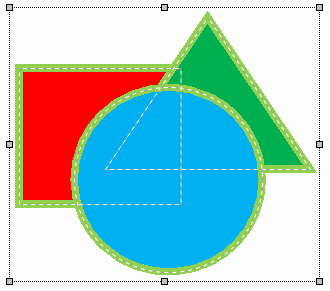
➢Select the vector object.
➢With the mouse left button, click on any color from the color palette to fill the body of the object with the selected color.
➢With the mouse right button, click on any color from the color palette to fill the border of the object with the selected color.
|
The first item in the color bar represents the “No color” entry and may be used to remove the border and fill color of vector objects. You cannot eliminate border and fill colors at the same time. |

|
The buttons at the top of the palette allows: •Edit this Palette: Opens a menu with commands to edit the color palette, load, save and delete palettes from disk. •Border color: Shows the current border color. Edit the color by click on it •Fill color: Shows the current fill color. Edit the color by click on it •Background color: Shows the current backgroung color. Edit the color or select a background fabric by click on it |
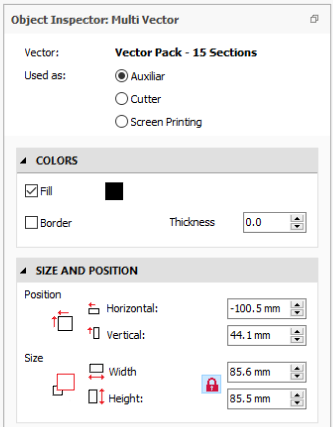
Vector Image Properties on the Object Inspector
You can also change some of the vector image properties from the Object Inspector.
➢Check the selected vector object. It is a single object or a pack of vector objects. ➢Set if the vector object is used as a reference (auxiliary), cut design or printing. ➢Change the colors of the vector object (fill and/or border) and the border thickness. ➢Set the image position and size. |
|
Block Editing Features
There are many block editing features; most of them are common for all decoration types.
Block editing features can be found in Block Editing