Some software configurations include IMAGING module, a Raster Image Editor focused in the image cleaning to facilitate the later digitizing process.
|
This module is not intended to replace other graphic image applications, as the main purpose of this software is not printing. This module was created many years ago to help the designers with the image cleaning. Today, some of the mostly used features of this module are integrated on the main software application (the digitizing application) to make it more complete and productive. Therefore, this module has become a tool of little relevance to designers. |
The Imaging Tool
➢Select an Image ➢On the the tooltab LAYOUT, click on IMAGING. |
|
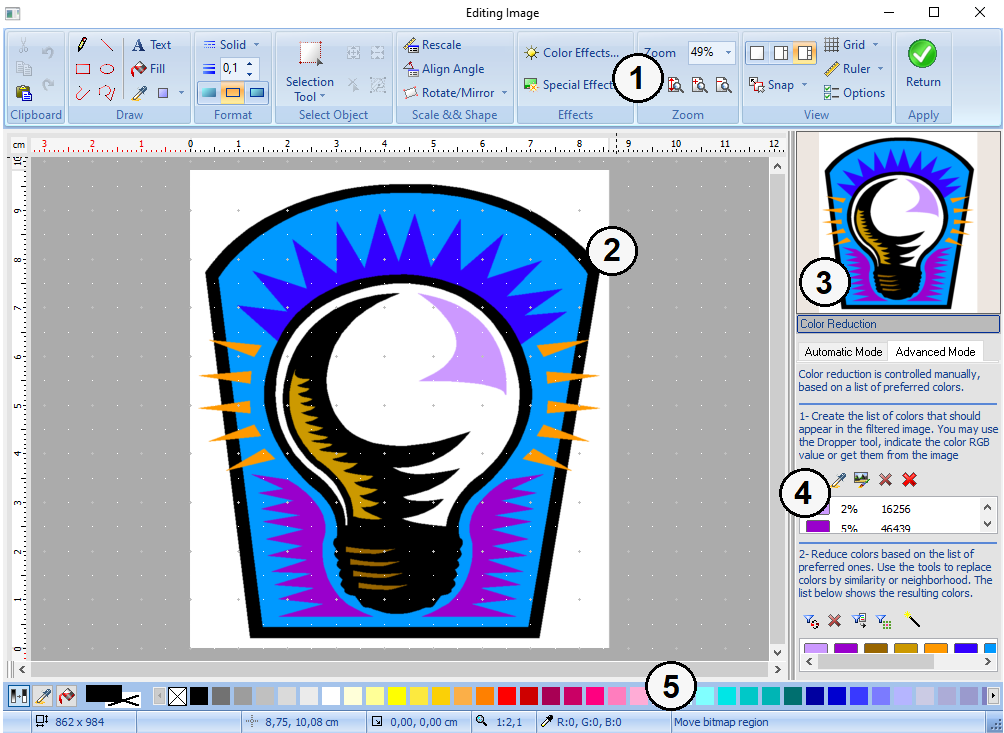
The editor displays the following elements:
1 |
Ribbon Tools |
Contains the tools, grouped in menus or dropdown buttons. These elements allow you to access almost every tool and function of the editor. It contains tools to create shapes and figures, transformations, effects, etc. |
2 |
Working area |
The image area. It displays the opened image with a real time result simulation upon any changes made. |
3 |
Satellite View |
Shows a thumbnail of the opened image if zooming to such a point that you cannot visualize the entire image within the Working Area. There is a box in the thumbnail image, which will help going through the image when the zoom is applied. If you drag on the Satellite view box, the image will move along the main window. |
4 |
Final Color Selection/Sequence view |
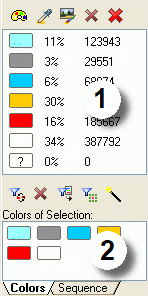
In bitmap mode, it allows to specify the amount of final colors and different shades. In vector edit mode, you can see the Sequence View, which shows the layout of shapes forming the design. |
5 |
Color Selection bar and Status bar |
Shows a list of colors to assign to fills or outlines. The status bar displays data related to the opened design or the area/ element selected. |
Load Colors
From the Color Selection bar, double click on any of the color boxes to open the Color Selection window. After selecting one, the Color box will be painted in that color. Before starting to work on a design, activate the suitable colors.
Primary and secondary color selection
You can visualize the primary and secondary colors from the two boxes at the bottom right corner of the window.
To set the foreground color, click on the desired color box. This color will be used for lines, edges and text. It is represented by the square at the top.
To set the background color, press the right mouse button on the desired color. This will be used to fill in the looped shapes. The background color replaces an image area that has been cut or moved. It is represented by the square at the bottom.
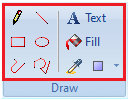
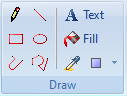
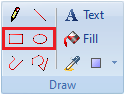
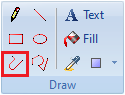
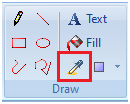
Drawing Tools
The Draw box offers different elements to draw on the working area: Lines, Rectangles, Curves, Polygons, Ellipses, etc. |
|
Pen
|
This tool is only available in the bitmap edition mode. Click to draw a pixel point using the primary color. Right click to draw a pixel point using the secondary color. |
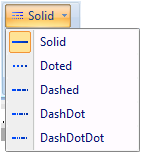
Line
|
This tool draws a line. Before drawing it, select its shape, by modifying the line type and its thickness. You can do this from the Format box.
|
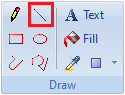
Rectangle & Ellipse
• |
Select a primary and a secondary color. Also, select the line type to use in the outlines. To draw a rectangle or ellipse, click on the working area and keep the mouse button pressed, while you drag the mouse pointer diagonally in the desired direction. You can draw rectangles and ellipses without outline, empty (just outlines) or filled and with an outline, according to the option selected from the Format box. If you use the left mouse button, the primary color will be used to draw the outlines of the polygon, and the secondary color will paint the filling area. To invert the colors, use right mouse button to drag the mouse cursor. |
Freehand
|
This tool creates a freehand line, like a manual drawing. Choose the line type to use for the outlines, press and hold the left mouse button and drag the mouse cursor. If you use the left mouse button, the primary color will be used. Use right mouse button to to use the secondary color. |
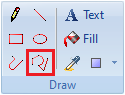
Curve
|
This tool creates a polygon. It creates complex shapes using Bezier curves. Select a primary and a secondary color, since this type of figures use both. Also, select the line type to use for the outlines. To draw a polygon, click and hold the left mouse button on the working area, then drag the mouse cursor to display the straight line drawn on screen. Click on the drawing area where you want to place a new line handle . Repeat this operation as many times as necessary, until drawing the desired figure. To finish, click on the starting point of the figure. You can also drag the mouse pointer at the moment of each click. You will modify the handles of the node created, forming curved lines. If you use the left mouse button, the primary color will be used to draw the outlines of the polygon, and the secondary color will paint the filling area. To invert the colors, use right mouse button to drag the mouse cursor. |
Text
It is used to introduce the text and assign the chosen format to it. Then, choose the type of line to use in the outline. Also, select a background and foreground color; the former will fill the text whereas the latter will define the outlines of each word.
When selecting this tool, a text options box and a dialogue box will appear in the working area.

|
Type the text in the main frame of the box, choose the typography, size, style (bold, cursive or underlined) and alignment. The result will appear within the text box. Before confirming anything, drag the box towards the suitable location in the graph. You can also adjust both height and width by dragging its borders. Confirm the text insertion by clicking on the button located in the right corner of the Text Options box. |
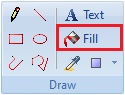
Fill with Color
|
This tool is only available in the bitmap edition mode. Select this option whenever you want to paint an entire area with only one same color. When activating this tool a floating box will appear. It allows to modify the color tolerance. Color tolerance: It helps to control the pixels over which the tool will operate, by painting it with the color of the paint can. Tolerance means the color palette that will be applied when clicking on a pixel. If you set the tolerance value in 0 and you click on a pixel, only the adjoining pixels with exactly the same shade will be painted. However, if for example you define a higher value, the amount of pixels will be increased as well, thus applying a larger color palette. In order to refill with the foreground color, click the left mouse button. To draw with the background color, click the right mouse button. If the figure that you are refilling shows an opening in any of its edges, the color will filter to the rest of the drawing area. To detect and close the opening, use the Zoom or the Magic Wand selection tool. |
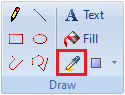
Choose Color
|
This option copies the color of an area or an object when you click on it. Clicking the right mouse button, the color will be copied as background color, whereas if you click Images and Vectors the left mouse button the color will be copied as primary color. |
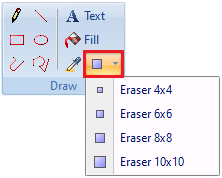
Eraser
|
Activate this tool to delete part of the drawing, keeping the left mouse button pressed when dragging the pointer to paint the area you wish to erase. This area will be painted in the background color. Doing the same but clicking the right mouse button, you can erase only those areas painted in a primary color. |
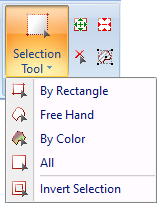
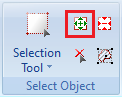
Selection Tools
|
The tools of the Selection box allow you to select one or several image sectors in order to work on the selected area. After carrying out a first selection, you can repeat the operation by pressing the Ctrl key. You can carry out a series of tasks on the selected area (bitmap mode) or selected objects (vector-based mode): copy and paste, convert to block, insert bitmap-type elements in a section/s (without altering the rest of the graph), etc. |
|
•Select All |
It performs a complete selection of the open image. It is available in both bitmap edition mode and vector-based mode. |
|
•Select with Rectangle |
Allows to select areas with a straight outline. It is only available in the bitmap edition mode. |
|
•Select with Free Hand |
Use this tool to select an area freely. It is possible to apply both bitmap edition mode and vector based mode. |
|
•Magic Wand |
It allows you to select pixel areas that have a similar color. Choose the tolerance level you will use in the selection, such value will be applied in a similar way to the procedure with the paint can creation tool. It is only available in the bitmap edition mode. |
|
•Invert Selection |
It selects the handle that is outside the current selection (the unselected pixels are now selected), while the current selection is canceled. It is only available in the bitmap edition mode. |
|
•Enlarge and Compress Selection |
With each click you make you expand or compress the selected area, making the selection bigger or smaller, respectively. Available in the Bitmaps edition mode. |
|
•Unselect |
It is used to undo a selection. This option is available in both edition modes. |
|
•Block with Region |
It forms a single unit with the selected area, separating it from the rest of the figure. In doing so, you will be able to drag the figure, expand or compress it, rotate it, etc. |
More about Selection
Once you have made a selection, you can modify it using different tools to include unselected areas, to improve the capture of a selection, etc. These tools are available either in the toolbar or by activating them from the corresponding keys:
•Add to selection: In order to select a second section (without unselecting the area already created), press and hold the SHIFY key. The mouse cursor changes its appearance. Therefore, when you create another selection, it will be added to the already existing one, creating a final selection that is the result of the merge of both selections.
•Delete selection: By pressing the Del key, you delete the selected pixels. The selection will be entirely painted with the secondary color.
Manual modification of blocks or vectors
In order to drag a block, you must move it from its center to the selected position. In order to expand or compress the size of the block or vector, drag any of the points that outline the figure, and move them to the desired size.
To rotate the block, press the CTRL key before dragging any of the corners.
Modifying Blocks
The following tools work on a block of the image. If you have not selected a section as a block, the modifications will apply on the entire image.
Measure and Scale
|
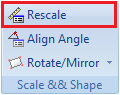
This tool allows you make an accurate adjustment of the block size, altering its original size according to measurement of an image segment.
Click on any point of the image and drag it. The system will trace a line from the first point to the mouse position. Release the mouse button. The Scale window displays the length of the line traced. Define the line's new value on the right column.
|
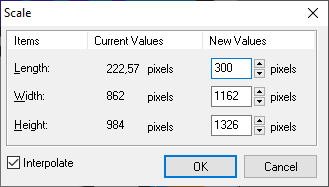
Click the "OK" button. The block will be scaled proportionally, according to the new size of the traced line.
Rotate Fixed Angle
|
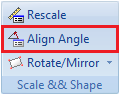
This tool allows you make an accurate rotation of the block.
Draw a line. Then, release the mouse button. Then, the "Rotate Bitmap" box will appear.The slant value of the line drawn also appears in the "Angle" field.
|
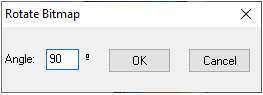
Insert the new angle value and press the "OK" button. The block will rotate according to the entered value.
Rotate 90º, 180º and 270º
|
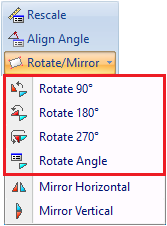
These tools rotate the selected block according to the selected angle value.
Horizontal and Vertical mirroring
|
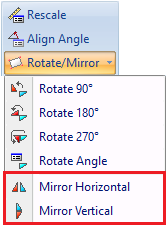
The mirroring tool will reverse the block layout in the vertical or horizontal axis.
Working with Colors
This option allows to reduce the amount of colors in the image, either by deleting the unused colors or by combining colors with a similar shade.
Reducing colors implies a series of benefits:
•Files be smaller.
•Creation of vector-based figures will produce better results.
•Bitmap images will be more accurate and well defined.
This view has two panels:
1.The "Final Colors" palette.
2.The "Colors Selection" palette.
These panels will be defined automatically after loading an image. You will be able to delete colors from the lists, insert new colors, replace them, etc.
The two panels work together. From the "Colors Selection" palette you can select or delete colors that already exist in the image. From the "Final Colors" palette you can select the colors that you want to use for the image. These will be your final colors. Then, you can combine the shades of both boxes until you achieve a completely clean image.
List of each of the controls of the "Final Colors" panel:
|
Add Color from Palette: It opens the colors box to search for a color in the list or customize one. |
|
Add color from Picker: It allows to obtain a sample of any pixel color by clicking on it. |
|
Load from Image: It loads all the colors that form the open image. |
|
Clear Selected / Clear All: It deletes all the colors or the selected ones from the "Final Colors" panel. |
List of each of the controls of the "Colors Selection" panel:
|
Combine Selected: Creates a single color as from the selected colors. All these colors are transformed into the first color selected. |
|
Replace by Nearest: Tracks and replaces the color(s) selected in the "Final Colors" panel by the most similar one. |
|
Replace by Neighbor: It is useful to delete sectors of the image, since it selects the closest color of a selection to paint it in a similar shade. It is not recommend to use this tool with very dirty images or with a great number of colors. |
|
Color Magic Wand: It is useful for selecting an area with identical or similar color (depending on the tolerance level selected) to the shade of the sector marked. |
|
Clear Selected: It deletes the selected colors from the "Colors Selection" panel. |
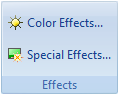
Filters & Graphic Effects
You can adjust the color by applying color filters and effects. These filters change the color composition in the image and they be accessed from from the "Effects" group, by clicking on the "Color Effects" or the "Special Effects" button. |
|
Color Effects Tool
The "Color Effects" has three tabs (Original, Sample and Both) below the image simulation. The "Original" tab shows the selection without any modifications. The "Sample" tab shows the result after applying an effect. The "Both" tab shows a combination of the two previous tabs. Some Zoom tools You can also apply different Zoom options from the upper left corner. The bottom left side shows the color effects available to apply. In general, the intensity degree applied is defined using the sliding controls at the right side. |
|
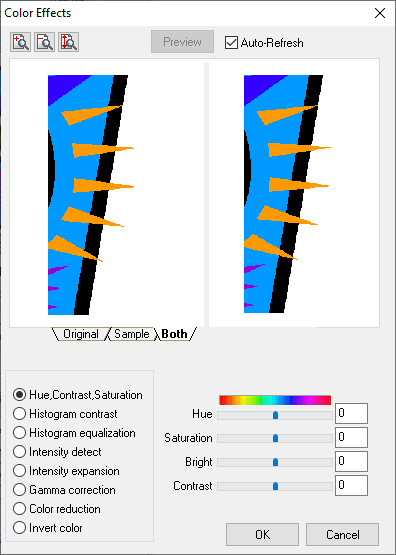
Colors Effects
•Hue, Contrast and Saturation |
The "Hue" control works over the shade (color) of the selection. The "Contrast" control marks the difference between the clear and dark areas. Sliding the control to the right increases the contrast (color difference) between areas. Sliding the control to the left decreases the contrast. The "Brightness" control changes the brightness of the image. The "Saturation" control works over the color saturation. A lower saturation makes the image more gray and vice versa. |
•Histogram Contrast |
The histogram is a representation of the image brightness. This method is used to achieve an optimum image contrast using a percentage control. |
•Histogram Equalization |
It is similar to the above. It can be used to improve the details of the dark area of an image. It does not have any controls. |
•Intensity Detect |
Allows to dramatically change the lower and higher tones of the image, according to the values defined in these two controls. |
•Intensity Expansion |
It increases the color grading when increasing brightness. It does not have any controls. |
•Gamma Correction |
It modifies the hue levels in an image to provide a specific tone correction. |
•Color Reduction |
Allows to reduce the amount of colors applied to an image when moving the slider to the right, leaving aside those less used. Check the Grayscale option to convert an image colors in a palette of 256 (or less) gray tones. |
•Invert Color |
It inverts the color of the image. |
Special Effects Tool
The "Special Effects" has three tabs (Original, Sample and Both) below the image simulation. The "Original" tab shows the selection without any modifications. The "Sample" tab shows the result after applying an effect. The "Both" tab shows a combination of the two previous tabs. Some Zoom tools You can also apply different Zoom options from the upper left corner. |
|
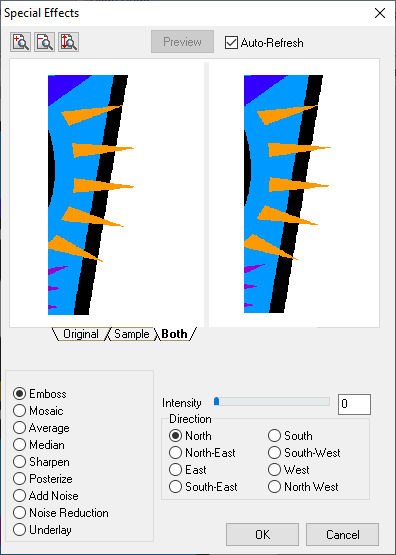
•Emboss |
Applies an emboss effect on the image. You can select the direction and intensity of the effect. |
•Mosaic |
The image will split into color blocks to obtain a pixel aspect, depending on the intensity of this effect. |
•Average |
Applies a diffuse effect, changing the focus of the image. |
•Median |
Performs a color simplification that can be useful before vectorizing a bitmap image, similar to a handmade paint. |
•Sharpen |
Allows to focus and highlight the edges, emphasizing the details of the outlines. |
•Posterize |
Used to make special color effects in the image, allowing to specify a number of brightness values for each color channel. |
•Add Noise |
Allows to modify the granular appearance of the image, adding noise according to the value entered. It also allows to select color channels on which the noise will be applied (red, green, blue, or all). |
•Remove Noise |
Modifies the granular appearance of an image, eliminating the noise. |
•Underlay |
It is used for loading a graphical file to combine it with the image. |
Steps to clean an image
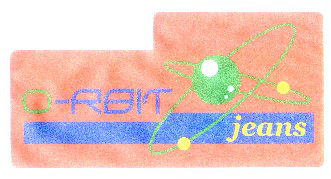
In the following example, we will use the image editor to clear the image shown below:
This is an image obtained with a scanner and has the typical imperfections that come up when using these devices. |
|
As a result, we will obtain the image shown below: |
|

The resulting image is clearer and more accurate. Although each image requires a specific treatment according to its features and characteristics (color, brightness, definition), it is possible to apply a standard cleaning process with the tools included in the image editor.
If necessary, you may use the Zoom in / Zoom out tools for a detailed visualization of the different areas of the image. Use the Satellite View to explore the image and to work on it in the main view.
Essentially, the clearing process is performed from the inside to the outside of the image, starting by the wider areas and background and finishing with the details and the larger and thinnest sections.
We will have to clean the document, removing several colors as they produce a dirty, impure color.
Reducing colors
Click on the "Color Effects" tool to open its window. Then, click in the "Colors Reduction" box. The reduction levels will vary from one image to the other. In the example, we have assigned a value of 8 for the "Color Reduction" control and "19" for the "Color Tolerance" control. The result offers an improved brightness as compared to the original image. |
|

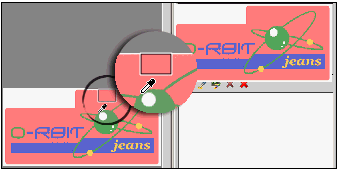
Selecting colors
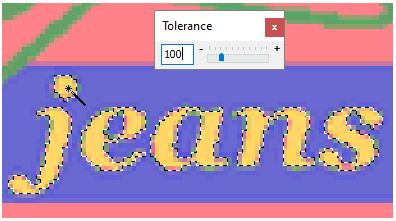
First of all, click on the magic wand. |
|
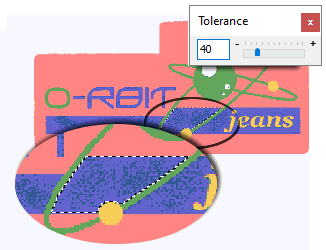
Drag the mouse cursor towards the image. The pointer becomes a magic wand. This tool opens the Tolerance box, that allows you to select a specific color range between adjacent pixels. Click on a blue area in the image. The aspect of the dotted line will be partially highlighted by the dots. Since we will need to make a selection of the different shades of blue, we will increase the tolerance level. |
|
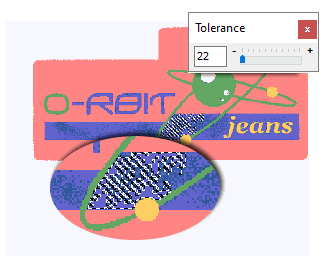
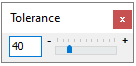
Move the tolerance control to the right in order to increase the color range, this will make the selection to include of the colors in a blue shade and treat them as a unit. |
|
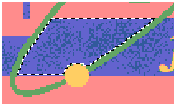
Again, click on the blue color area. After increasing the tolerance, the selection now covers the entire blue area (up to the outline that limits with the green color). Once you have achieved the correct selection of an image area, you will be ready to continue. |
|
Cleaning selected colors
In the image below, you can see that the selection includes different shades of blue. |
|
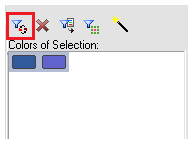
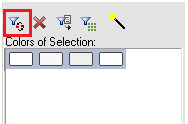
In the next step you will clean this area, leaving only one color. This task will result in a much brighter surface. You will select all the colors that appear in the box. In order to select more than one color, use the Ctrl or Shift keys when clicking on them from the "Colors of Selection" box.
In the "Colors of Selection" box, click on the "Combine Selection" tool. This option combines the selected color and create creates a single color. |
|
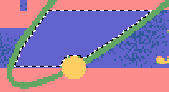
The shades will be replaced by a single blue color (the one initially selected).
During the color color selection, pay special attention to the first color you select, since all of the other colors will be converted into this one. Then, repeat the process with the rest of the blue areas, including the fonts. |
|
If, during the color selection, you notice that the range is the suitable one but some small areas remain unselected, you can increase the selected surface by clicking on the Selection ++ (Enlarge) tool as many times as necessary. |
|
Background cleaning
Select the magic wand and repeat the steps above with the background color, which is white. In this case, all of the background colors are white with practically invisible shades at first sight. However, these shades are identified by the system, and will appear in the "Colors of Selection" box.
In order to change the background shade into a “pure" color, select all the colors in the Colors of Selection box, selecting the lighter color first (in this case the whiter color). Then, click on the Combine Selection tool.This will create a single color with the selected colors. The final color will correspond to the first color selected. |
|
Likewise, clean the entire surface of the image, selecting the areas according to the image colors.
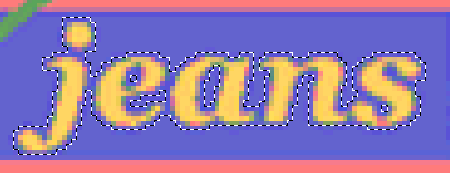
Improving the traces of the figure
Now we will work on the word "jeans", that appears on the right lower margin of the image. The word "jeans" is one of the smallest and most important elements of the logo. The resulting design depends on the brightness and accuracy, especially when converting it into embroidery.
For the selection of the complete orange color range of each letter, use the magic wand tool with an a adequate tolerance degree. After selecting the first letter, press the SHIFT key to select the rest of the sections, until you complete the word. |
|
If you edit the design to transform it later into an embroidery design, have in mind that you must always meet the necessary requirements to obtain a satisfactory result.
For example, take a look at the the letter "a" (left figure). You will notice that the upper and lower sides of the font are extremely thin. This, which at first sight seems to be fine, once embroidered can lead to a needle break. |
|

Therefore, it is necessary to make the letters thicker to obtain a more dense and appropriate embroidery design. For this to happen, we will use the Expand tool. |
|
Click on it as many times as necessary. Each time you do it, the selection will enlarge 1 pixel, therefore increasing its original size. |
|
Now, paint the selection in only one color (as you can see, a big portion of the selection is blue in addition to the text’s own color). In this case, disable the selection for an accurate definition of the background color.
Select the "Pick Color" tool. |
|
Place the mouse cursor on any of the letters. Try to select a plain color by clicking with the right mouse button. This will pick the text color as a secondary color. |
|

You will see the color of the text appears as a background color in the "primary/ secondary colors selection". |
|
Press the DEL key to disable the selection. The entire selection will appear as the secondary color. |
|

Selecting the final colors of the design
In this step, you will define the colors you want to give to the final design. These colors are loaded in the Final Colors Selection field, and may be either the colors used by the design, any color of your preference (not necessarily the one used in the design) or even a combination of both.
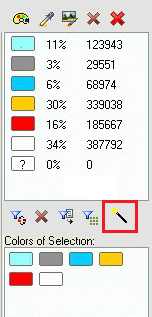
In the Final Colors Selection box click on the Delete All button to remove all the colors that are displayed in this section by default. |
|
In this case, you will select some of the colors used in the graph. These colors will not be the only ones since the image is still dirty, even though it is not noticeable at first sight.
From the Final Colors Selection box, click on the dropper to start the selection. |
|
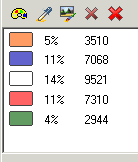
Click on the suitable areas to select the colors you want to maintain. In this particular case, these colors are: white, magenta, blue, orange and green. The colors list is updated with the selected colors. |
|
These five colors are the ones of the future design. All of them are well differentiated and correspond to the standard shades of the design, and not to those created after the digitizing process (scanning). |
|
Remember that these colors were chosen to complete the example. However, you may select other colors. It is not necessary to use the same colors of the graph, you can select other colors from the Colors Palette.
Removing the unused colors
Usually after a cleaning process, some image particles remain (different pixel colors). This will only be noticeable if you zoom in. These particles must be removed, since they may lead to undesired results.
The system can identify and track every pixel color, leading them to the closest shade to the ones defined as final colors.
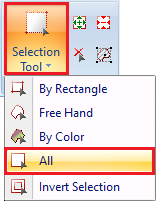
Open the Selection box on the left panel and click on the Select All option. |
|
You will observe a dotted line along the outlines of the entire image. From the Colors Selection buttons, click on Replace by nearest. |
|
In this way, you have removed all of the “dirty” colors from the image, which do not belong to the list defined in the Final Colors box.
Correcting shapes
Some sectors of the design can still be pixeled and show some defects. Then, the last step will be the correction of these small imperfections. |
|
In order to improve these details, you will use the standard drawing tools: paint: paintbrush, dot, line, etc. |
|