This tool automatically converts an image into a design with cross stitches, according to the regions formed by each color of the image. Once the cross-stitch design is created, you can modify the design using the Edit Stitches tool.
|
|
|
|
|
Create a Cross Stitch design
Load an Image
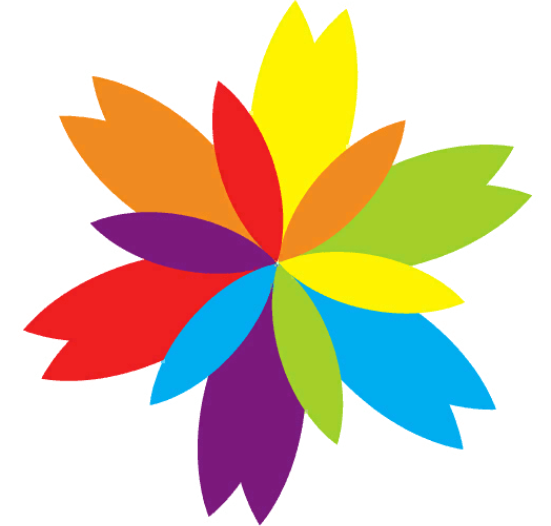
Open/load an image (from file, from scanner, etc). We use an image from the Catalog. ➢Click on the Catalog button, on the tooltab HOME. ➢Select a media type (we use Raster Images). ➢Select the file folder. ➢The bottom panel of the Catalog displays the content of the folder according to the selected media type. ➢Select the "ASR-009" raster image from the "Artwork > Raster" folder. ➢Drag the image into the workspace to load it. |
|

➢Select the tooltab EMBROIDERY
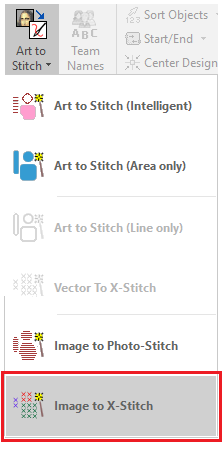
➢Click on the Art to Stitch" tool. |

➢Select the Art to Stitch mode: oImage to X-Stitch |
|
Cross Stitch toolbox
The Cross Stitch toolbox is displayed. You can define some parameters to make the conversion.
The Art to Stitch toolbox has 2 tabs: •Color Settings •Needle Settings |
|
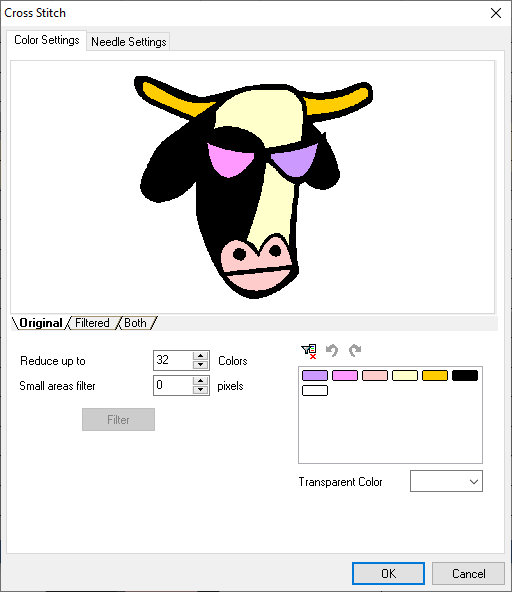
Color Settings
Specify how to reduce the color count of the image and how many colors do you want to keep. You must try to reduce the number of colors as much as possible without affecting the expected result while getting a reasonable design resolution.
|
If you use vector images to produce cross stitches, you can skip this step. |
|
This panel has the following tools: 1.Preview box: to see the original image and compare with the processed image 2.Previews tabs: to select between the original image and the processed image 3.Reduce Color filter 4.Color Merging tool 5.Transparent Color setting Reduce the color count: ➢Select the number of color you would like to keep (eliminating most of the unnecessary colors) on the Reduce Colors Filter. ➢Click on Filter button. If the resulting image loses quality greatly, increase the number of colors and repeat the filtering process again (you can delete more colors later). Remove the image noise: ➢Set the number of contiguous pixels that should be considered as noise on the image (3, 4, 6...) to avoid very small holes ➢Click on the Filter button. Combine similar colors: You can merge similar colors to reduce the number of colors and get better defined colors. ➢Use Ctrl + Click to select two or more colors to merge ➢Click on the Combine button. If the result does not satisfy your needs, use the Undo/Redo buttons. You can repeat this steps for all the colors you want to merge. Set the transparent color: ➢The drop-down list shows the colors on the image. Select the background color, that is, the color that should not produce stitches as it is not part of the design. |
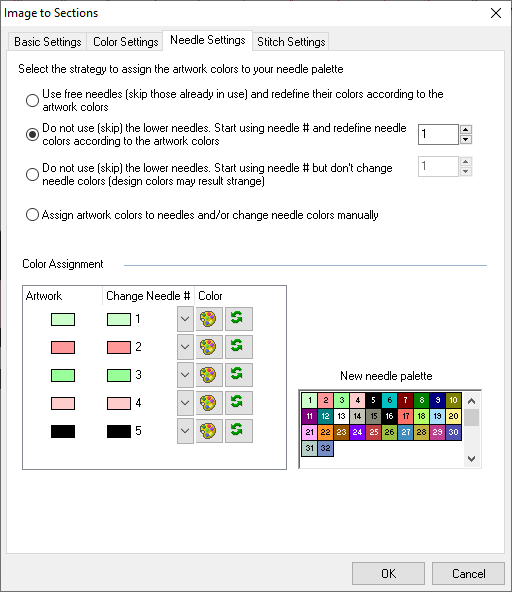
Needle Settings
Specify which is the needle and thread color to use for each color of the image.
|
➢Select any of the following options: oOption #1: It is the default option. Allows to use free needles, skip those already in use and redefine their colors according to the artwork colors. oOption #2: Allows to select the starting needle # and redefine their colors according to the artwork colors. Please avoid using the lowers needles. oOption #3: Allows to select the starting needle #, however it will not change the needle colors. Therefore, design colors will look different than the artwork colors. Please avoid using the lowers needles. oOption #4: Allows to assign artwork colors to needles and/or change needle colors manually from the Color Assignment box. |
Interactive Cross-Stitch Maker
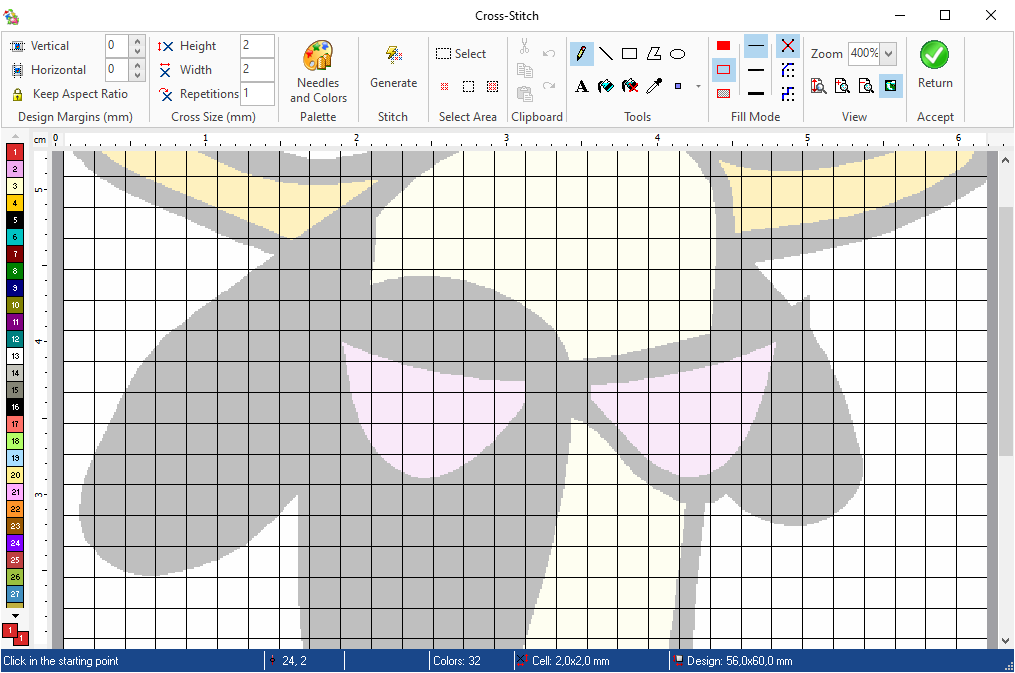
The Cross Stitch Maker has several tools, distributed in panels: |
|
|
|
1.Cells control panel. 2.Size control panel. 3.Needle and Colors panel. 4.Generate button. 5.Edition tools (selection). |
1.Clipboard tools (undo, redo, cut, copy, paste). 2.Drawing panel. 3.Fill Mode panel. 4.View panel. 5.Accept and return to main window. |

The status bar displays the design information.
|
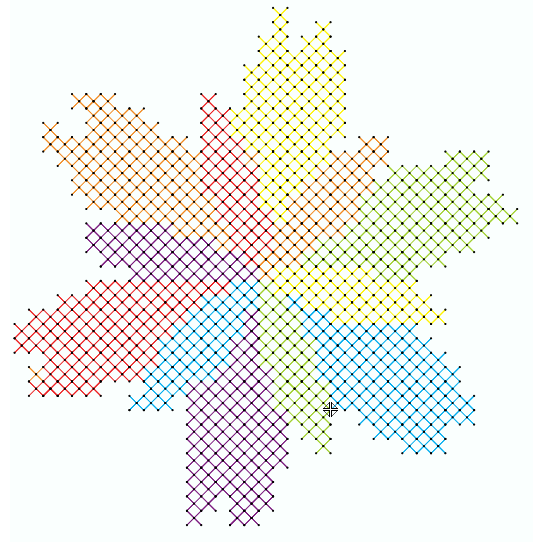
➢Press the Generate button to view the stitches that represent the reference image.
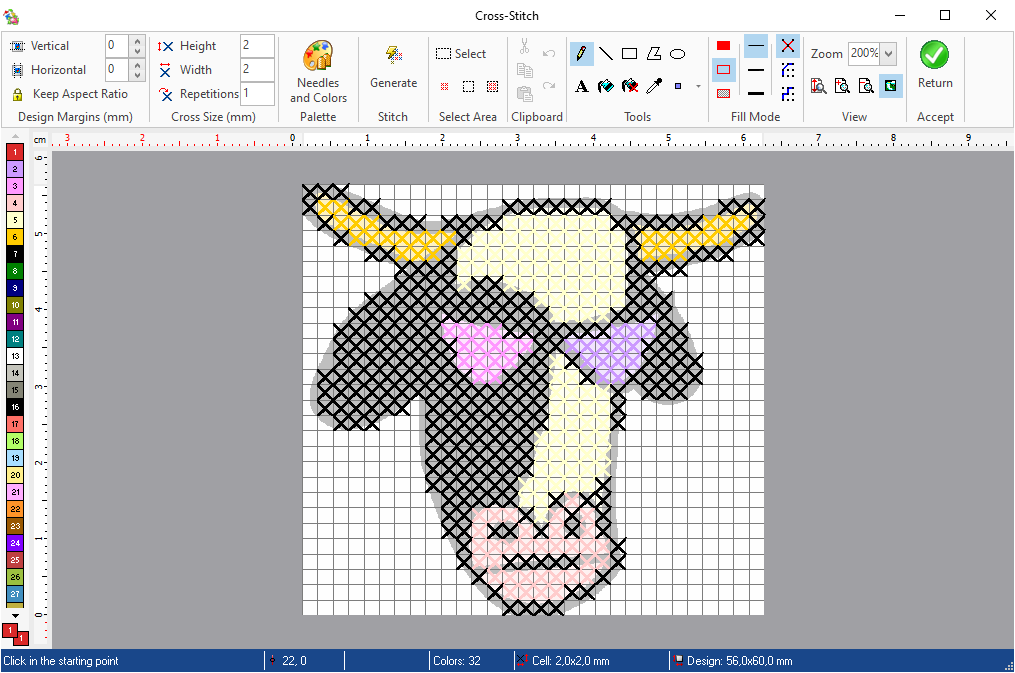
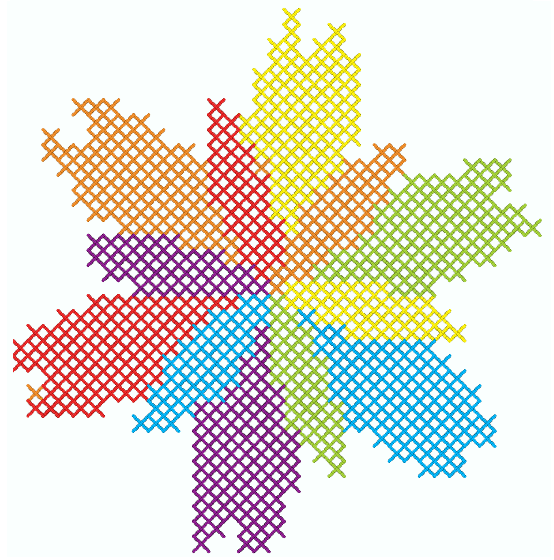
➢At this stage you will be able to edit them: delete stitches, insert them, change their color, etc.
➢Once you have finished the operation, press the Return button so that the result is displayed in the working area.
Cross Stitch Maker functions
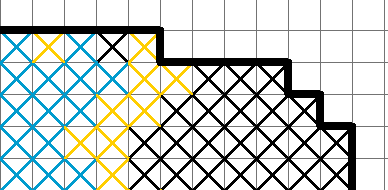
The working area contains cells using a network pattern. On these cells, you can apply either Cross stitches or Back stitches. Back stitches insert stitches in the borderline of the cells. |
|
Color selection
|
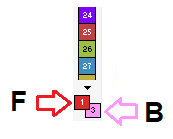
The color bar is located at the left of the cross stitch maker. You must define the primary color (or foreground) and the secondary color (or background), which are displayed on the bottom of the color bar. Foreground color: This color will be used for lines, shape borders and text. ➢Press the mouse left button on the desired color box. Background color: This color will be used to fill the inside of the closed shapes. The background color replaces the image area that was either cut or moved. ➢Press the mouse right button on the desired color box. |
Selection Tools
|
Use these tools to select different objects in the design •Select button: It is used to enclose part of a design within a rectangle, to copy it, move it or edit it. •Selection mode: Select stitches only, border only (back stitches) or select every element (default operation mode). |

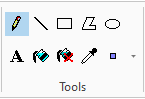
Drawing Tools
|
Use the different tools in the Drawing panel to draw the finishing of the design. •Pen and Line: Draws straight lines. Depending on the mouse button you press (left or right), it will apply the color of the foreground or background. In order to select the thickness of the line, press on any of the Line options on the middle row of the Fill Mode panel. •Rectangle, Ellipse and Polygon: Draws geometric lines. Use the left mouse button to select the foreground color and with the right mouse button to select the background color. In order to select fill type, press on any of the Fill options on the left row of the Fill Mode panel. •Font: Inserts text. After pressing on the text button, a window will appear to type the text, select the font, size, etc. This is similar to any Windows application that allows the insertion of texts. •Fill with Color: It is used to refill a sector with stitches or make a selection with the same color. Depending on the mouse button you press (left or right) it will apply the color of the foreground or the background. •Eraser: Erases stitches. There are several size options for this tool. •Fill with Eraser: Deletes an area with stitches or a selection of stitches with the same color. •Pick Color: Picks a color from a design. Pressing on the left mouse button, it will pick the foreground color of the stitch. Pressing the right mouse button will pick the foreground color. |
Stitches type
|
Use this panel to set the drawing tools: •Left row: Set fill modes for geometric lines: Body, Border or Border & Body. •Middle row: Select between 3 levels of thickness for pen and line drawings. •Right row: Select between Cross stitch or Back Stitch. Back Stitch has two options: Diagonal or Stepped. The difference between these border options lays in the way in which stitches behave when creating slant lines (diagonally or stepped lines). |
