Creating a simple hotfix design from a raster image using manual digitizing (classic), and some object editing.
You can create this design while you read this article.
|
This example includes: •Creating a new design document •Load a raster (bitmap) Image. Resize it. •Bling Types Library. Set the Bling Palette. •Bling Object Type: Area + Inner Ring Bling Fill •Bling Object Type: Area + Flexible Bling Fill •Bling Object Type: Path + Regular Multi-Bling Fill •Bling Object Type: Area + Uniform Bling Fill •Bling Text |

Open a new blank design document
➢Click on the New Document Tab, that is the small tab on the top of the workspace with blank document icon. You can also open a Blank Design Document from FILE > OPEN menu. |
|
Load a Raster Image
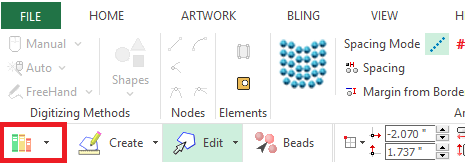
➢Click on CATALOG on the MAIN toolbar. |
|
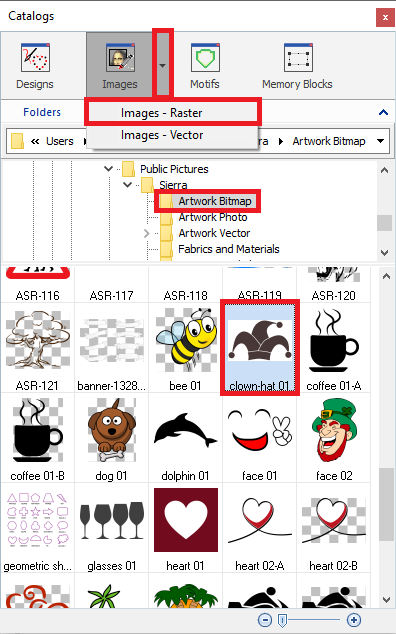
➢As we need to import a raster image, select the media type Images-Raster on the Catalog tool. ➢Select the folder where the image is located. ➢The bottom panel of the Catalog displays the contents of the folder for the selected media type. ➢We selected the clown-hat 01 raster image from the Artwork Bitmap folder. ➢Drag the image into the workspace to load it. |
|
Customizing the raster image
➢Change the raster image size from the Main Toolbar. Activate the padlock (proportional sizing), type in 200 in the horizontal size control and press Enter. The other size will be adjusted to keep proportion. |
|
Personalize the Bling Palette
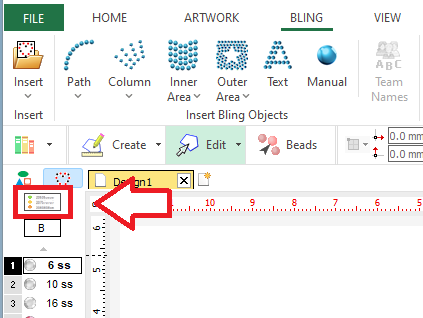
➢Select the tooltab BLING ➢Click on the Bling Palette function on the Bling Bar. |
|
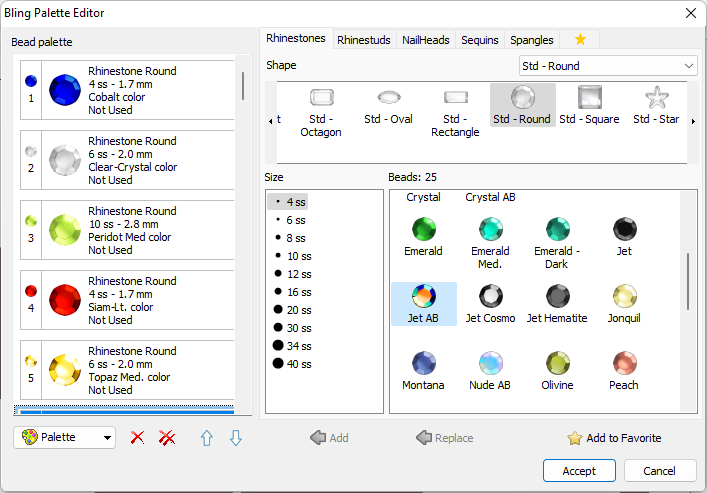
The Bling Palette Editor opens. ➢We will use the default palette and replace the first 6 beads ➢Select the first bead by clicking on it. Navigate through the different tabs and options on the right panel to select the desired bling type, shape, size and color. ➢Press the Replace button. The first bead in the palette will be replaced by one you selected in the catalog. ➢Use this list to replace the beads 1 to 6 in the palette •The 4ss - 1.7 mm Cobalt Color. •The 6ss - 2.0 mm Clear-Crystal Color. •The 10ss - 2.8 mm Peridot Med Color. •The 4ss - 1.7 mm Siam-Lt Color. •The 6ss - 2.0 mm Topaz Med Color. •The 4ss - 1.7 mm Jet AB Color. |
|
Create the left and right part of the clown hat
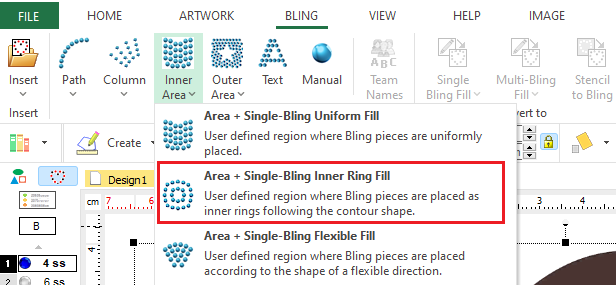
Define the object type ➢On the tooltab BLING, Click on Inner Area and select Area + Single-Bling Inner Ring Fill. |
|
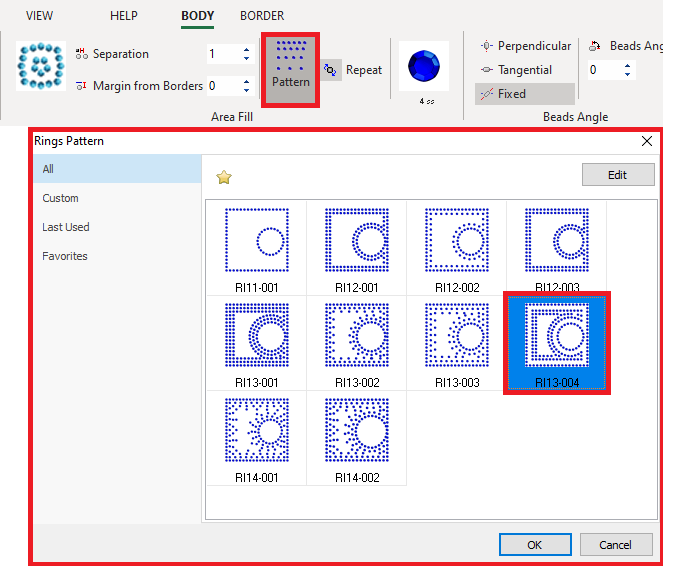
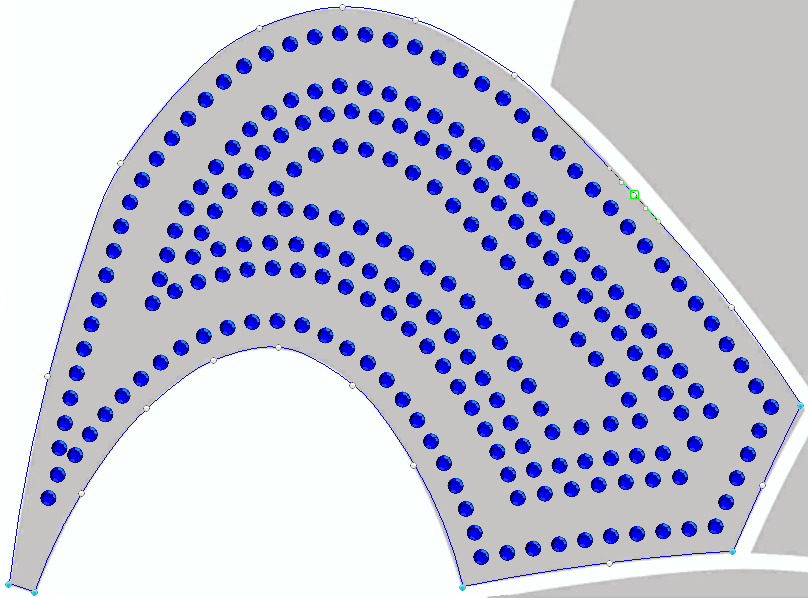
Define the object properties ➢Set a 1 mm bead separation and a 0 mm margin. ➢Select the 4ss - 1.7 mm Cobalt Color stone. Select the Ring Pattern ➢Click on the Pattern function. ➢Select RI13-004 and press OK. |
|
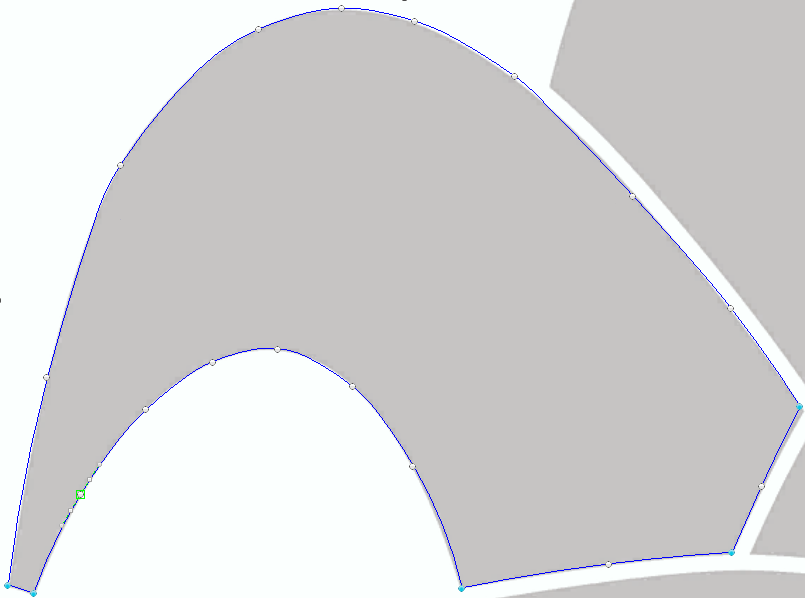
Digitize the object ➢You must insert a sequence of nodes (one by one) to define the geometric shape of the object. Consecutive nodes will be connected by straight lines or curves, depending on the properties assigned to those nodes. Curves can be Arc or Bezier types. ➢To close the object, place the last node above the first node. The application will close the area automatically. ➢Press the Enter key to confirm the object and generate the beads. |
|
Same steps for the second shape ➢Use the same Inner Ring Bling Fill for right part. ➢Set a 1 mm beads separation and a 0 mm margin. ➢Select the 4ss - 1.7 mm Cobalt Color stone. ➢Set the RI14-001 ring pattern. ➢Digitize the area on the right in the same way as the previous one. |
|
Create the middle part of the clown hat
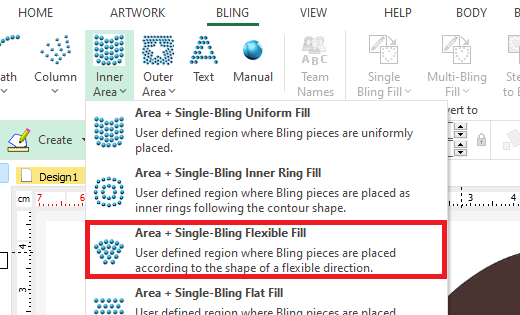
Define the object type ➢On the tooltab BLING, Click on Single-Bling Fill and select Area with Flexible Bling Fill. |
|
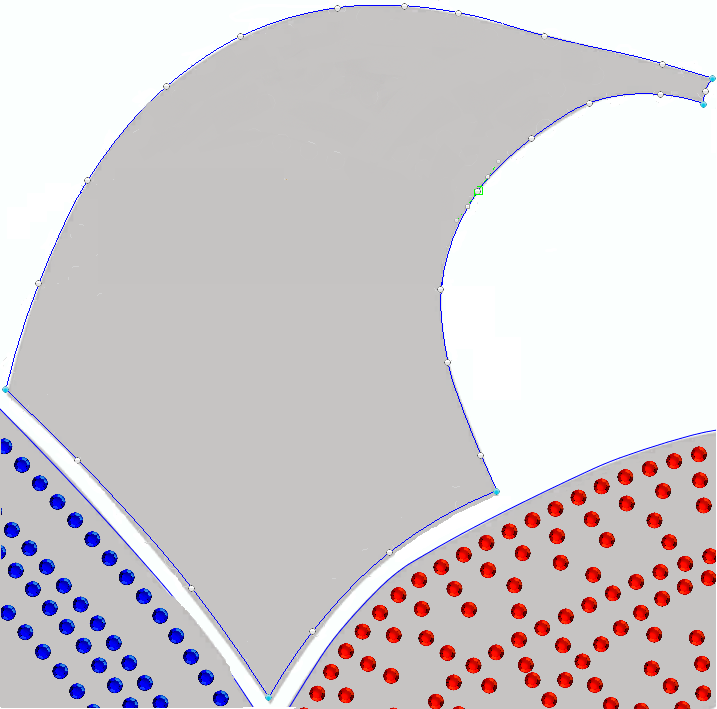
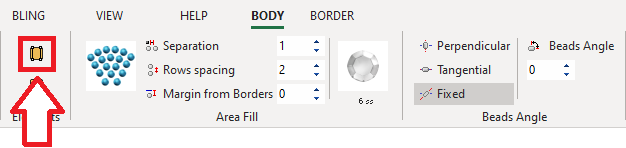
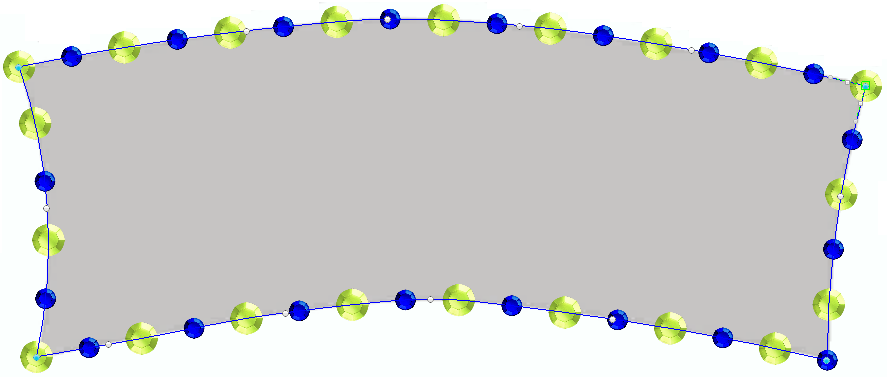
Define the object properties ➢Set a 1 mm bead separation, a 2 mm row spacing and a 0 mm margin. ➢Select the 6ss - 2.0 mm Clear-Crystal Color. Digitize the object ➢Digitize the area on the middle, but do not click on the Enter key yet (there are more geometric elements to add before). |
|
➢Click on the Direction button on the tooltab to add a direction line. |
|
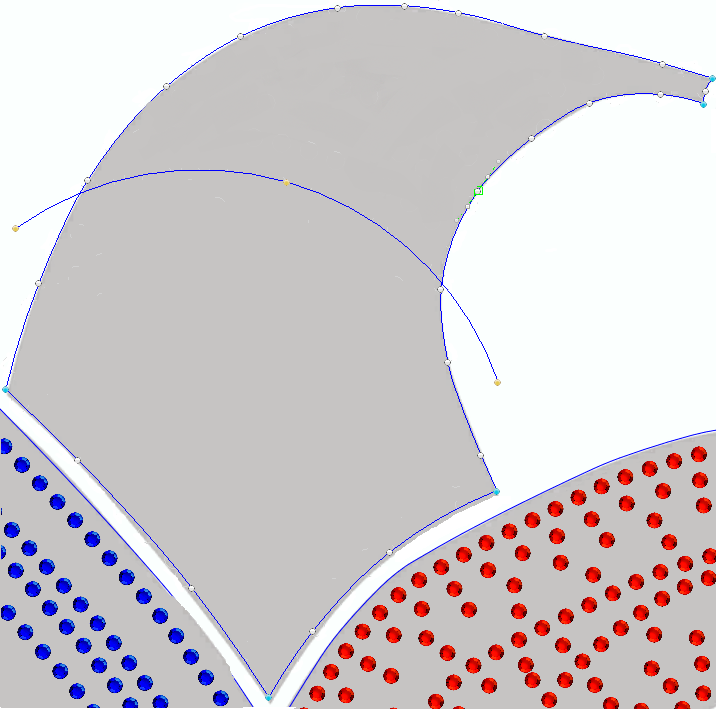
The direction line will guide the beads placement. ➢Add the nodes (straight or curve) of the direction line. ➢Press the Enter key to confirm the object and generate the beads. |
|
Create the bottom part of the clown hat
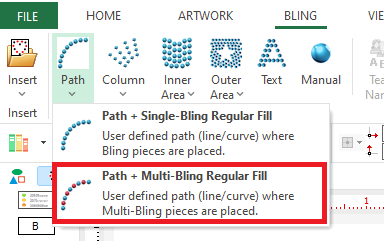
Define the object type ➢On the tooltab BLING, click on Multi-Bling Fill and select Path + Regular Bling Fill style. |
|
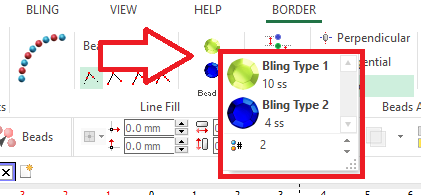
Define the bottom part properties
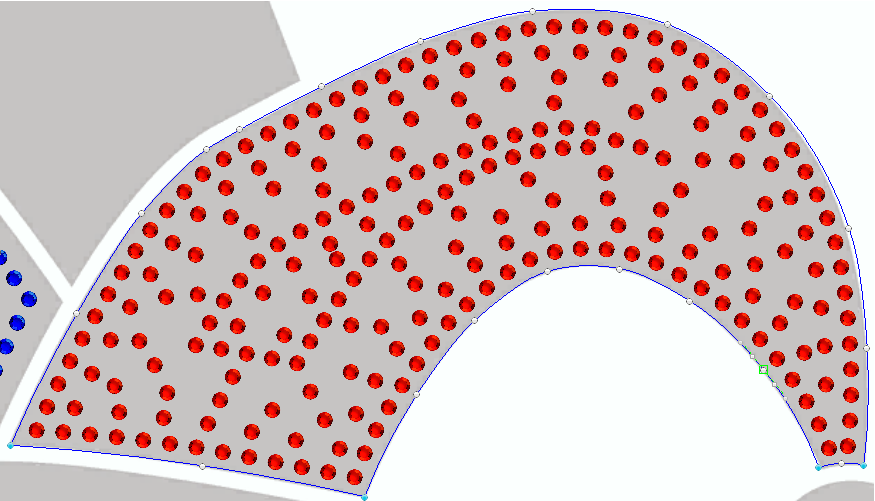
Define the object properties ➢Press on the bead list and select the 10ss - 2.8 mm Peridot Med Color and the 4ss - 1.7 mm Cobalt Color stones. |
|
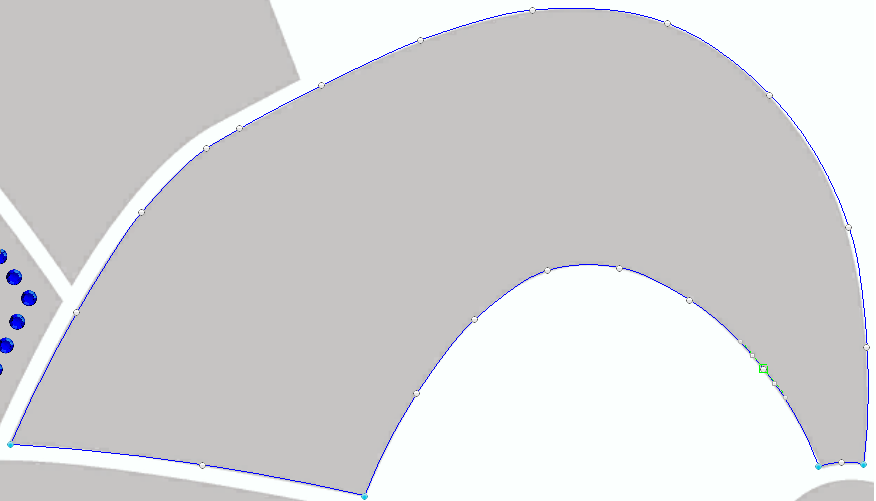
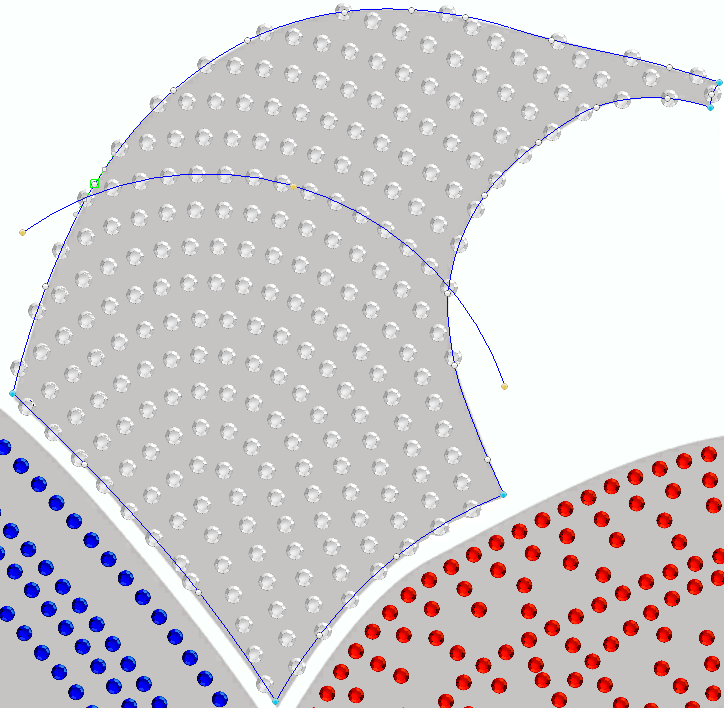
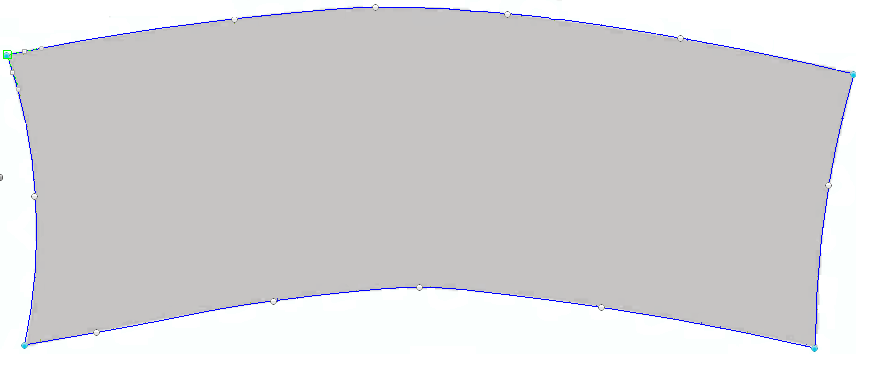
Digitize the object ➢Digitize the area for the bottom part. ➢Press the Enter key to confirm the object and generate the beads. |
|
Create the jingle bells
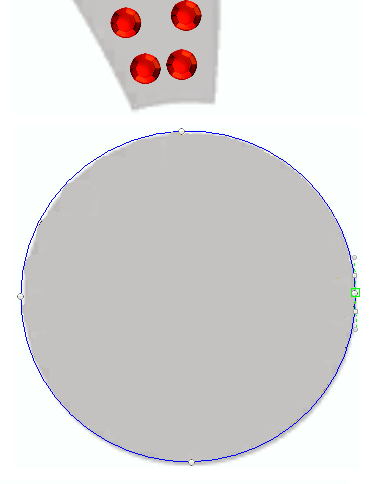
Define the object type ➢On the tooltab BLING, click on Single-Bling Fill and select Area + Uniform Bling Fill stype. |
|

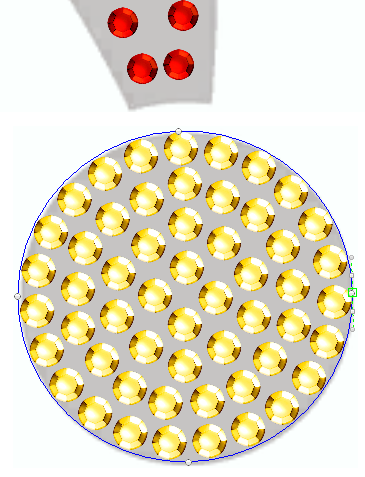
Digitize the object ➢Digitize the area for each bell. ➢Press the Enter key to confirm the object and generate the beads. |
|
Editing the object position
➢Click on Edit Object ➢Select the left bell. |
|
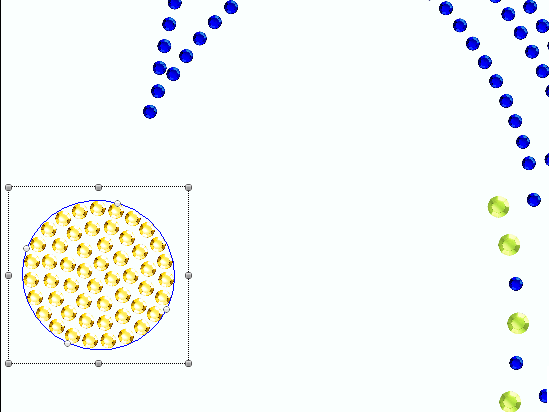
➢Press and hold the mouse left button over the object, and move the mouse (that is, drag the object to a new position). |
|
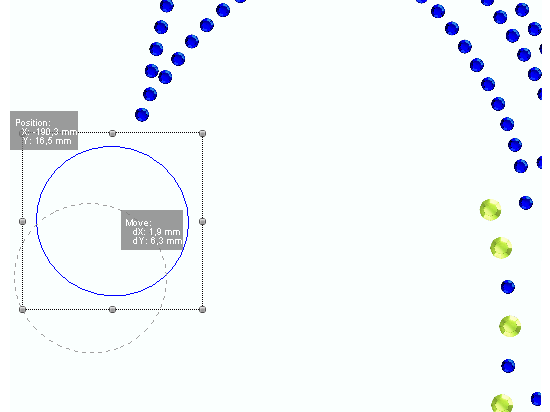
➢Release the button ➢Click on Enter key to confirm the new position. |
|

Create the text
Define the object type ➢On the tooltab BLING, click on Bling Text. |
 |
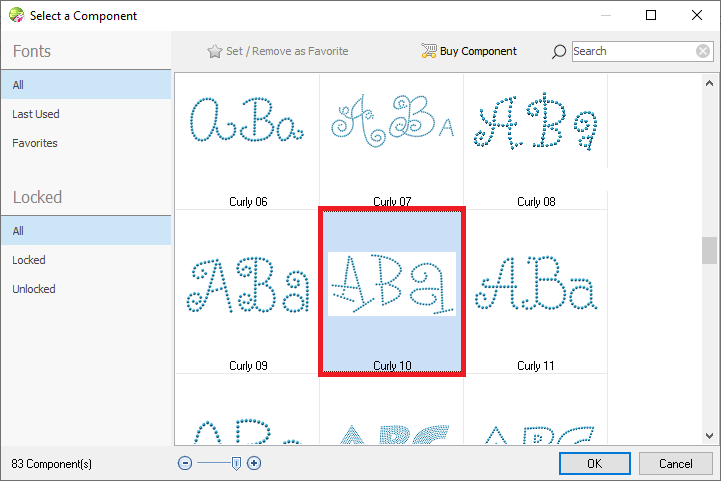
Define the object properties (text properties) ➢Select the font type. On this example, we will use the Curly 10 Digitized font. |
|
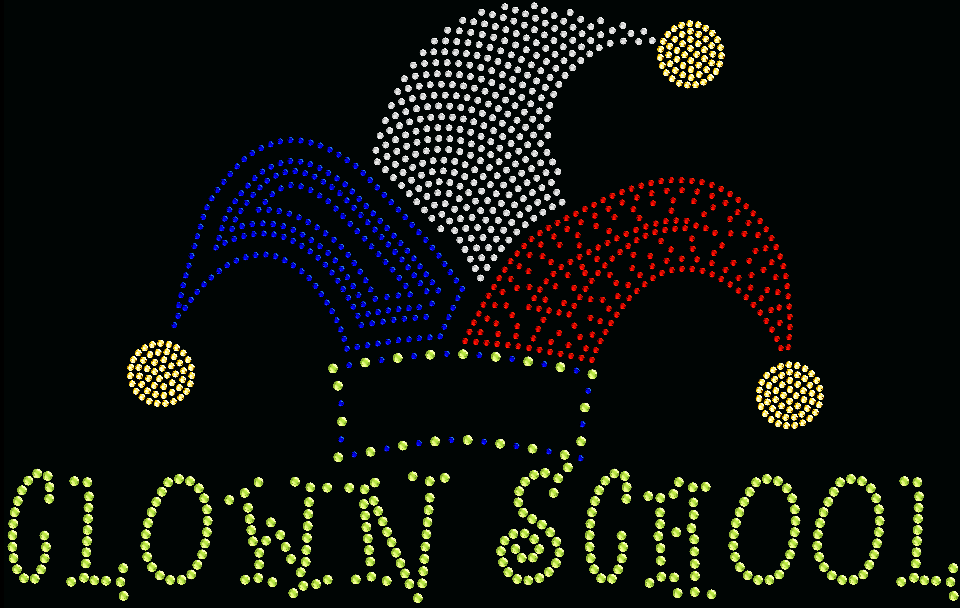
➢Specify the bling type by pressing on the bling type thumbnail on the tooltab. We used the 10ss - 2.8 mm Peridot Med Color stone. ➢Change the text separation for both texts to 0.3 mm and the text height to 40. ➢Type the text "CLOWN SCHOOL" ➢Press the Enter key to confirm the object and generate the beads. The text is displayed in the workspace |
|

➢Adjust the text position. Place the text object under the hat. |
|
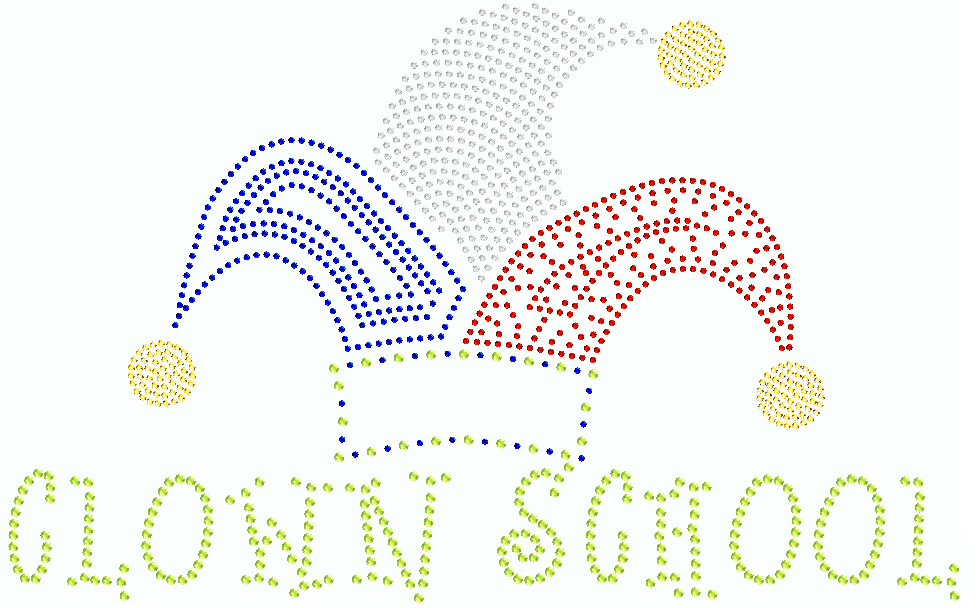
Final Design