Creating a bling design from a vector graphic image through vector-digitizing, using the tooltabs and the Smart Design tool.
You can create this design while you read this article.
|
This example includes: •Creating a new design document •Load a Vector Image. Resize, Ungroup and Combine. •Bling Types library. Set the Bling Type Palette. •Smart Design •Bling Object Type: Path + Regular Bling Fill |

Open a new blank design document
➢Click on the New Document Tab, that is the small tab on the top of the workspace with blank document icon. You can also open a Blank Design Document from FILE > OPEN menu. |
|
Load a Vector Image
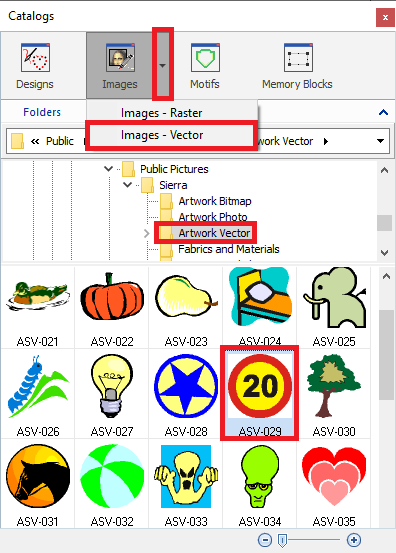
➢Click on CATALOG on the MAIN toolbar to open the Catalog tool. |
|
➢Select the media type Images-Vector on the Catalog tool. ➢Select the folder where the image is located. ➢The bottom panel of the Catalog displays the contents of the folder for the selected media type. ➢Select the ASV-006 vector image from the Artwork Vector folder. ➢Drag the image into the workspace to load it. |
|
Customizing the vector image
➢Change the vector size from MAIN TOOLBAR ➢Type in the value 100 in the horizontal size and press Enter. Repeat for vertical size |
|
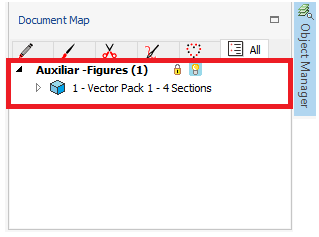
➢The image is probably a composition (group) of many combined graphic elements. ➢To ungroup the elements of the image, press on "Ungroup All Objects" from the "Group" button at the MAIN TOOLBAR. |
|

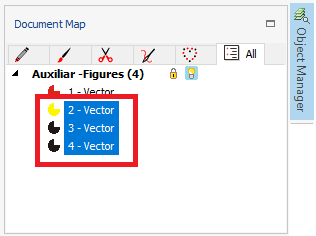
➢Select vectors 2, 3 and 4 from the Document Map, on the Object Manager tab. |
|
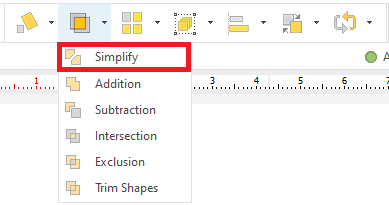
➢On the Main Toolbar, click the "Combine Objects" button and select "Simplify". |
|
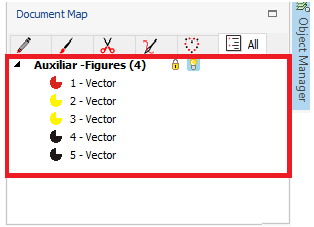
On the Object Manager, you will see the vector objects composing the vector image after ungrouping and simplified it. |
|
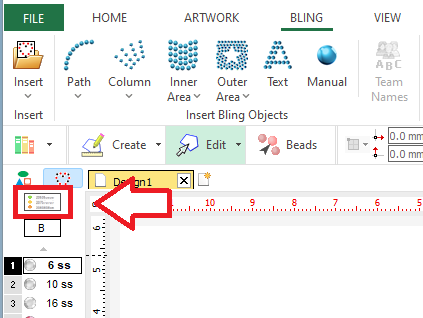
Personalize the Bling Types Palette
Before digitizing, we will personalize the Bling Bar, which requires to edit the Bling Palette. ➢Select the tooltab BLING ➢Click on the Bling Palette icon. |
|
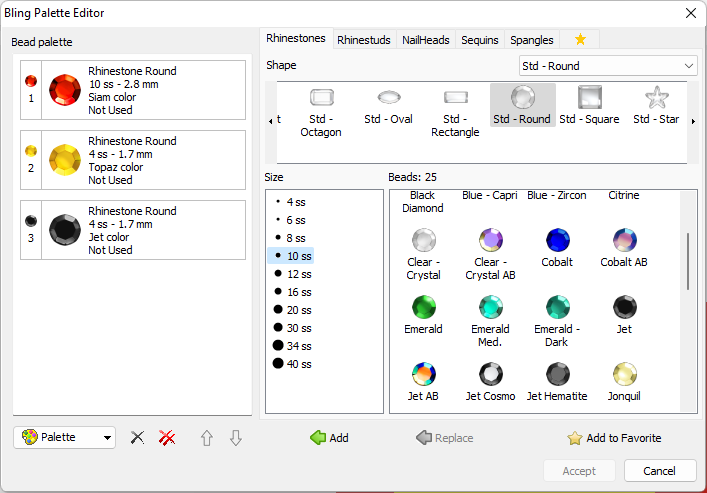
➢On the Bling Palette Editor, press on Remove All Beads button at the bottom to clear the current palette. ➢Navigate through the different tabs and options on the right panel to select the desired bling type, shape, size and color. ➢To add a bling type to the palette on the left panel, double click on it or press on the green arrow between the panels. For the example, we selected three Rhinestone Round stones: ➢The 10ss - 2.8 mm Siam Color for the red vector. ➢The 4ss - 1.7 mm Topaz Color for the yellow vectors. ➢The 4ss - 1.7 mm Jet Color for the black vectors. Then, click Accept |
|
Create the red shape
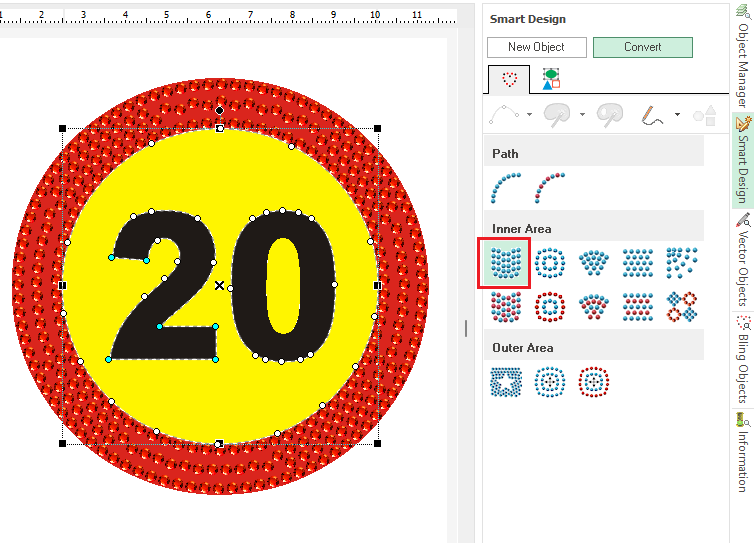
➢To start digitizing, open the Smart Design tool from the tabs at the right edge. |
|
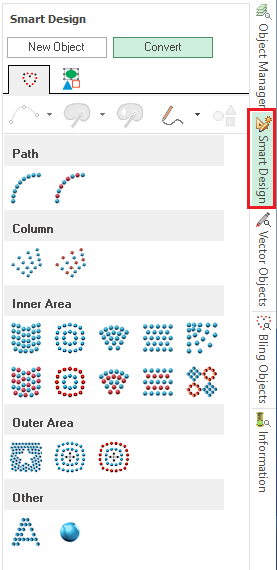
Select the vector object to convert to bling ➢Select the red vector object. Define the object type ➢On the Smart Design tool, press on Area + Uniform Bling Fill style. This action will automatically create the area according to the selected vector shape. |
|
Define the object type ➢Select the corresponding bling type from the context toolbar or from the Bling Bar on the left side of the workspace. In this case, we use the 10ss - 2.8 mm Siam Color stone. ➢Set a 0.5 mm beads separation and a margin o 1.5 mm. Note: You can change the settings of any object from the tooltab. |
|
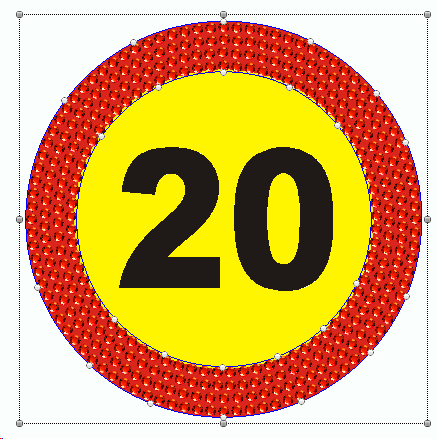
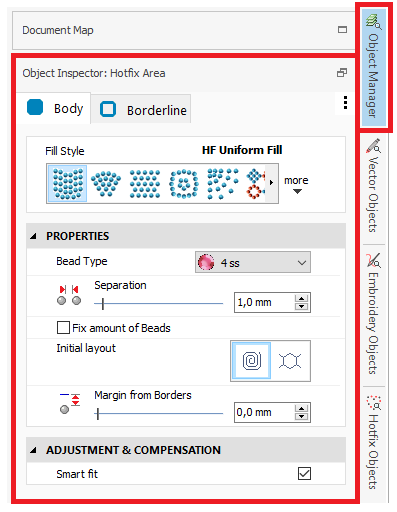
For more advanced settings, use the the Object Inspector. ➢To access it, click on the "Object Manager" button, at the right side of the screen. |
|
Create the yellow shape
Select the vector object to convert to bling ➢Select the yellow vectors. Define the object type ➢On the Smart Design tool, press on Area + Uniform Bling Fill style. This action will automatically create the area according to the selected vector shape. |
|
Define the yellow shape properties
➢Select the corresponding bead type from the context toolbar or from the Bling Bar on the left side of the workspace. In this case, we use the 4ss - 1.7 mm Topaz Color stone. ➢Set a 0.5 mm beads separation and a 2 mm margin. |
|
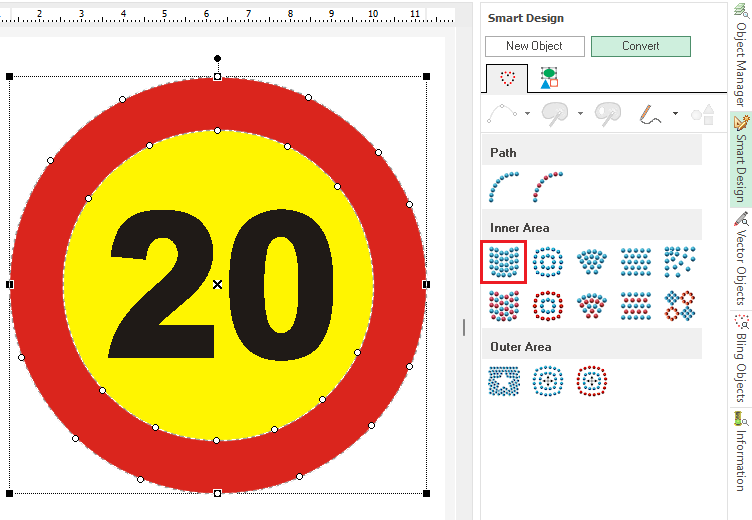
Create the black shapes
Select the vector object to convert to bling ➢Select one of the black vector objects. Define the object type ➢ On the Smart Design tool, press on Path + Regular Bling Fill style. This action will automatically create the path according to the selected vector shape. |
|
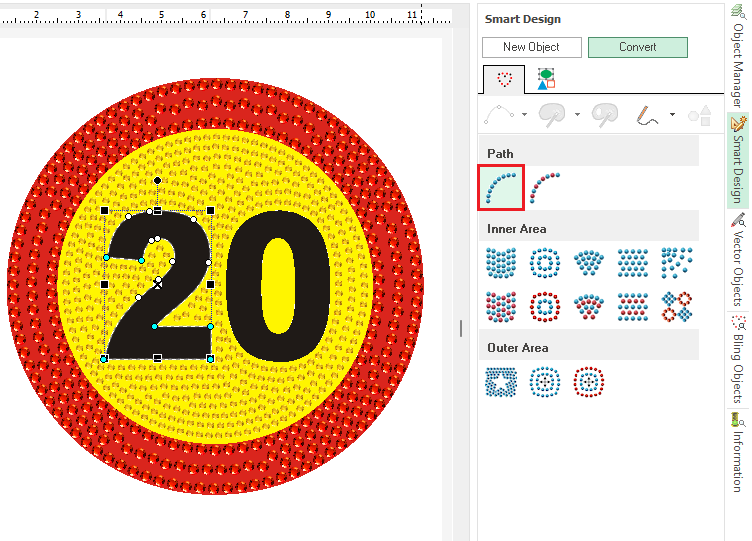
Define the object properties ➢Select the corresponding bead type from the context tooltab or from the Bling Bar on the left side of the workspace. In this case, we use the 4ss - 1.7 mm Jet Color stone. ➢Set a 0.3 mm bead separation. ➢Repeat the steps for the remaining black vector object. |
|
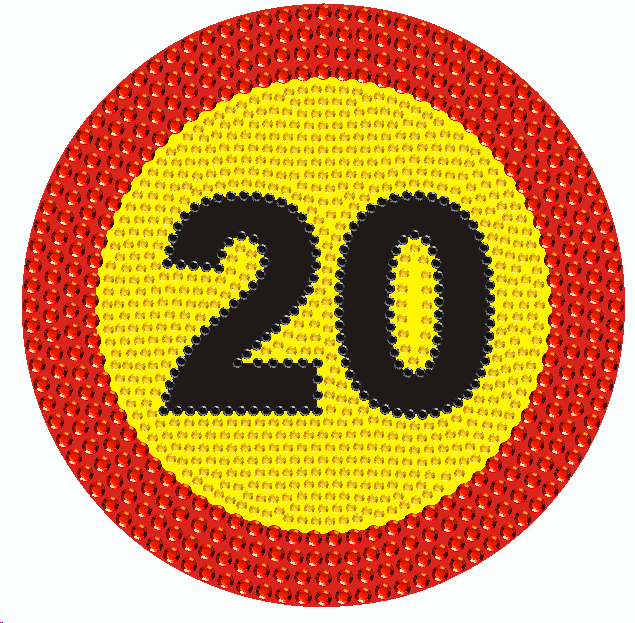
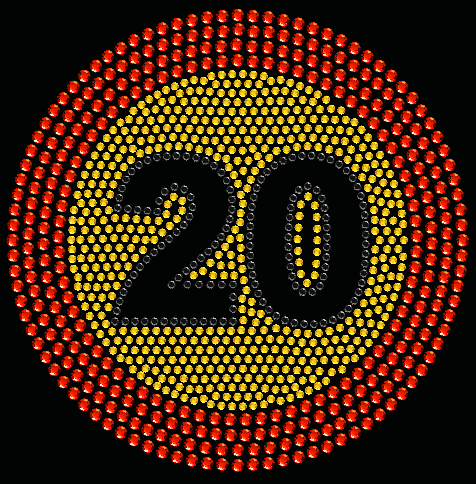
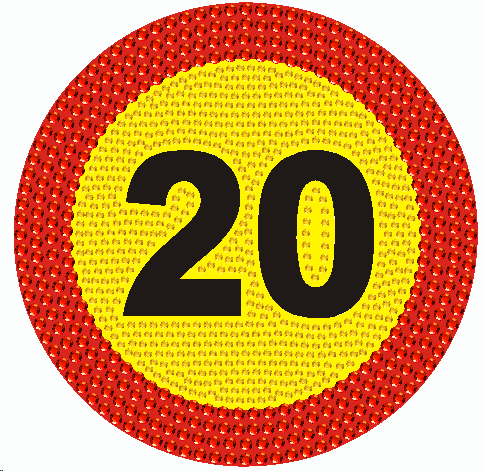
Final Design
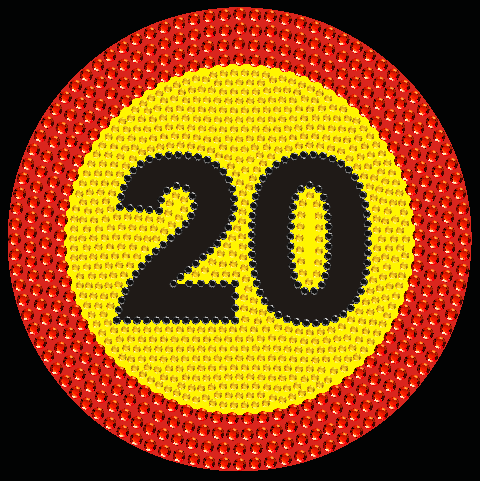
Final Design (hidden vector image)