This application offers an advanced set of stitch type recognition and block processing tools. That is, blocks of consecutive stitches can be automatically defined when the application realizes that they constitute a known stitch type or fill style (zig-zag stitches, pattern stitches, etc). Then, the application offers specific functions for those kind of blocks.
Auto-detect Blocks with Stitch Type Recognition
The application includes tools to recognize and re-process stitch types on Expanded Design, such as Running Stitches, Zig Zags or Fill Patterns.
|
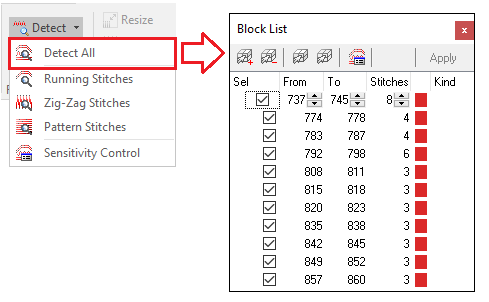
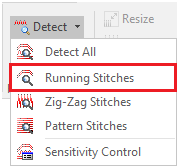
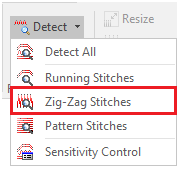
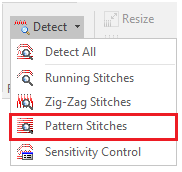
1.Activate the Stitch Editing mode ("Edit Stitches" button on the Thread Color Bar or by pressing the F12 key). 2.Click on one of the stitches of a supposed stitch type. 3.Click on the "Detect" button to display the options you can use to select (a specific type of stitch). |
|
|
|
|
|
The next table summarizes the available parameters to change the recognition criteria
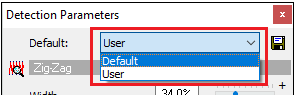
Once you have adjusted the parameters, you can save them using the Save button at the upper right corner of the box. If you want to return to the original parameters, select the Default option in the Predefined drop down list. If you want to use the last saved parameters, select User.
|
||||||||||||||||||||||||||||


Smart Re-size a Stitches Block
Change the size of the selected block of stitches.
|
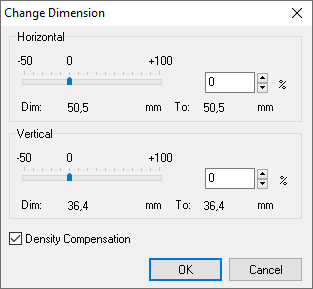
After selecting a block of stitches using the stitch type recognition tools, click on the "Resize" button on the Stitch Editing tooltab, Block Processing group. The "Change Dimension" window opens.
You can re-size the block of stitches by moving the horizontal and/or vertical slider to change the values or type it in the corresponding box.
|
Smart Block Re-processing
Make changes in the stitch type of the selected block
|
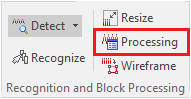
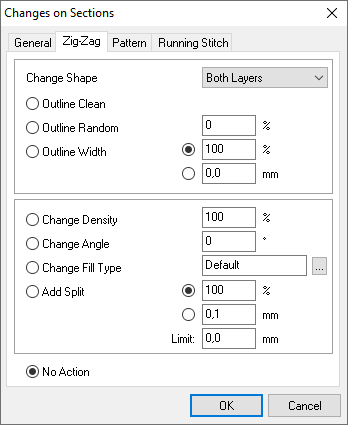
After selecting a block of stitches using the stitch type recognition tools, click on the "Processing" button on the Stitch Editing tooltab, Block Processing group. The "Block Processing" window opens.
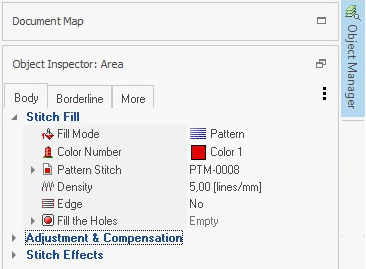
Functions are classified on tabs according to the stitch type. General Tab The following functions apply to the overall block of stitches. •Filter small stitches •Change the stitch density •Change the outline width Zig-Zag Stitches Tab The following functions apply to the blocks of zig-zag stitches. •Outline Clean (smooth edges) •Outline Random (irregular edges) •Outline Width (widen or narrow edges) •Change Stitches Density •Change Stitches Angle •Change to Pattern Stitch •Add Split Stitches Pattern Stitches Tab The following functions apply to the blocks of pattern stitches. •Outline Clean (smooth edges) •Outline Random (irregular edges) •Outline Width (widen or narrow edges) •Change Stitches Density •Convert to Zig-Zag Stitch Type •Change Pattern Stitch Running Stitches Tab The following functions apply to the blocks of running stitches. •Repeat |
Convert Stitches Blocks to Embroidery Objects
This function does the EXPANDED TO CONDENSED conversion. You can convert the whole expanded design (sequence of stitches) into a condensed design (sequence of objects) or parts of the design. Basically, it converts the found blocks of recognized stitch types into the appropriate embroidery objects.
This the ideal tool when you want to edit an expanded design file (machine format file) with the power of Object Editing.
|
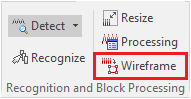
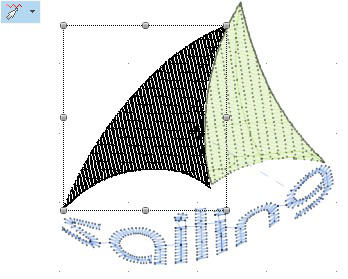
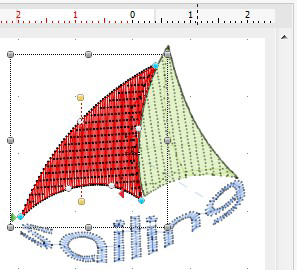
After selecting a block of stitches or the complete design, click on the "Wireframe" button on the Stitch Editing tooltab, Block Processing group. That's all. You can then activate the Object Editing mode (Edit Object), select the new created embroidery objects, and edit both the objects geometry and the objects properties. See an example of how does this feature work:
|
Embroidery Office levels |
|
Included |
|
Available (extra feature) in |
Requires the module |
|---|---|---|---|---|---|
EO/EOL ART-E25 |
|
No |
|
|
|
EO/EOL ART-E30 |
|
Yes |
|
|
|
EO/EOL ART-C45 |
|
Yes |
|
|
|
EO/EOL ART-D50 |
|
Yes |
|
|
|
EO/EOL ART-D60 |
|
Yes |
|
|
|
EO/EOL ART-D65 |
|
Yes |
|
|
|
EO/EOL ART-D80 |
|
Yes |
|
|
|