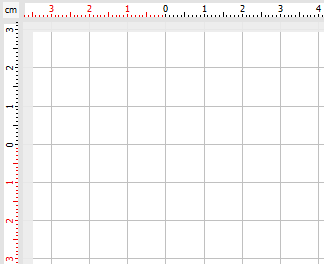
The Grid function shows a set of small, equally spaced marks on the workspace. Not only the grid is useful as a reference of the size, it also allows you to accurately place objects within your design using the snap to grid function.
You can control many aspects of the grid, such as the distance, mark shape, color, etc.
|
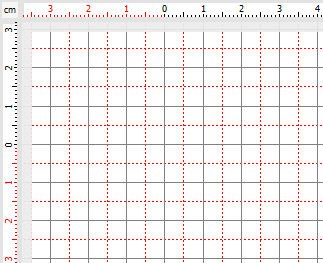
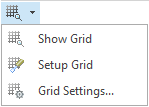
To access the Grid customization controls, press on the dropdown arrow button. Show/Hide Show/Hide the grid. Grid Setup A basic and interactive method to change the grid size. Turn on the grid and then select Setup Grid. The mouse pointer will change into a ruler shaped icon. Press and hold the left mouse button, then drag. The grid size will change following the mouse movements. This method is useful when you need to set the grid distance matching the size of an object displayed in the screen, such as a detail in an image. Grid Settings This command opens the Options window, with the grid page already selected. You will find controls to set the grid position (grid displayed above or below the objects), style, color and size. You can also set a sub-grid, allowing a set of closer sub-marks be displayed inside the main grid marks. |
Samples