We call Guidelines to a set of auxiliary vertical and/or horizontal lines you can insert in the workspace to help with objects alignment and placement.
|
How add a Guideline?
Follow this procedure:
➢Place the mouse pointer over one of the rulers (vertical or horizontal).
➢Press the CTRL key and press the left mouse button.
➢Drag the mouse (move the mouse while you hold both CTRL key and the left button of the mouse). A guideline will appear and follow the mouse pointer while you drag.
➢Once the pointer reaches the position you want, release the mouse button.
➢Repeat this procedure for each guideline you want to add.
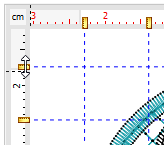
How change the Guideline position?
Follow this procedure:
➢Place the mouse pointer over one of the guidelines.
➢Drag it (press and hold the left button of the mouse while moving the mouse) to the new position.
|
Show/Hide Guidelines
Show or hide all the guidelines from the corresponding button on the Main Bar.
|
No need to press the drop-down arrow to toggle between the show or hide functions.
|
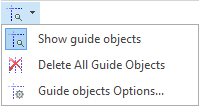
Snap to Guidelines
Allows easy and accurate alignment of any type of object or block to the guidelines. This snap is always active while guidelines are visible, however, you can disable it by pressing and holding the ALT key
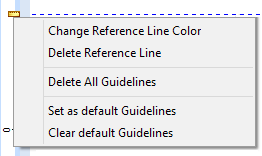
More Guideline Functions
Right click on the guideline icon to open a context menu that contains several functions related to guidelines.
|
You can: •Change the guideline color •Delete the guideline •Delete all guidelines •Set guideline as default •Reset guidelines default |