A branch is a group of objects linked for a specific purpose: The branched group has one single entry point and one single exit point, and the connection points of all the contained objects are created automatically by the application. That is, the application creates the internal under-paths to connect the exit points of every object with the entry point of the consecutive object. In this way the designer saves time to evaluate, decide and specify the internal connections of the branched objects. Certainly, consecutive objects are required. If they are not, the branching will reorder the objects and make them consecutive objects. In fact, the order of the objects will be redefined during the branching process, and they may change if the objects are edited later.
This functions are available (when a block is selected) from: •The Main Toolbar |
|
Branch
|
➢Click on EDIT OBJECT function on the MAIN toolbar to activate the Object Editing Mode ➢Select several objects in any of the available options (no need to be consecutive objects first) ➢Branch the objects from Main toolbar > Block > Branch function. |

For the following example we have created 4 area objects (it doesn't matter the order, as it will be reordered automatically).
|
➢Click on Edit button. |
|
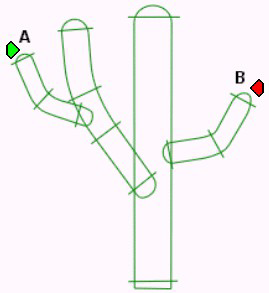
➢Define a block that contains the 4 objects. ➢Branch the objects executing the Branch function. The application will ask you to set the Entry point. ➢Move the mouse cursor towards the (A) zone and click to set the Entry Point for the entire branch. Next, the application will ask you to set the Exit point. ➢Move the mouse cursor towards the (B) zone and click to set the Exit Point for the entire branch. |
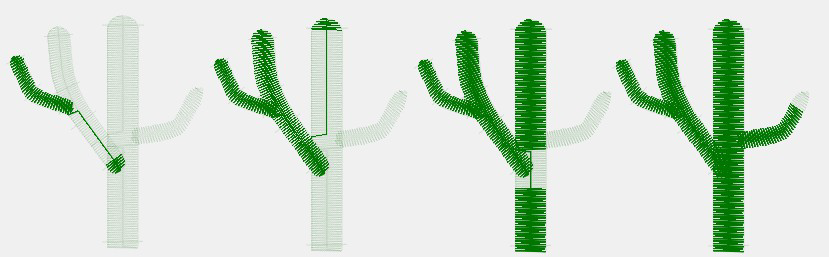
The group of sections is connected in a branch. The application generates all the stitches of the branched objects including the required under-path stitches to connect them.
You can define branches containing different object types. Use any stitch type or fill style, except programmable stitches and variable density stitches with more than one density curve.
|
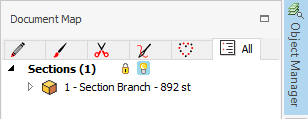
The objects connected in the branch are displayed with a "box" icon in the Document Map on the Object Manager. |
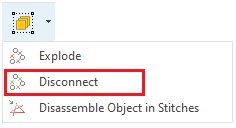
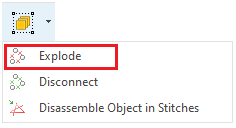
Explode (branch off)
|
Use this tool to disconnect a Branch, keeping the embroidery sequence it had before it was branched. ➢Click on Select Object button on the Main toolbar to activate the Object Editing Mode. ➢Select any object of the branched group. The branched group is selected. ➢Finally, you can explode the objects from Main toolbar > Block > Explode function. |
Disconnect (branch off)
|
Use this tool to disconnect a Branch, while keeping the embroidery sequence defined by the branching function. ➢Click on Select Object button on the Main toolbar to activate the Object Editing Mode. ➢Select any object of the branched group. The branched group is selected. ➢Finally, you can disconnect the objects from Main toolbar > Block > Disconnect function. |