Stitches Block functions refers to a set of functions or actions that can be applied to a block of stitches, such as moving, scaling, rotating, etc.
•The first step is to activate the Stitch Editing mode (click on the Edit/Select Stitch button).
•Then you must select the block in any of the available options
•Finally you can execute any of the available stitch block editing functions from the ToolsTab STITCH EDITING.
Stitches Block Editing, Clipboard functions
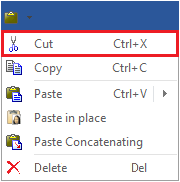
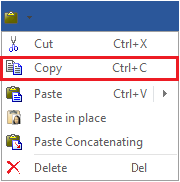
This application offers the standard clipboard functions (cut, copy, paste, etc) for blocks of stitches.
|
This functions are available from: •Tooltab HOME, Clipboard group. •Quick Access ToolBar. •Context menu (mouse right button) while selecting an object or block •Keyboard shortcuts |
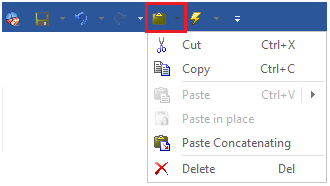
Cut
|
Use this function to copy the selected block into the clipboard (temporary system memory), and delete it from the current document without modifying the rest of the design. |
Copy
|
Use this function to copy the selected block into the clipboard (temporary system memory). |
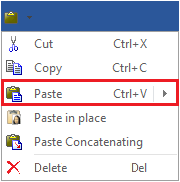
Paste
|
Use this function to paste (insert) the clipboard content in the insertion point of the active design. As the expanded embroidery design is a sequence of stitches, and the block is also a sequence of stitches; the stitches are re-sequenced when you use this function. You must indicate which is the stitch where you want to insert the block of the clipboard (Just select a stitch point on Stitch Editing mode). |
Paste in Place
|
Use this function to paste (insert) the clipboard content in the insertion point of the active design, but keep the exact position of the original block. As the expanded embroidery design is a sequence of stitches, and the block is also a sequence of stitches; the stitches are re-sequenced when you use this function. You must indicate which is the stitch where you want to insert the block of the clipboard (Just select a stitch point on Stitch Editing mode). |

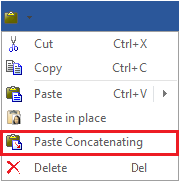
Paste Concatenating
|
Use this function to paste (insert) the clipboard content, so that the entry point of the pasted block is the last stitch. |
Delete Block
|
Use this function to delete a block without modifying the rest of the design. |
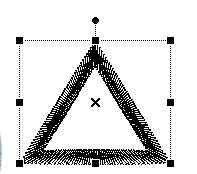
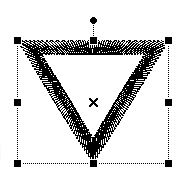
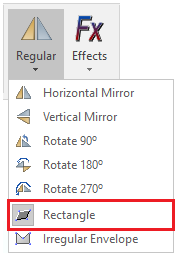
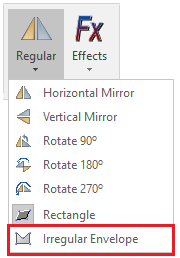
Stitch Block Editing: Rotate / Mirror
You can mirror or rotate the block easily.
|
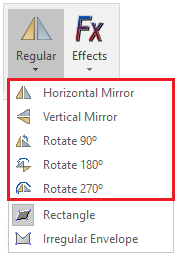
Click on the "Regular" button on the tooltab STITCH EDITING to open the drop-down menu. You can also open the context menu, "Mirror/Rotation" group.
Select the option of mirror (horizontal, vertical) or rotation (90º, 180º or 270º).
|
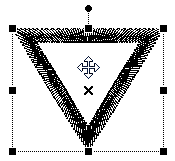
Stitch Block Editing: Rectangular Envelope
The rectangular envelope offers several functions you can apply to the block of stitches directly on the workspace.
|
When a block of stitches is selected, the rectangular envelope is automatically activated. The grips to use on the available functions (four corners and the sides mid points) become visible. Functions include: Move, Scale and Rotate. |
Stitch Block Editing: Move
Move a Block, from the workspace
Place the mouse cursor over the block (the selection rectangle). The mouse cursor will change its shape into a cross icon.
Press and hold the left mouse button and drag the block. It moves the block to a new position.

This action does not modify the order of the block in the stitches sequence, it just changes the physical position.
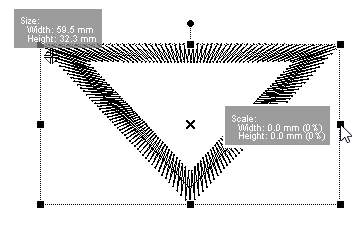
Stitch Block Editing: Scale
Scaling is the variation of the block size. Basically there are two types of scaling:
•Proportional: It changes the size of the block keeping its aspect ratio.
•Non proportional: It changes the size of the block not keeping its aspect ratio.
Drag the grip of any corner of the rectangle that contains the block. This action will change the block size in a proportional way.
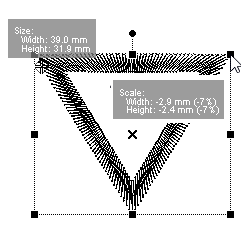

Drag the grips at the center of the sides of the rectangle that contains the block. This action will change the block size only in one of the axis.

|
You can press and hold the "Shift" key while dragging the grips to keep the center of the shapes in the same position |
|
This way of scaling just enlarge or reduces each stitch length according to the re-size values. As there is no density compensation when the block change the size, the stitch density will vary and leave empty gaps when the block becomes larger or pile up too many stitches when the block becomes smaller. If density compensation is required, use the corresponding functions of Stitch Block Advanced Editing. |
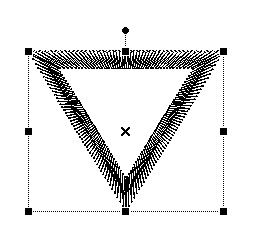
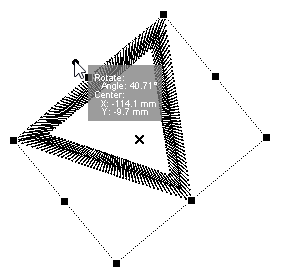
Stitch Block Editing: Rotate Angle
You can freely rotate the block easily on the workspace.
|
Place the mouse cursor on the top middle grip of the block (the selection rectangle). Press the and hold mouse left button, then drag to rotate. |
|
The block rotates while the mouse cursor moves. The pivot of the rotation is the center of the block. Note: If you prefer to modify the pivot position, place the mouse on it, move the pivot point by pressing the mouse left button. Release the mouse left button when the expected angle is reached. |
|
You can now: •Move the block to a different position. •Scale the rotated block by moving the grip. •Rotate the block again from the top middle grip. Press the Enter key to confirm the result. |
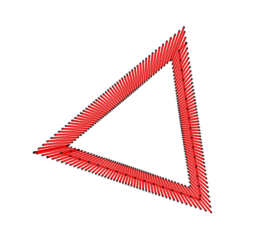
Stitch Block Editing: Irregular Envelope
The irregular envelope offer an alternative way to deform the block of stitches.
|
If any grip on the corner of the rectangle that envelopes the block is moved, the envelop will be deformed (not a rectangle any more) and the position of the stitches of the block will change accordingly. The grips that are on the middle point of the envelope sides can also be moved, so the irregular envelope will adopt more different shapes. One click with the mouse right button allows to move the middle point creating lines from that point to the adjacent corner. A second click allows to move the middle point creating arcs from that point to the adjacent corner. |
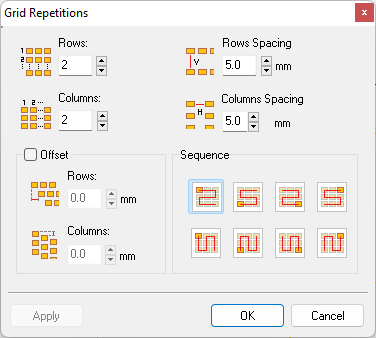
Stitch Block Editing: Repeat as a Grid
Use this tool in order to duplicate the stitch block a given number of times in the shape of a grid.
|
1.Select a stitch block and execute this function. The grid window opens
2.. Define the number of rows, columns, the distance between them and a layout/sequence. 3.Click on the "Apply" button to visualize the result before confirming the action. 4.Once you are satisfied with the result, press "OK". |