This feature allows you to embroider designs whose dimensions are larger than the maximum dimensions allowed by the largest hoop available.
The idea consists of dividing the design into parts that fit in the hoop and then embroidering each part while keeping an accurate control of the position.
Typically, the multi-hoop technique involves the use of an adhesive backing. This allows the fabric (with some parts of the design already embroidered) to be accurately repositioned in the hoop, to continue with the next parts.
Once your design is ready for embroidery, select MULTIHOOP from the EMBROIDERY tool tab
|

The Multihoop tooltab will appear and the workspace will enter in multihoop mode
|
We will follow a simple example to describe the use of this feature.
Our design is around 110 mm width and 145 mm height and our largest hoop is 130 mm width and 110 mm height.
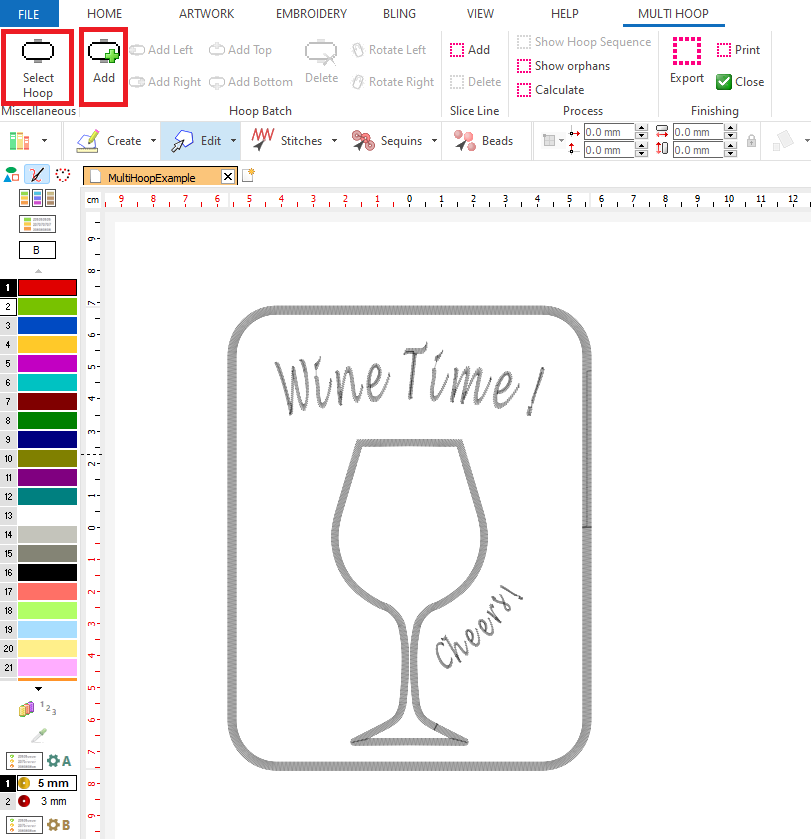
Step 1: Select hoop
Use the button Select hoop to open the Hoop library and select the hoop you will use. Once the hoop is displayed, click on it to select it and move it toward the top
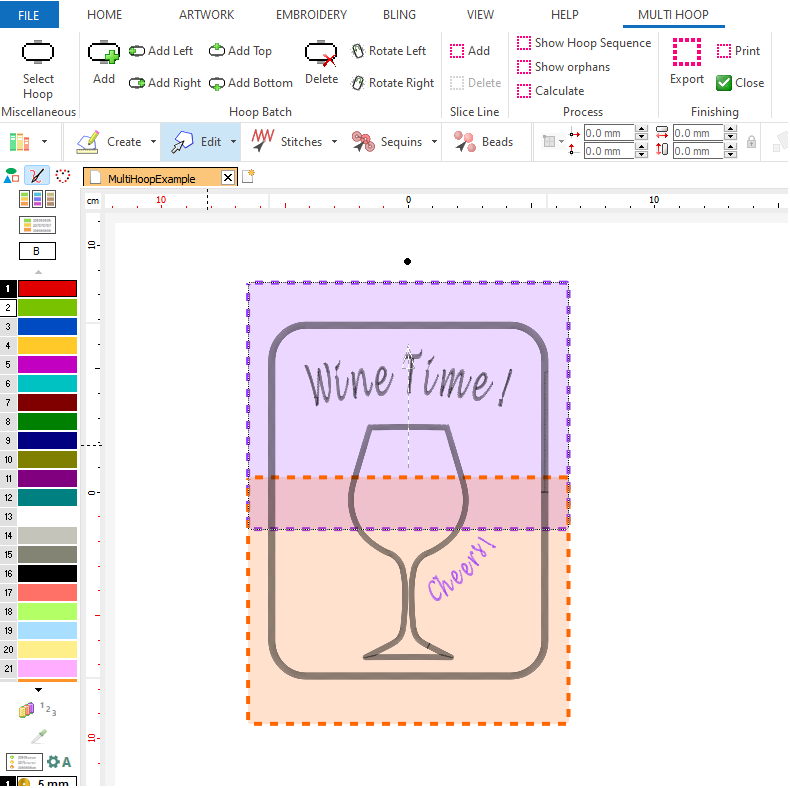
Use the Add Bottom button to add a copy of the hoop. Then select it and move it so that both hoops cover the design completely. Include some overlap (20 mm minimum) between the hoops.
The hoops are drawn using different colors to identify them easier
|
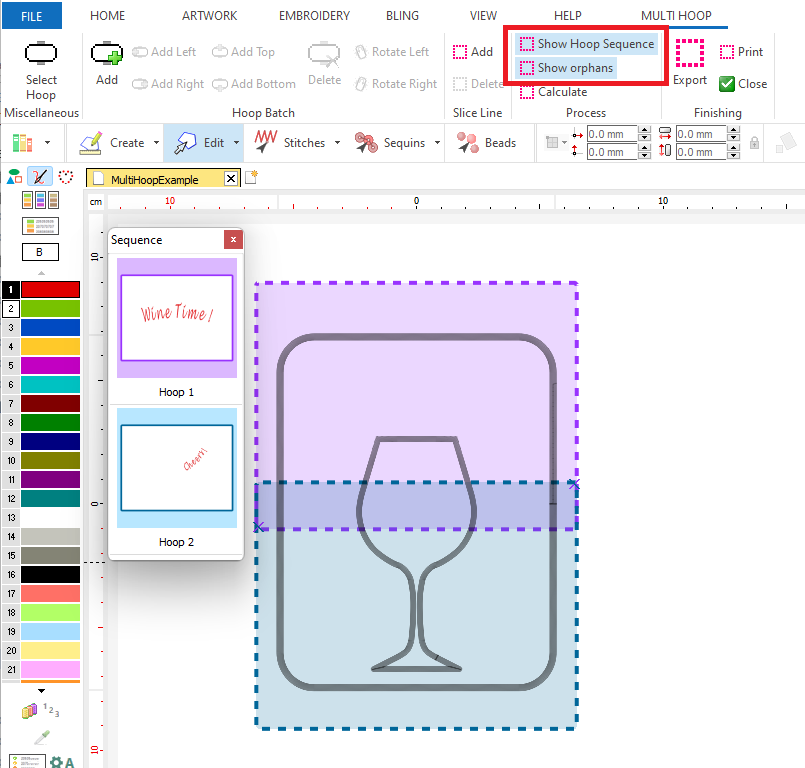
Step 2: Orphan objects and Hoop Sequence
Once the necessary hoops have been added and positioned, it may happen that some objects are completely included in one or another hoop and others are not.
Use the Show orphans function. This function will filter out from the view, those objects that are completely included in a frame (it is said that have a hoop assigned). It will remain visible just those objects not assigned to any frame.
The Show Hoop Sequence command opens a view with the hoop order to be followed. It also shows what objects are included in each hoop
|
Step 3: Splitting the large objects
As some of the objects do not fit in any of the frames, it will be necessary to split them.
To do this, click the Add button in the Slice Line group. The slice lines must be placed in the region where both frames overlap and must cross the objects to be split. You can use more than one slice line to divide an object, and it is also possible to use one slice line to divide several objects.
To create a slice lines just press Add, enter the first node and then enter the second one. Once the second node is entered, the slice line is defines and the tool recalculates the hoop sequence and the orphans objects
|
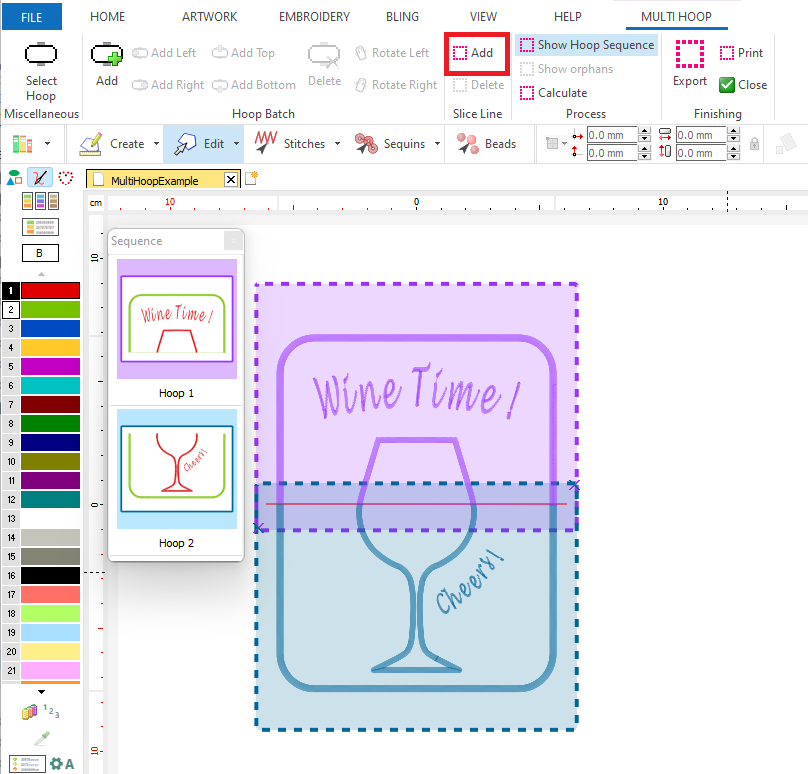
In the example, the slice line has split both orphan objects. All the objects (and all the "parts" of the objects are now assigned to a hoop). Our multi-hoop is almost ready
Step 4: Reference marks
Once you embroidery the first hoop of the multi-hopping sequence you will need to remove the fabric from the hoop (with the first part of the design already embroidered), prepare a hoop with adhesive backing and stick the fabric on it. In order both parts match you will need some references.
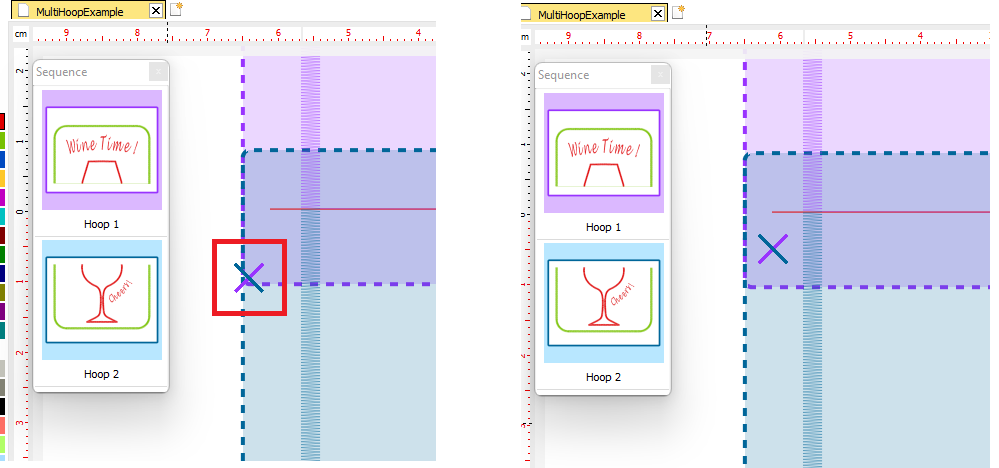
When all objects were split, in the previous step, the tool automatically added some reference marks. In the screen they look as a cross made with the color of hoops and located in the hoops overlap area.
The marks should be placed as far apart as possible to avoid rotation mismatch and, of course, should not be placed over any part of the design. You can adjust the position of the marks by clicking on them and dragging.
These marks will be also added to the design as a simple cross made with a couple of stitches.
|
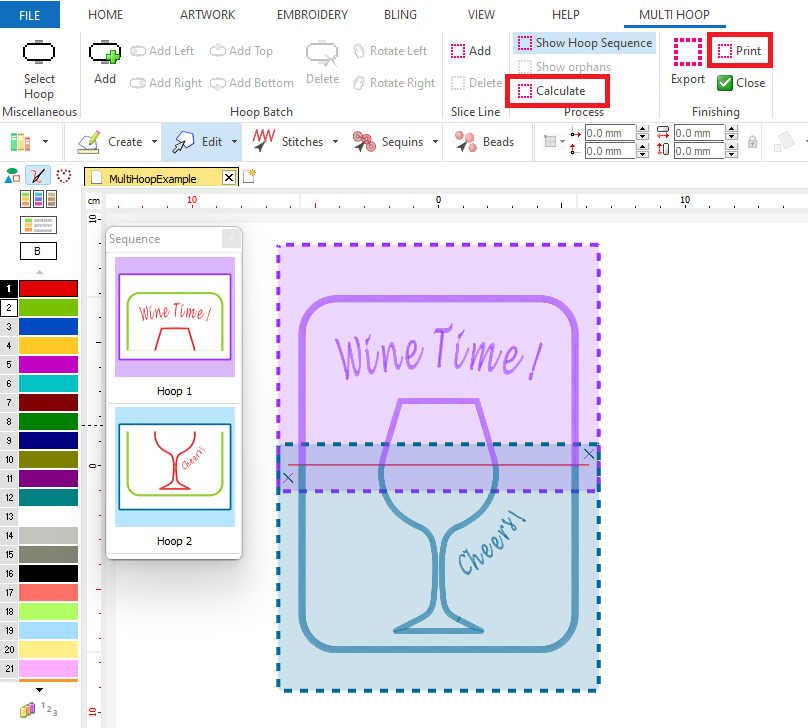
Step 5: Calculate, check and export to machine format
At this point, you just need to press the Calculate command to instruct the tool to create the hoop runs. As this is a simple design, with just two hoops, it will require 2 hoop runs.
Some designs, due to object sequence order, may require more runs than the number of hoops used.
Use the Print command to get a preview of the designs (in machine format) that will be exported as the result of the multi-hoop function
|
|
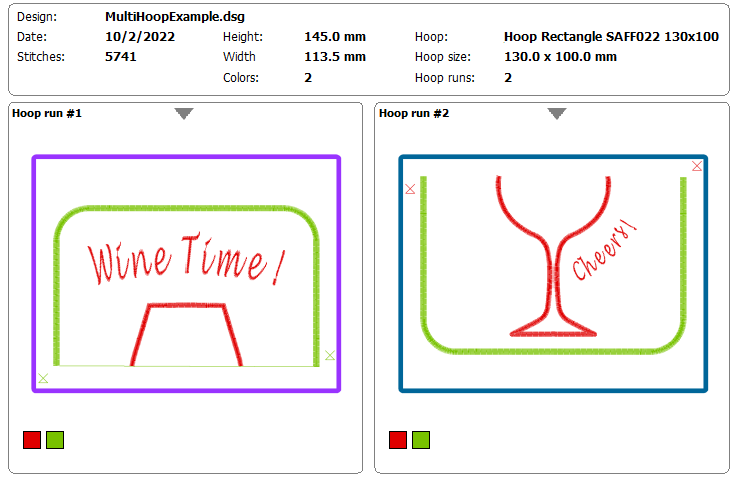
Finally, use the Export command to create the machine format designs. Each run will be exported with the design name followed by the number of the hoop run
Step 6: How to embroider the runs?
1.Prepare the piece of fabric you are going to use. It should be enough for the whole design. Although the first part does not require an adhesive backing, it is better to use it as well so that both parts are embroidered with the same backing.
2.Place the backing on the frame, adhere the fabric as firmly as possible and execute the first part of the design. The last stitches will be those that correspond to the reference marks.
3.Remove the frame from the machine, remove the fabric and place a new piece of adhesive backing on the frame.
4.Remove the backing from the fabric.
5.Load the second design into the machine and start embroidering without attaching the fabric. The machine will embroider only the reference marks and it will stop.
6.Take the fabric, use a pair of needles and insert them in the center of each mark. Then, using the needles, match each mark on the fabric with the embroidered marks on the adhesive backing. Accuracy in this step is essential for a good result.
7.Firmly adhere the fabric to the backing and execute the rest of design 2.