You can easily modify the text layout. There are several customizable base lettering layouts for text transformations to choose from.
The default lettering layout
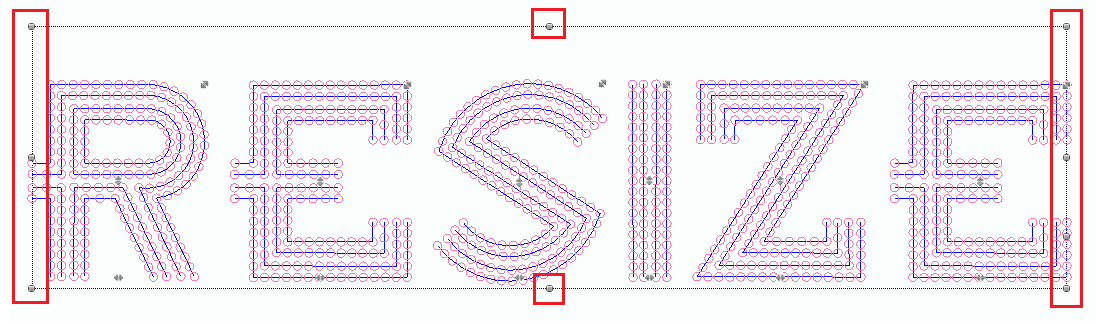
When inserting a bling text in the workspace, a dotted rectangle (text box) surrounds it. The text box includes some control points (grips) to graphically customize the text transformation. This is the ROTATE & RESIZE layout.
Types of Text Layouts (transformations)
There are 2 kind of lettering layout. The main difference between them is how the transformation affects to the individual letters.
Line Transformations
The text can move through a line (or curve) and the aspect of each character does not change.
Envelope Transformations
The text is embedded in a box (or area) and all the text can stretch, compress and deform the shape of each letter.
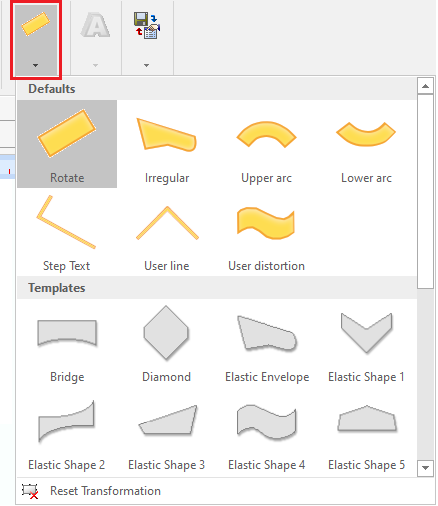
➢Click on the arrow next to ARRANGE on the tooltab LETTERING to display the layout options. |
|
Control Nodes
Transformation Grips
Each predefined lettering layout offers different control points with a specific feature to apply different transformations when they are moved. You will see the result of the text transformation while moving those grips.
|
Letter Grips
There are also some control points that are common for different lettering layouts (letter grips) and the use is similar for any lettering layout. You will see the result of the letter transformation while moving those grips.
|
•Size (top right arrow) Enlarge or reduce the size of a single character without modifying the total size of the text. •Vertical Position (central arrow) Move vertically a single character. •Horizontal Position (bottom arrow) Move (horizontally) a single along the text base line, following the shape of the transformation. |

Lettering Layouts
Regular Envelope Layout (Rotate & Resize)
Modify the text according to the deformation of the rectangular envelope box that contains it. You can enlarge, compress, rotate or move the text.
Select the Regular Envelope layout. The grips of this layout are displayed. |
|

If you drag the corner grips (A), you expand and compress the text proportionally in both axis at the same time. If you drag the mid points (B) and (C), it is possible to expand or compress the text to a single dimension.
To rotate the layout, place the mouse cursor on the top middle grip (E). Press and hold mouse left button, then drag to rotate.
To modify the rotation point, place the mouse cursor on top of a X icon, at the center of the layout. Now, press and hold the mouse left button, then move the mouse to change its position.
Irregular Envelope Layout
Modify the text according to the deformation of the irregular envelope box that contains it. You can enlarge, compress, rotate or move the text.
Select the Irregular Envelope layout. The grips of this layout are displayed. |
|
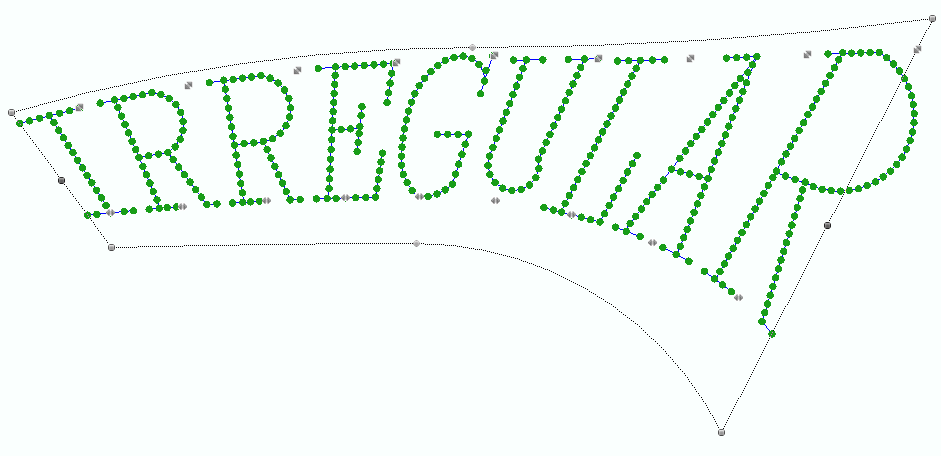
Grips on the middle of the sides of the irregular envelope change the transformation properties (free, straight and curve), allowing different deformations of the box. Press the mouse right button to change the property of those grips.
Upper and Lower Arc Layout
Curve the text in an arc shape. The letters modify their position and rotation based on the arc curvature.
Select the Arc layout. The grips of this layout are displayed. |
|
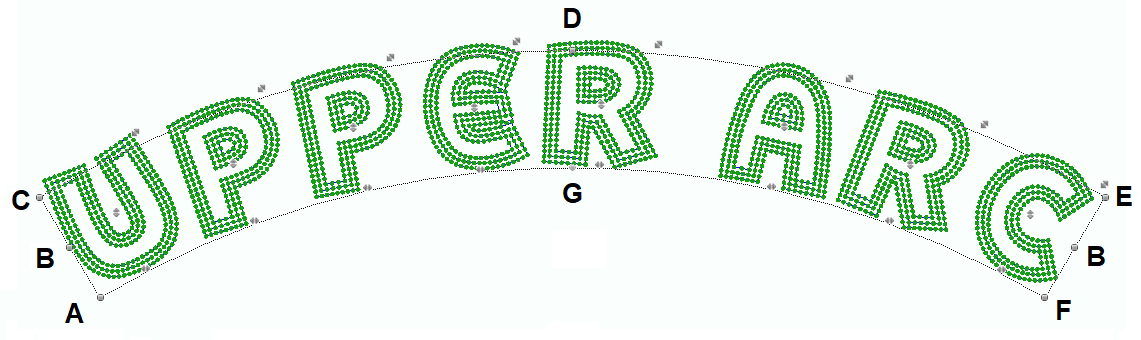
You can also move each letter along the curved line, using the letter grips.
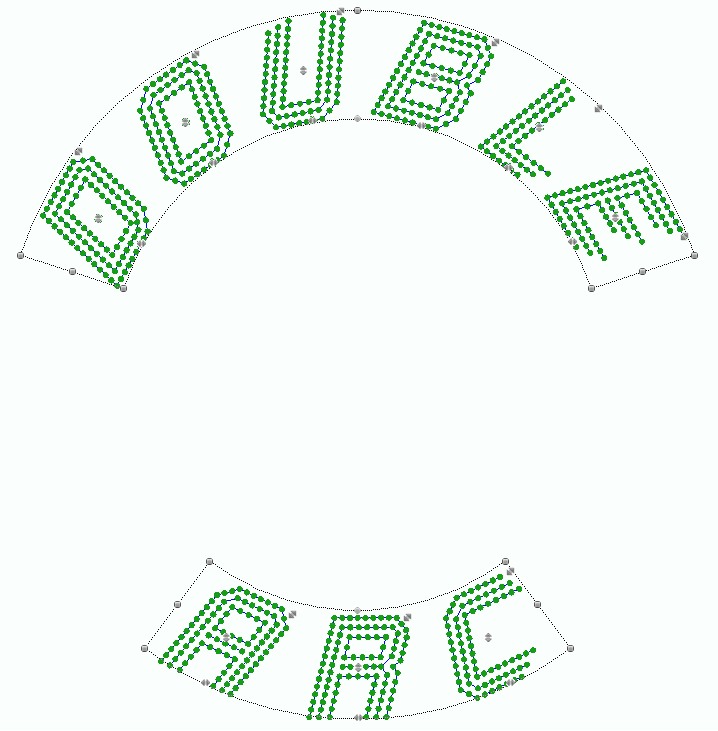
Double Arc Layout
Curve two text lines at the same time. The letters modify their position and rotation based on the arc curvature. Both arcs are synchronized, that is any change performed in one of them are also reflected in the other.
This transformation is only available for texts with two lines. To get a second text line, press Ctrl+Enter after having entered the first line of letters in the text box.
Select the Double Arc layout. The grips of this layout are displayed. |
The grips of this layout work in the same way as the Upper and Lower Arc layouts. |
Stair Layout
Arrange the text as a stair. Characters remain in a vertical position.
Select the Stair layout. The grips of this layout are displayed. |
|
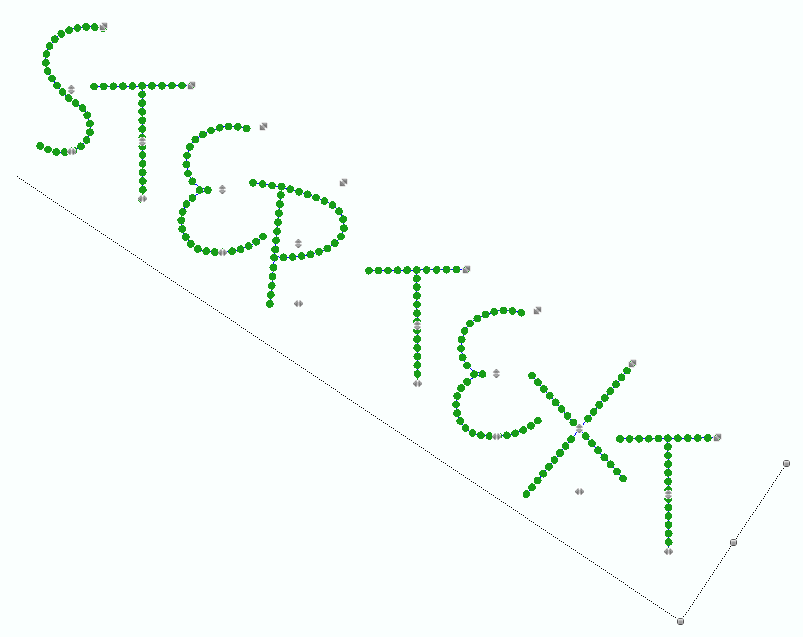
User Defined Line Layout
You can create a custom baseline where the text can be placed.
Select the User Defined Line layout. The grips of this layout are displayed. |
|

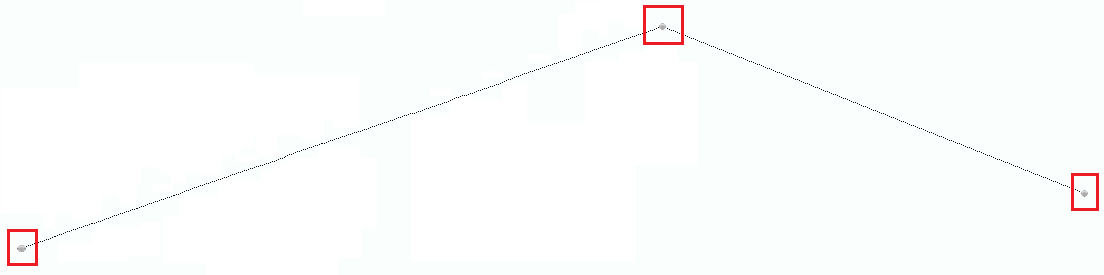
You must define the baseline (with straight or curved nodes) where the text will be placed. Click on the mouse left button on different positions of the workspace (from left to right) to define the baseline nodes. |
|
You can insert curve or straight segments. By default, line segments will be straight, but pressing the Shift key when entering the nodes they will become curved line segments. Once you have finished inserting the nodes, click on the Enter key to place the text on the workspace, following the shape of the baseline you have created.
You can modify the baseline shape by moving the nodes. You can also change the nodes properties (straight, curve, corner) by placing the mouse cursor on them and pressing the mouse right button. You can also add a node by placing the mouse cursor on the baseline where you want to insert the node (the cursor turns into a cross arrow), then press the Insert key. If you want to delete a node, place the mouse cursor on it and press the Delete key. You can move the characters along the baseline, by dragging the corresponding letter grip.
User Defined Envelope Layout
You can create a custom envelope (bottom and top sides) where the text can be placed.
Select the User Defined Envelope layout. The grips of this layout are displayed. |
|
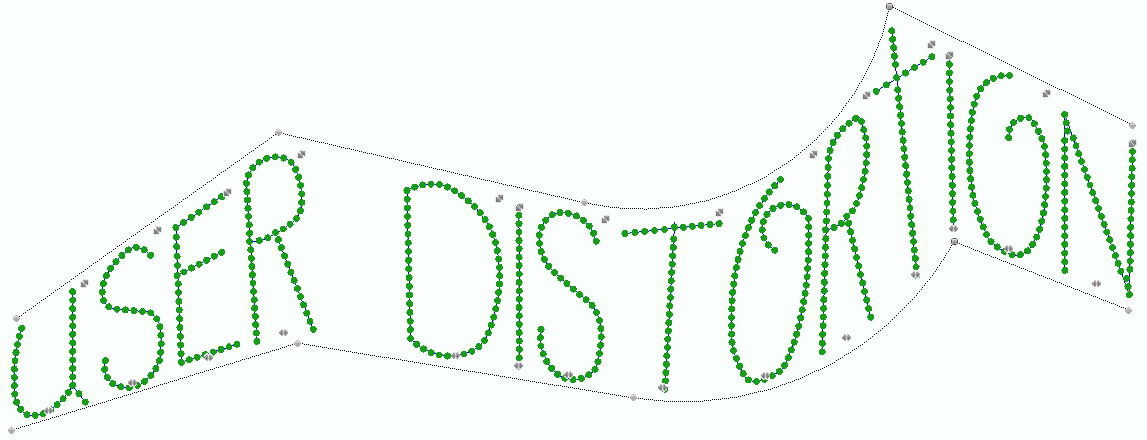
The creation of these lines are similar to the User Defined Line layout.
You must define the bottom line first (with straight or curved nodes), then click on the Enter key.
Second, you must define the top line (with straight or curved nodes), then click on the Enter key.