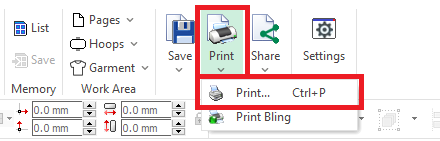
There are two methods for printing your bling designs
•Print Design
•Print Draft
You can execute the PRINT function from the tooltab HOME > Output group > Print
You can also execute the Print function from the menu FILE > PRINT. |
|
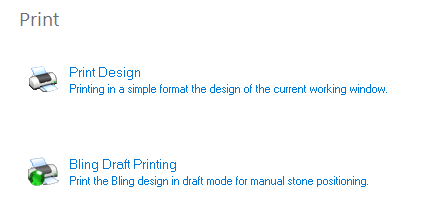
Print Design (standard)
This is a general design printout, using a simple layout, with a quick setup and basic printing parameters.
|
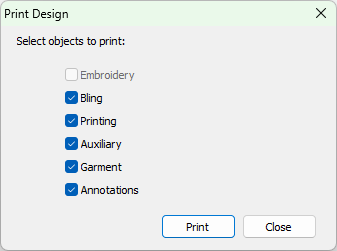
First, you decide what to include in your printout Decoration •Bling •Printing (artwork objects marked as Printing) And additional objects •Auxiliary reference images •Garment •Annotations (option available starting with version 23.20) |
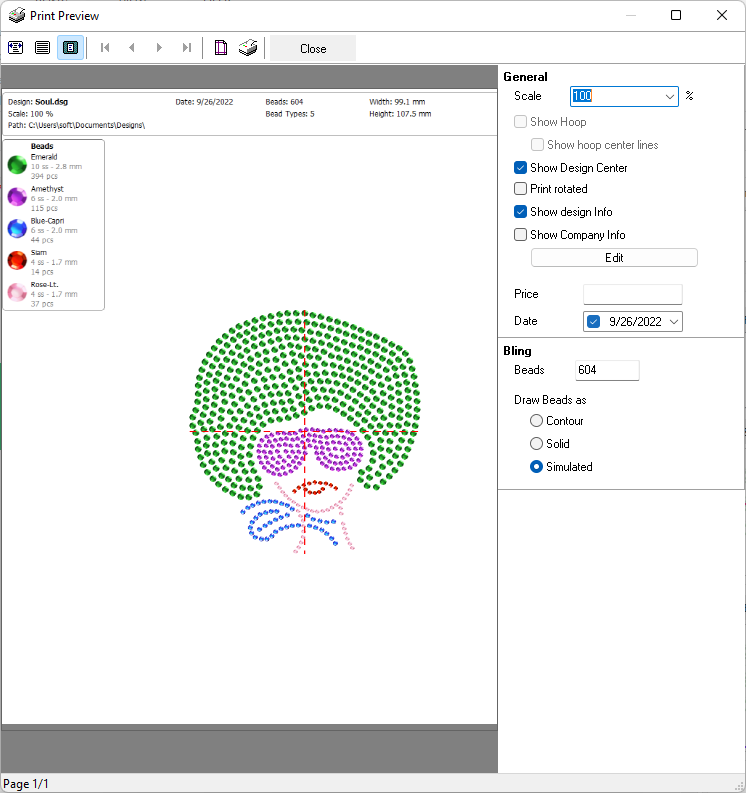
When you press Print, the Print Preview box appears. The panel at the right side allow you to control several printing options: •Print Scale (100% is a 1:1 printout) and print rotation •Show Hoop (and its center lines), Design Center, Design Info and Company Info. Press "Edit" to customize the company information, add a logo, etc. •Design Price (leave the field blank to skip printing it)
•Bead count (you can modify it if required) •Draw mode (Contour, Solid, Simulated)
The preview will be updated while you change the print options automatically |
|
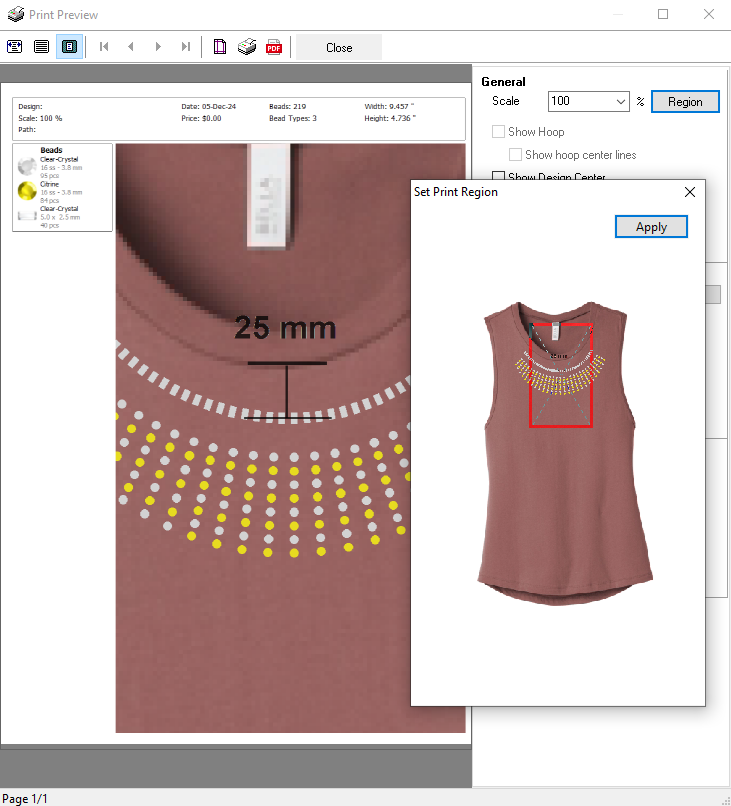
Print Region
Starting with version 23.20, the Print Region option prints a single sheet, at 1:1 scale, of a selected region of the design.
This feature, together with the annotation printing feature, allows the creation of printouts with production details.
|
Click on the Region button to display the Set Print Region box This box shows the whole design and a rectangle representing the size of the print area available, that depends on the paper size and the information panels you included (Design info, Company Info, etc.) You can move the box by dragging it so as the region of interest will be included within the rectangle Press Apply to update the main print preview. Finally, close the box Print Region works at 100% scale. Changing the scale once the Region was set, will reset it. |
Bling Draft Printing
Print the bling design in draft mode for manual rhinestone positioning
Page Design Tab
Select basic printing parameters for the design and for the information to be printed with it, such as information header, design frame, alignment marks, design rotation, mirror and general scale. |
|
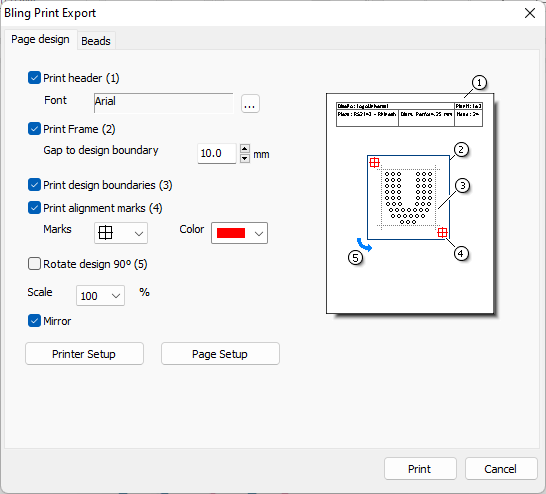
Select basic printing parameters for the design and for the information to be printed with it, such as information header, design frame, alignment marks, design rotation, mirror and general scale.
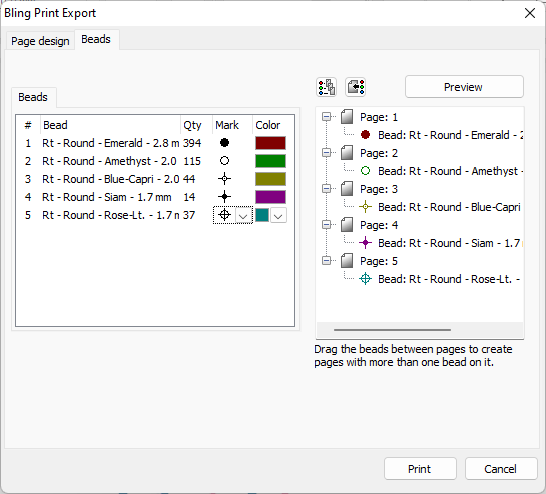
Beads Tab
It includes two lists: •Bling Type list on the left pane •Pages List on the right pane You can change the Marks visualization and Colors among the options given, to be able to locate them easier. You can also set to print one bling type per page, or every bling type in one separate page. |
|
The Bling Draft Printing tool also allows to print placement sheets to use them, for example, as a reference for manual placement: 1.Print the placement sheet. 2.Put a transparent transfer sheet (adhesive up) over the placement sheet. 3.Manually set the pieces using the placement sheet as reference. 4.Place the transfer sheet on the garment and apply heat to transfer it. |
|
