Creating a simple embroidery design using the lettering system and some other objects from pre-defined geometric shapes.
You can create this design while you read this article.
|
This example includes: •Creating a new design document •Embroidery Lettering. Layout. •Object Manager and Object Inspector. •Block Menu •Embroidery Object Type: Uniform Area + Pattern Fill •System Shapes |

Open a new blank design document
|
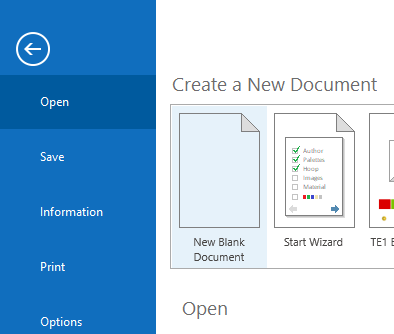
➢In the File Menu, click on the New Blank Document icon to open a new design document. |
Select the Lettering Tool
|
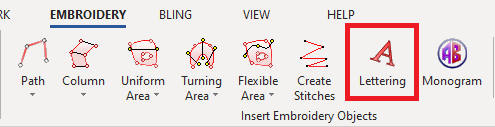
➢Select the ToolsTab EMBROIDERY. ➢Then press on Lettering. |
Select the font to use
|
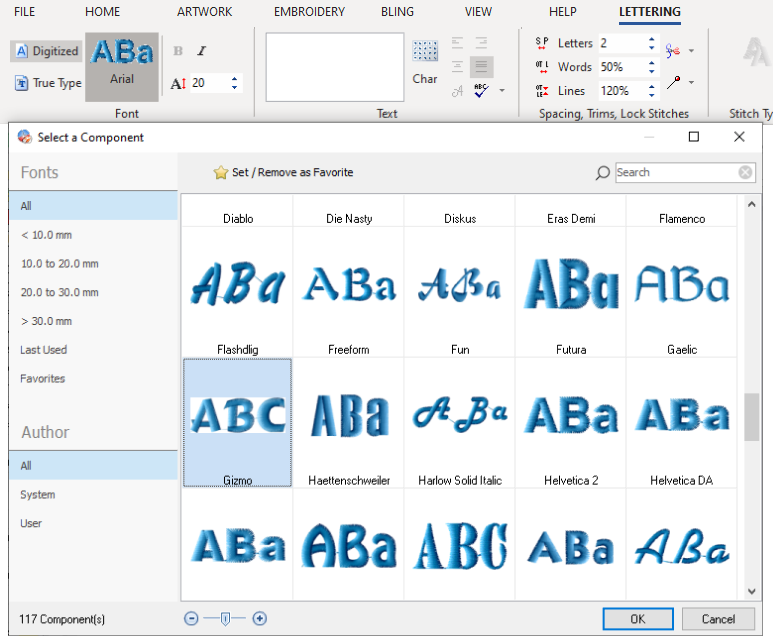
➢Click on the "font preview" button to open the Digitized fonts window. ➢Select the font type. ➢Click on the Gizmo Digitized font. |
Create a text on 2 lines
|
➢Click on the Text edit box (white rectangle). ➢Type the text "YACHT". ➢ Press CTRL + ENTER keys together to start a new line of text. ➢Type the text "CLUB". ➢Press ENTER to confirm the text. The text will be displayed on the Workspace. ➢Change the height of the font to 40mm. Press ENTER to confirm. |

Define the basic text properties
|
➢Select the text using the EDIT OBJECT tool to edit the text. |
|
➢Change the lettering spacing value to "3". ➢Set the Trim option to "Letters". |

Define the text layout
|
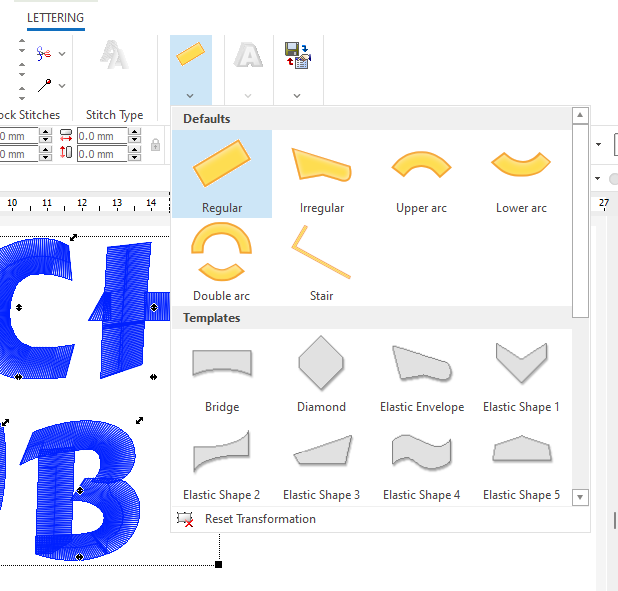
➢Click on the Arrange button and change the text layout to Double Arc. |
|
➢You can also adjust the position of the handlers to change the curvature, the text width, the text height, the characters scale, the characters position, etc. |

Define the advanced text properties
|
➢Select the text using the EDIT OBJECT tool to edit the text. |
|
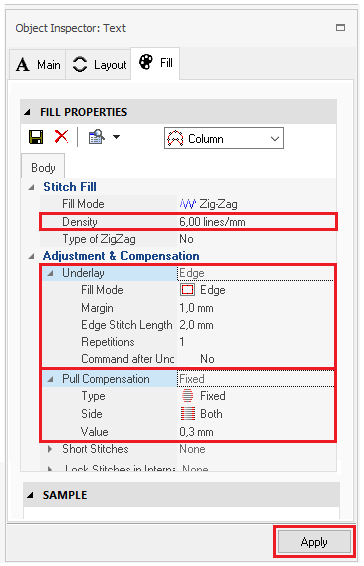
➢Click on the Object Manager button at the right side panel. ➢From the Object Inspector window, click on the Fill tab. |

|
➢Set a stitch density value of 6 lines/mm. ➢Set an "Edge" Underlay, using a Margin Distance of 1mm and an Edge Stitch Length of 2mm. ➢Set a "Fixed" Pull-Compensation, for Both sides and a value of 0.3mm. ➢Click on Apply to confirm. |
Creating the boat object
|
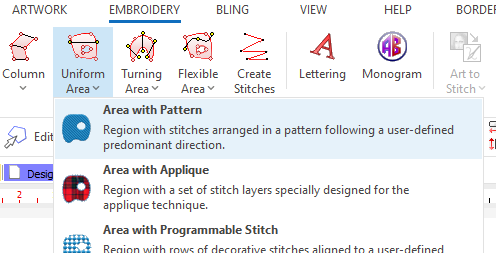
Select the object type and the fill stitch style: ➢Select the tooltab EMBROIDERY ➢Click on Uniform Area. ➢Select Area with Pattern. |
Define the boat object properties
|
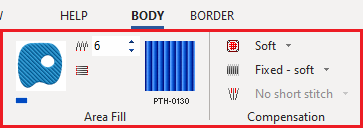
Define the main fill: ➢Set a stitch density value of 6 lines/mm. ➢Click on the "Pattern Stitch" icon to access the patterns library. Select the PTH-0130 manual pattern. ➢Set a "Soft" Underlay. ➢Set a "Fixed - Soft" Pull-Compensation. |
Digitize the boat object
|
Digitize using pre-defined shapes ➢Click on the "Shapes" button and select the "AAS_008" boat shape. |

|
➢Press and hold the CTRL key in order to keep the symmetry of the shape. ➢Click and drag the mouse to create the shape. ➢Once the desired size is obtained, release the button and press ENTER to confirm and generate the stitches. |
|
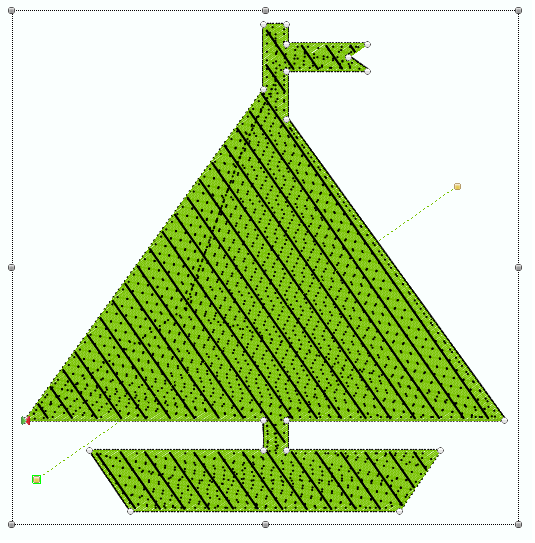
➢Select the created area using the EDIT OBJECT tool to edit it. |
|
➢Click on the green color from the Color Bar to change the area color. ➢Change the pattern direction line by moving its nodes. |
|
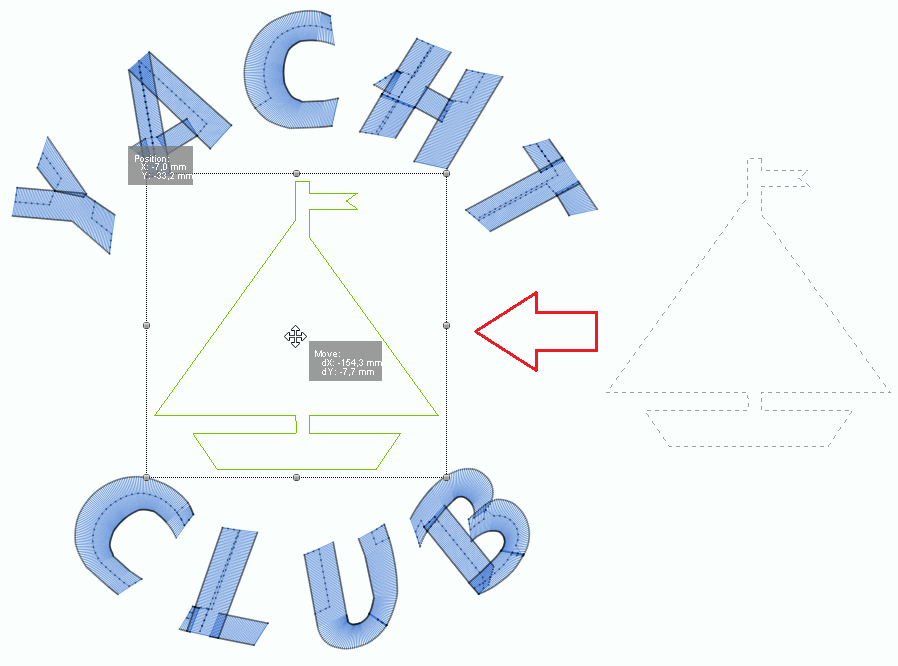
Define the object position: ➢Click and hold the mouse button on the boat shape. ➢Without releasing the mouse button, drag it to the center of the created text. ➢Release and press ENTER to confirm.
|
|
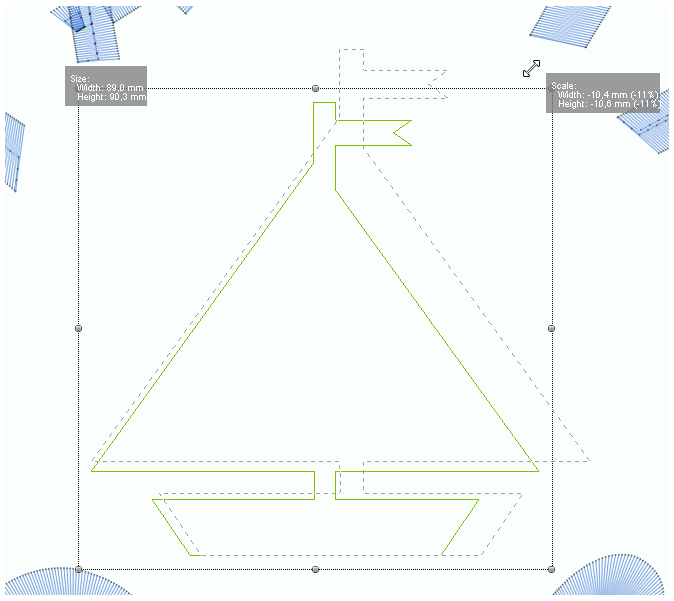
Adjust the area size if necessary: ➢To change the size keeping its symmetry, click and drag any of the corner nodes. ➢To change the size not keeping its symmetry, click and drag any of the middle nodes. ➢Press ENTER to confirm and generate the stitches. |
|
You can also adjust the size from the MAIN TOOLBAR ➢Select the created area using the EDIT OBJECT tool to edit it. ➢Type in the desired horizontal size in the upper-right control and press Enter ➢Type in the desired vertical size in the lower-right control and press Enter To change the size keeping the object proportions, click on the padlock icon before writing the new size value. Then type the vertical (or horizontal) size and press Enter. The other size will change proportionally. |
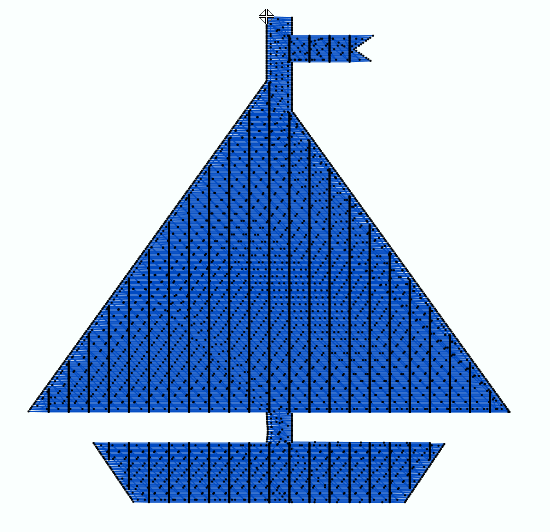
Final Design