An embroidery design is a file that contains a set of data that define the stitch information to be sent to the embroidery machine for production.
There are 2 kind of embroidery design files:
•Embroidery machine design files, also known as expanded designs
•System native design files, also known as condensed designs
It is very easy (and absolutely necessary) to understand why both kind of files exist, and to decide when to use each of them. The following table compares the main characteristics of both kind of embroidery design files:
Embroidery machine files (expanded designs) |
System native files (condensed designs) |
|---|---|
|
|
•Embroidery machine design files are compatible with the embroidery machines, files that the embroidery machine can read. They are designs ready to use or produce with embroidery machines. |
•Embroidery machines cannot read system design files, but the software can easily convert it to the compatible embroidery machine file format while exporting it. |
•STITCH ORIENTED Embroidery machine design files contain (at least) the information about each stitch and each machine command (expanded data). Then embroidery machine design files are also known as expanded designs. |
•OBJECT ORIENTED System design files are the native files used by the software to store the complete design specification (it is much more than stitches and machine commands). This is an all in one file format which contain detailed information about all the objects the design is made of (objects and properties, images, settings, stitches, etc) to produce the stitches and machine commands. The digitizing applications use system design files to simplify the designs creation and editing. It is also known as native designs or system condensed designs. |
•Regrettably, there is no a unique standard format of embroidery machine design files for all embroidery machines, as many machine manufacturers have developed their own proprietary design file format to load the designs into the embroidery machine. Anyway, most machines brands can read different file formats, not all of them (see machine specifications). Some of the popular embroidery machine file formats are: ”DST” (Tajima), “PES” Brother, “JEF” Janome, “VIP” Husqvarna Viking, “TAP” Happy, “EXP” Melco, “PCS” Pfaff, etc. Depending on the machine model, designs can be loaded from floppy disks, USB memory or direct connection from a computer. There is a list of the compatible embroidery machine file formats in the embroidery compatibility chapter. |
•Each software manufacturer has created its own proprietary system file format. Our system (native) format has the extension “DSG”. After a design is created and stored as a condensed design, it can be converted and exported in a single step as a machine embroidery design file for production. |
Expanded designs / Embroidery machine files
|
As mentioned, expanded designs contain the data required by the embroidery machine. All the machine file formats contain 2 basic elements: stitches and commands. Some machine file formats may include complimentary information.
|
Let’s see how stitches and commands work on embroidery machines.
Any embroidery machine has 2 main parts:
•Head |
This part includes the needle (or needles) and the thread color cone (or cones). The needle moves up and down penetrating (sewing) the fabric or cloth loaded in the hoop. |
•Hoop |
The fabric or cloth is loaded in the hoop. The hoop is attached to a pantograph that moves a distance (stitch length) according to the design information. |
In summary, the embroidery machine reads the stitch information (stitch length and direction) and moves the pantograph containing the hoop (with the fabric) in sync with the needle up/down movement: While the needle is up, the hoop moves the specified distance producing a stitch.
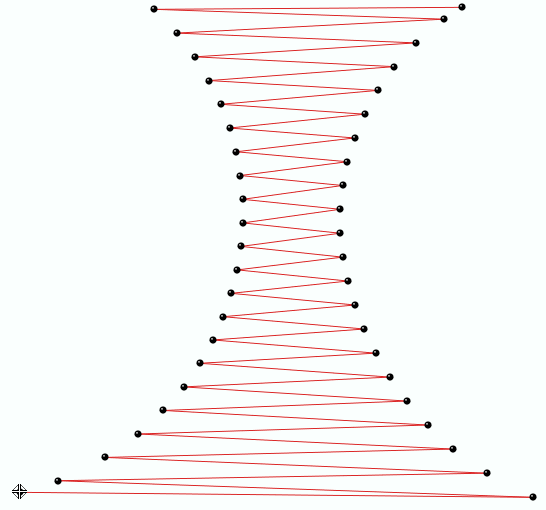
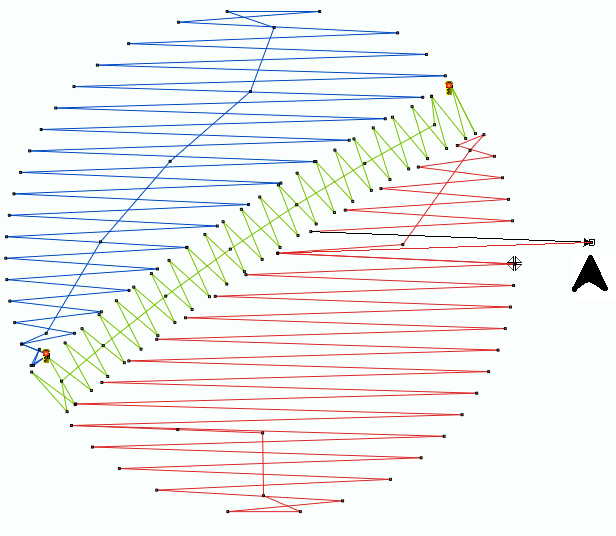
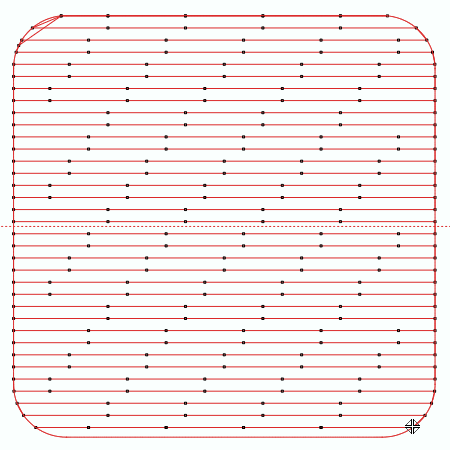
Then, expanded designs is basically a sequence of:
•Stitches |
Individual hoop movement on both horizontal and vertical axis. The result is the thread that you can see on the fabric between 2 needle penetration holes. |
•Commands |
They are orders for the machine (special functions), including needle change (to change the thread color), thread trim (to cut the thread), stop (to stop the machine), jump-stitch (to make a long stitch, avoiding needle penetrations), etc. |
Condensed designs
|
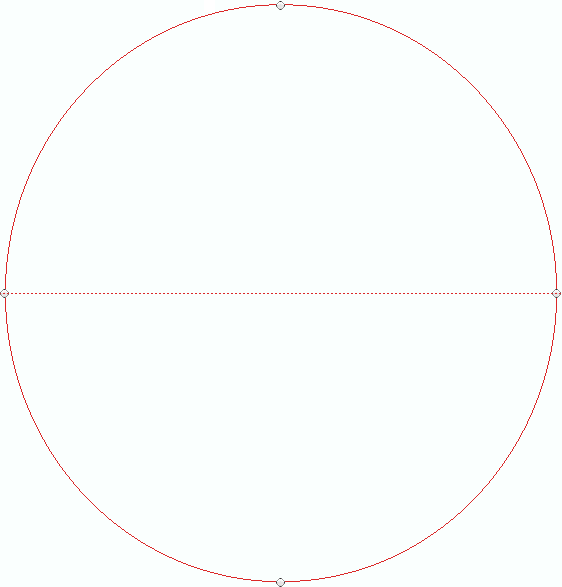
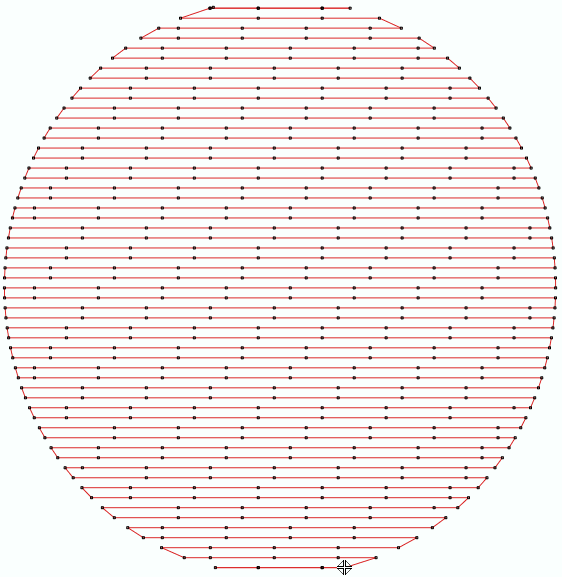
Certainly, an embroidery designer could create designs by inserting each individual stitch and each machine commands. In fact, something like this was the normal method to create embroidery designs many years ago before computers replace the old digitizing devices (punching systems). Today, a designer can define a rectangle with only 4 points, and the digitizing applications can automatically generate the stitches to cover all that shape with stitches (and machine commands if required) according to pre-defined characteristics. As that rectangle created with 4 points or any other more complex geometric shape created with more points can be turned into many stitches and commands, we say that it is a condensed design. The conversion from condensed designs to expanded designs is named stitch generation. |
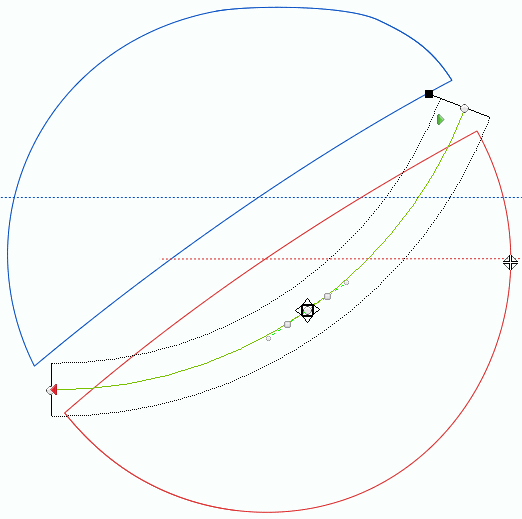
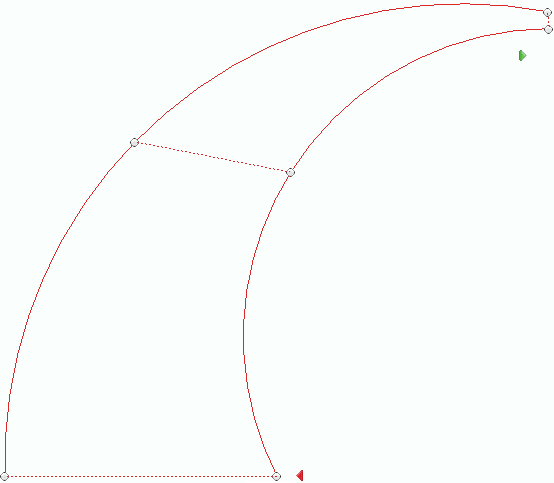
The basic elements of the condensed designs are the objects (or embroidery objects). Objects are defined by:
•Geometry |
That is basically the shape. The geometry includes the nodes (the points that define the shape) and some complementary elements (stitch direction line, entry/exit points, etc). |
•Properties |
That is basically the stitch fill style. The properties include the main fill style and other parameters to adjust the final stitches and commands (stitch density, color, etc). |
There are many types of objects grouped in categories (see later).
Advantages of working with condensed designs over expanded designs
To understand one of the many advantages of the condensed designs compared to expanded designs, compare the process to scale a simple design in both cases:
Using condensed design you can scale any object of the design (or the whole design) just re-sizing the rectangle that contains that object. The stitches are automatically re-created by the digitizing application keeping the stitch density.
|
|
|
original object |
resize object |
re-calculated object |
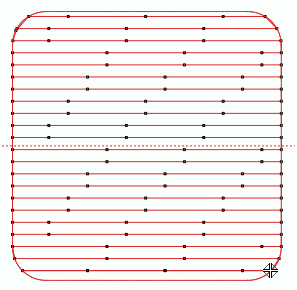
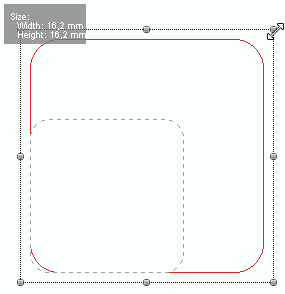
Instead, scaling the expanded design would be a very difficult task, almost impossible, as it will require to insert and move many stitches to get the scaled design (a simple scaling won't keep the stitch density, it will only enlarge or reduce the stitches).
In addition, if you want to change the fill style of any object or if you want to change any other property (like the density, stitch lengh, etc) it is easy and immediate on condensed objects, while it is not possible to change those characteristics on expanded designs.
As a conclusion,
It is more convenient for designers to create and store the designs as condensed designs (system format) and convert or export to expanded designs in any embroidery machine file format when the design is required for the embroidery production.
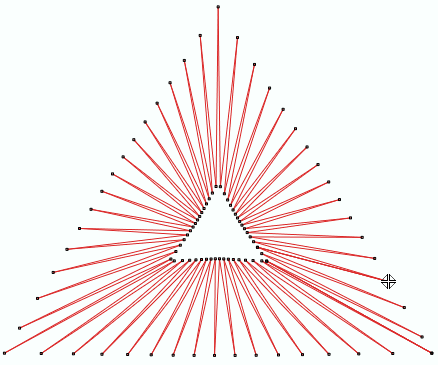
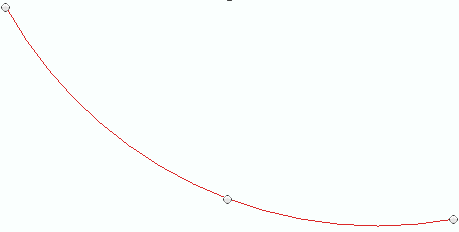
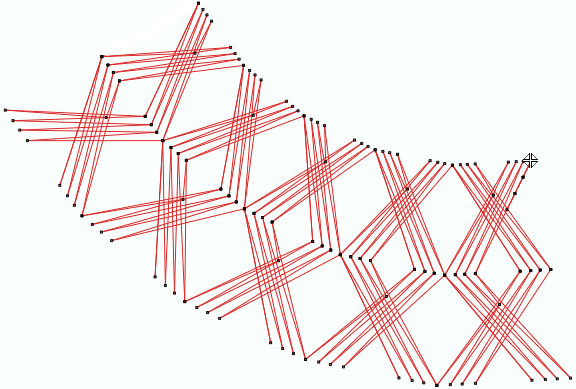
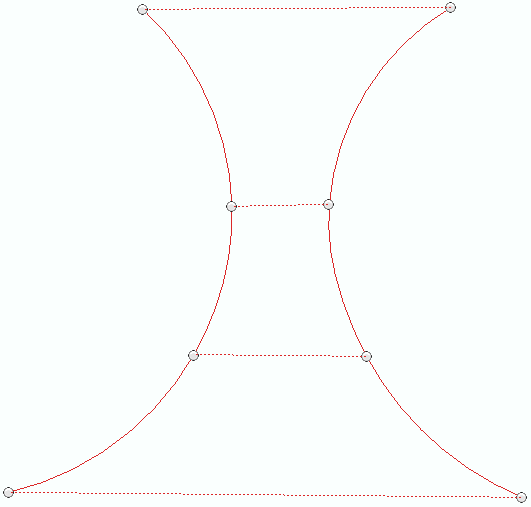
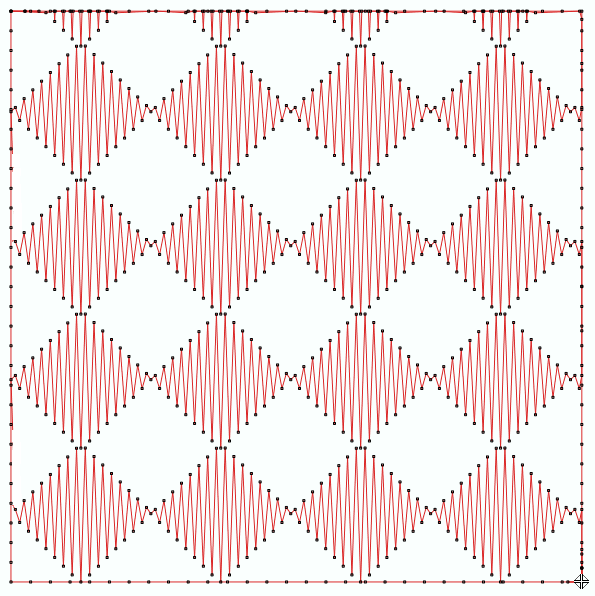
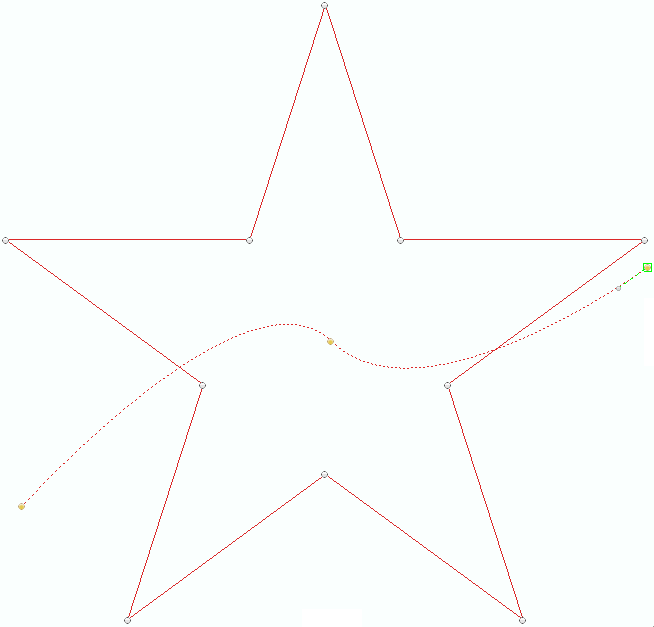
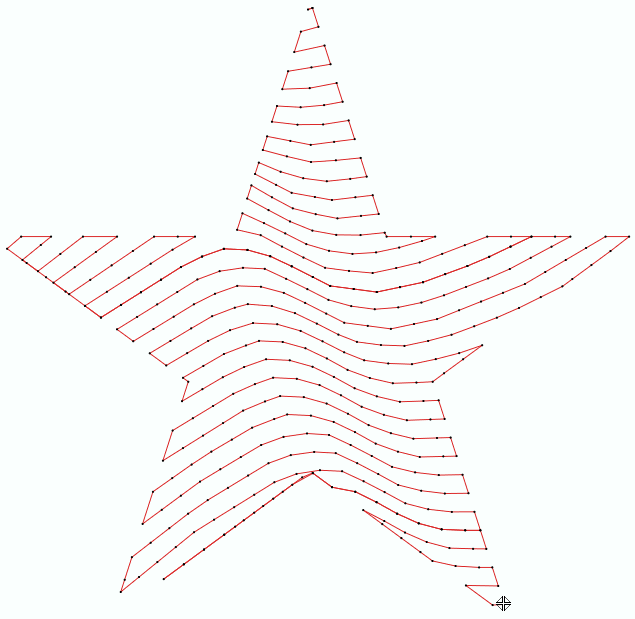
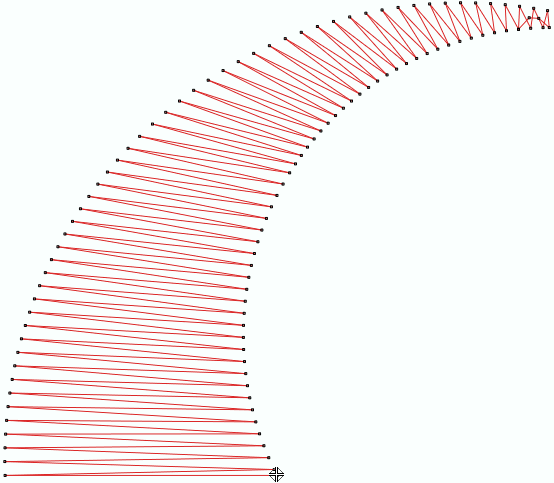
See some examples of object types (condensed) with the corresponding stitches (expanded).
 |
 |
|
|
|
|
|
|
|
|
|
|
|
|