The embroidery lettering system includes many pre-digitized fonts ready to use. They are system components (system embroidery fonts). There are 2 tools to create new pre-digitized fonts (user embroidery fonts) to enlarge the library:
•Embroidery Font Builder Standard (from any source)
•Embroidery Font Builder Advanced (from True Type Fonts)
Embroidery Font Builder Standard
Using this tool to create a new embroidery pre-digitized font, you must create the font document and name it, digitize all the characters of that font with any digitizing method, and then save each digitized character on the font document.
How to create a new font using the embroidery font builder standard?
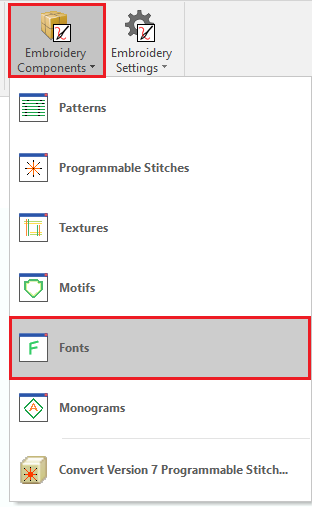
➢From the ToolsTab EMBROIDERY, click on "Embroidery Components". ➢Select the option "Fonts". |
|
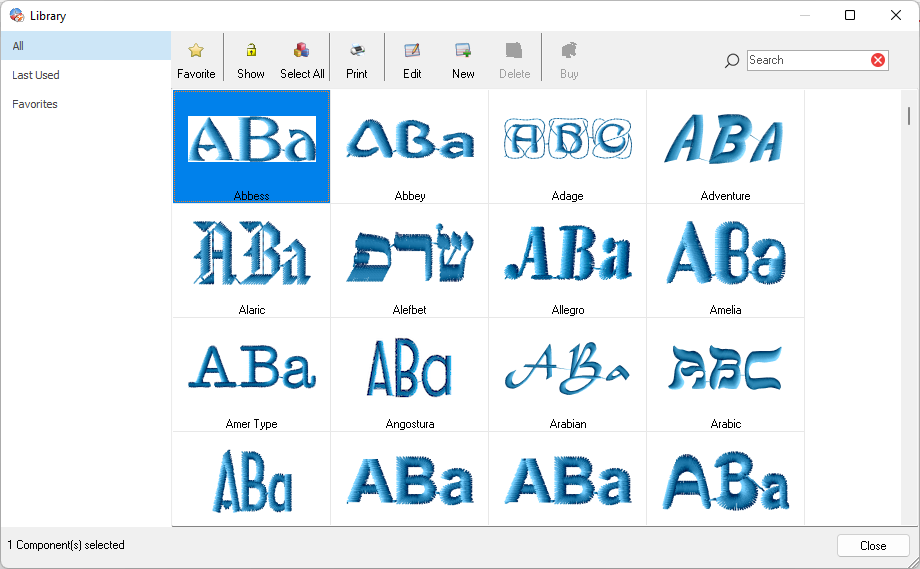
The Font Library window will open. ➢Click on "New" to open the Creation Wizard. |
|
➢On the Creation Wizard, click on "Next" to continue. |
|

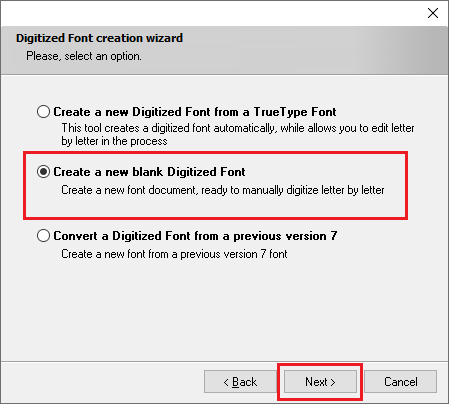
➢Select the option "Create a new blank Digitized Font", that is, a new Font Document. ➢Click on "Next" to continue. |
|
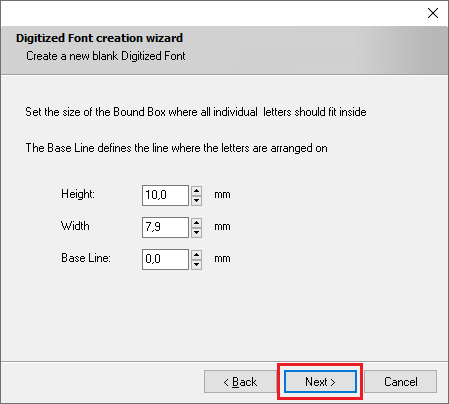
➢Set the size of the Bound Box for the new digitized font. ➢Values to set are Height, Width and Base Line. ➢Click on "Next" to continue. |
|
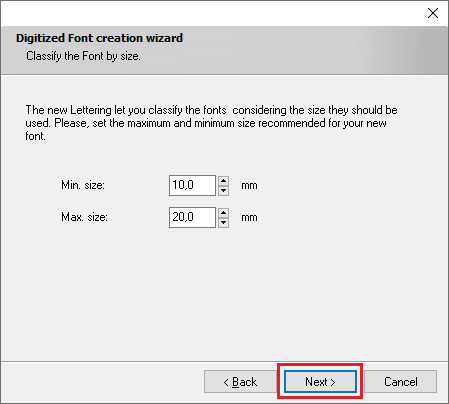
➢Set the Minimum and Maximum size. ➢Click on "Next" to continue. |
|
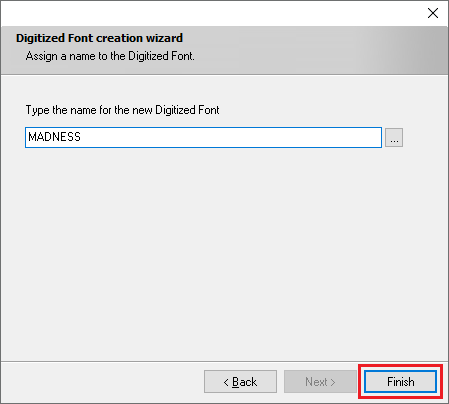
➢Assign the name for the new Digitized Font. ➢Click on "Finish" to continue. |
|
|
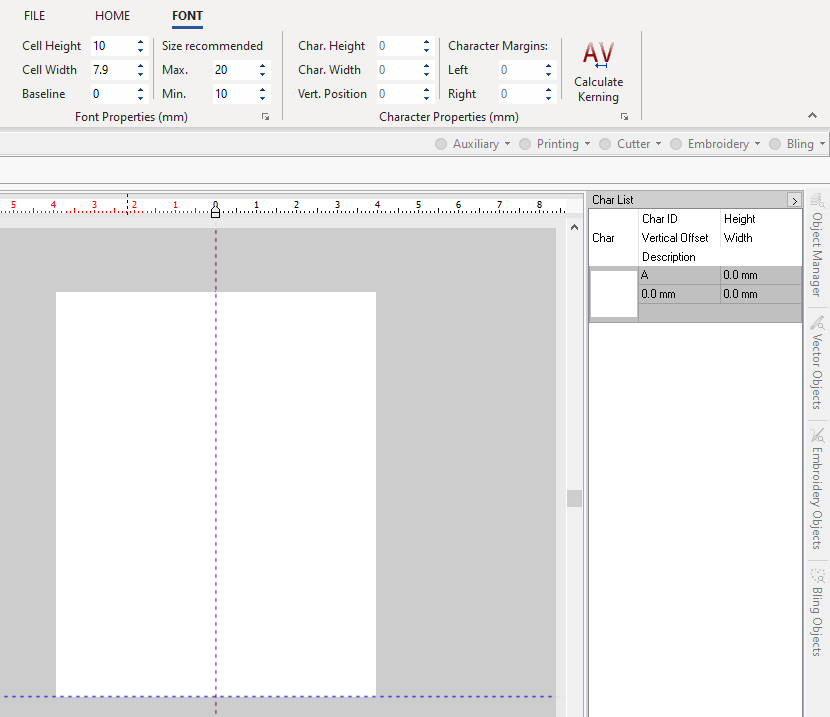
The font Height, Width and Base Line will appear represented on the working window by a white rectangle.
On the ToolsTab FONT, you will find the Font Properties, the Character Properties and a tool to calculate the Kerning.
On the right pane, you will find the Characters list.
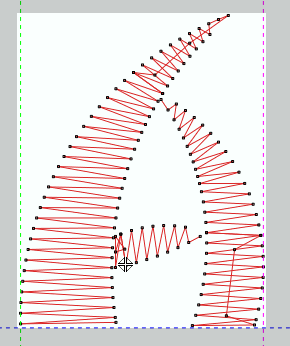
➢Click on the working window to switch the ToolsTab menu. ➢Click on the ToolsTab EMBROIDERY, and create the font character using the desired embroidery tools. Note: You can also copy and paste a created character from an existing design (a design document in other design tab). |
|
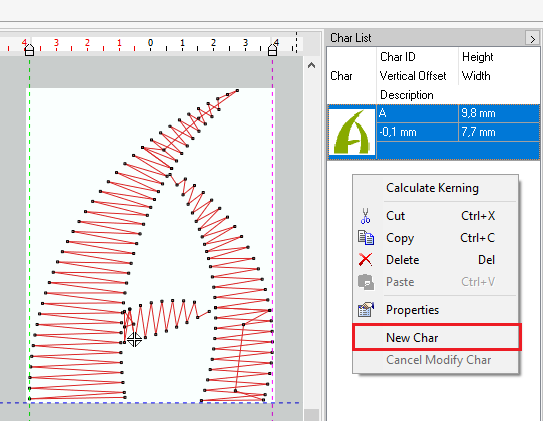
➢To add a New Character, access the context menu by pressing the right mouse button on the Character list. ➢Then, select the option "New Char". Note: From this menu, you can also calculate the kerning, cut, copy, paste and delete any character, check its properties, etc. |
|
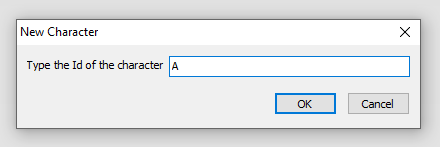
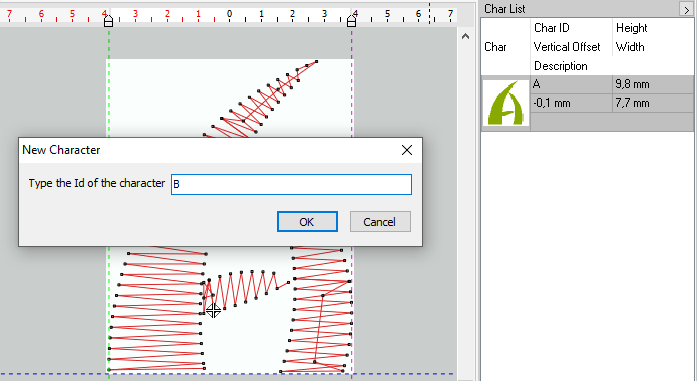
➢You will be prompt to type the Id of the next character you want to create. ➢Repeat these steps to complete the desired characters of the new Digitized Font. |
|
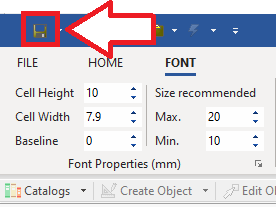
Once finished, save the new Digitized Font. ➢To do this, click on the "disk" icon from the Quick Access ToolBar. |
|
Read about the availability of this feature in your software level: Embroidery Office Levels & Features |